There’s something especially satisfying about turning an ordinary household object into a tiny crochet project—and this little crochet iron keychain does exactly that.
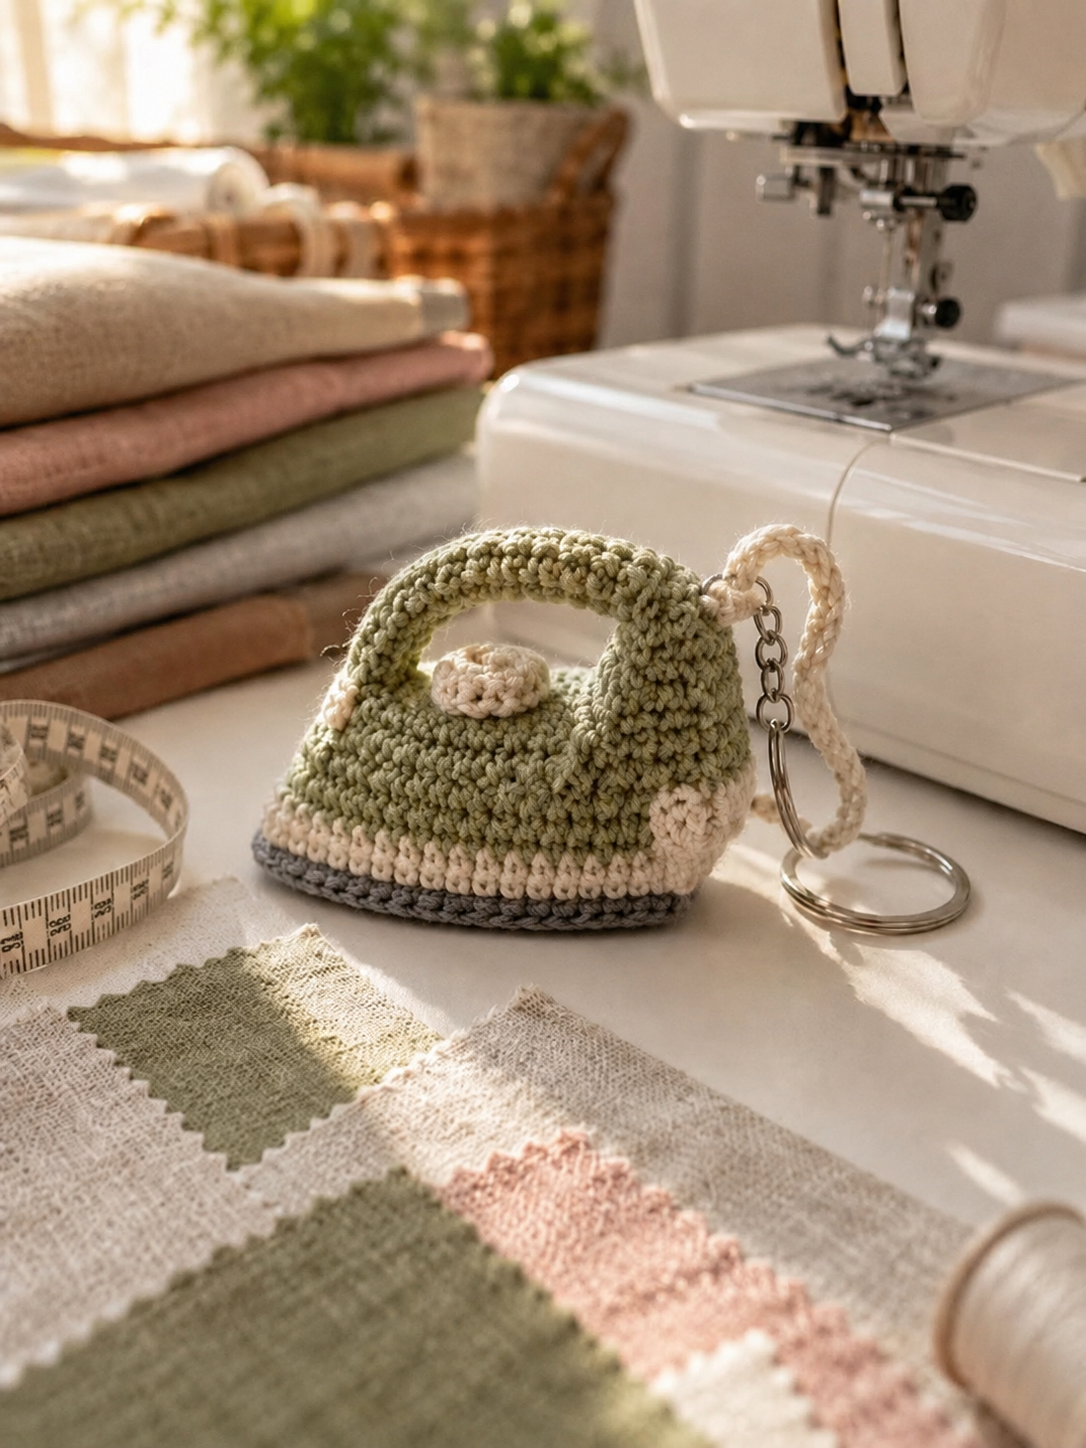
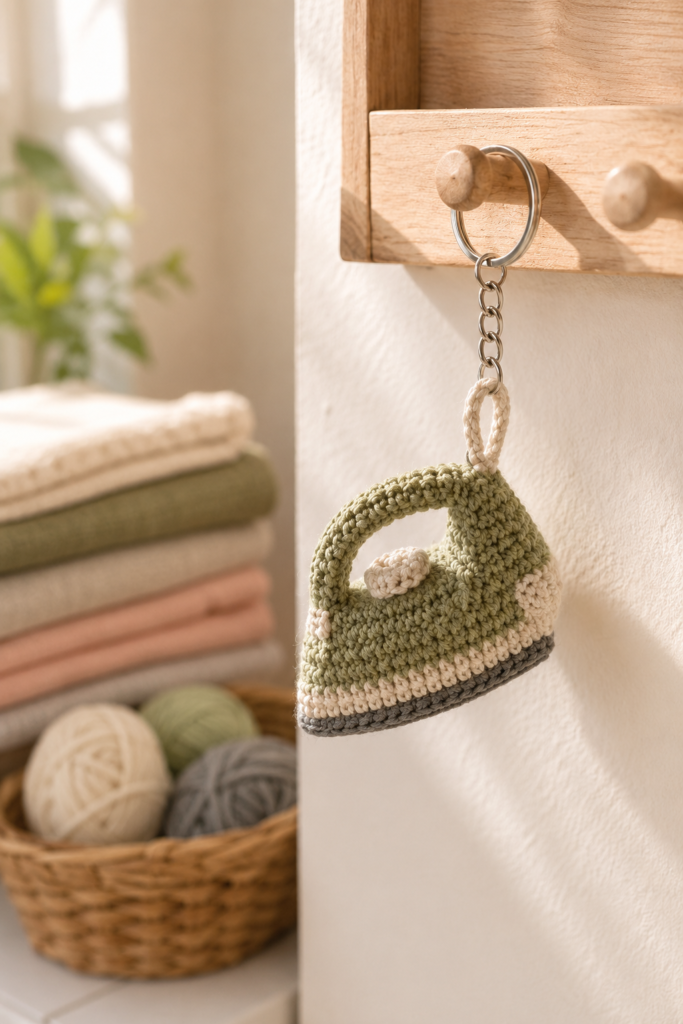
With its soft sage-green body, curved handle, cream detailing, charcoal-gray sole, and simple metal keyring, this miniature iron has a wonderfully handmade look without feeling overly complicated. It’s small enough to work as a keychain or bag charm, yet detailed enough that you can immediately tell what it’s meant to be.
If you enjoy quick crochet projects, handmade gifts, or simply using up those smaller amounts of yarn left after bigger makes, a crochet iron keychain is a fun project to add to your list. The compact size also makes it much less intimidating than a full amigurumi project.
In this guide, we’ll look at the materials and techniques that work best for this style of project, how to keep a tiny crochet shape neat and recognizable, and the finishing details that can make a handmade keychain look polished enough to give as a gift.
Table of Contents
- Why Make a Crochet Iron Keychain?
- Understanding the Design
- Materials You’ll Need
- Choosing the Best Yarn
- Hook Size and Tension
- Crochet Skills That Help
- Planning the Iron Shape
- Creating a Firm Crochet Body
- Making the Curved Handle
- Adding the Cream Knob and Details
- Creating the Dark Gray Sole
- Attaching the Keychain Hardware
- How to Keep a Mini Crochet Project Neat
- Beginner Tips
- Common Mistakes to Avoid
- Ways to Use Your Finished Keychain
- Gift Ideas
- Care and Storage
- Frequently Asked Questions
- Final Thoughts
Why Make a Crochet Iron Keychain?
Small crochet projects are useful for more than simply filling an afternoon.
They’re a great way to practice shaping because every stitch matters. When you’re working on a larger stuffed toy, a slight change in tension may barely be noticeable. On a tiny keychain, however, a few loose stitches can completely change the silhouette.
That makes miniature projects surprisingly good skill builders.
This particular design is also appealing because it turns something completely ordinary—an iron—into a cute handmade accessory.
Unlike character keychains, you don’t need to worry about embroidered expressions, eye placement, hair, clothing, or complicated facial shaping. The personality of the project comes from its recognizable silhouette and carefully chosen colors.
A finished crochet iron can be used on:
- house keys
- craft-room keys
- a crochet project bag
- a zipper pouch
- a backpack
- a tote bag
- a sewing-machine case
It can also make a sweet little gift for someone who loves sewing, quilting, crochet, dressmaking, or other textile crafts.
Understanding the Crochet Iron Design
Before starting any miniature crochet object, spend a moment thinking about what makes the real object recognizable.
For an iron, the silhouette matters more than tiny decorative details.
In the reference design, the eye is immediately drawn to the large curved handle. Beneath it sits a compact sage-green body with a small cream control knob. A cream stripe separates the main body from the dark gray lower edge, helping suggest the soleplate of an actual iron.
The keychain hardware then turns the miniature object into something practical.
The restrained palette is one of the reasons the design works so well.
Sage green provides a soft handmade feel. Cream keeps the design light, while charcoal gray visually grounds the bottom.
You don’t need ten different colors to make a miniature crochet project interesting. Often, three carefully coordinated shades produce a much cleaner result.
Materials You’ll Need
Mini crochet accessories generally require very little yarn, which makes them perfect for leftover skeins.
For a crochet iron keychain in this style, your basic supply list would include:
Yarn
Choose sage or muted olive green for the main body and handle, warm cream for the accent stripe and knob, and charcoal or dark gray for the bottom sole.
Crochet hook
Use a hook slightly smaller than you might normally choose for the yarn. This helps create tight stitches and keeps the finished shape firm.
Other supplies
You’ll also want a yarn needle, scissors, stitch markers, a small amount of stuffing if your construction requires it, and metal keychain hardware consisting of a split ring and short chain.
A cream crochet loop can be added between the iron and hardware to create the handmade attachment visible in this design.
How Much Yarn Will You Need?
Not much.
That’s one of the biggest advantages of miniature crochet projects. Small leftover yarn balls that seem too short for another amigurumi can often be enough for a keychain.
Keep a scrap-yarn basket specifically for projects like this. Neutral colors, greens, browns, creams, dusty pinks, and grays are particularly useful for small accessories.
Choosing the Best Yarn for a Crochet Keychain
The yarn you choose affects more than color.
It also affects how clearly the stitches and shape can be seen.
Cotton Yarn
Cotton is an excellent choice for miniature crochet because it usually provides crisp stitch definition.
It also tends to hold its shape well, which is particularly useful for the curved iron handle.
Cotton-Blend Yarn
A cotton blend can give you much of cotton’s stitch definition while feeling slightly softer and more forgiving.
This can be a good option if pure cotton feels stiff in your hands.
Acrylic Yarn
Acrylic can certainly work, especially if you’re using yarn you already own.
However, very fuzzy acrylic may make small details less distinct. If possible, choose a smooth acrylic with minimal halo.
Avoid Very Fuzzy Yarn
For this project, texture should come from the crochet stitches themselves.
Highly fuzzy or novelty yarn can blur the edges of the handle, knob, and sole and make the iron harder to recognize.
Hook Size and Tension Matter More Than You Think
One of the secrets to neat miniature crochet is firm, consistent tension.
Your stitches should be tight enough that gaps aren’t obvious, particularly if the body contains stuffing.
But don’t crochet so tightly that inserting the hook becomes uncomfortable.
If your usual amigurumi stitches look loose when working at this scale, try dropping down one hook size.
The exact hook will depend on your yarn.
For many small crochet accessories made with DK or light worsted yarn, something around the 2.5–3.5 mm range may be practical, but treat this only as a starting point. Your yarn label and personal tension should guide the final choice.
Do a Tiny Test First
Crochet a small swatch or a few rounds before committing to the project.
Ask yourself:
Are the holes between stitches noticeable?
Does the fabric feel firm?
Can I still insert my hook comfortably?
Does the fabric maintain its shape when gently pressed?
If the answer to those questions looks good, you’re probably close to the right hook and tension combination.
Crochet Skills That Will Help
This type of project doesn’t require advanced crochet knowledge, but familiarity with a few basic techniques will make the process easier.
You should be comfortable with:
Magic ring — useful for starting small circular components.
Single crochet — likely to make up most of the dense fabric.
Increase — used when expanding shapes.
Decrease — helps taper the body cleanly.
Working in rounds — common in miniature amigurumi-style construction.
Chains — useful when constructing or shaping narrow pieces.
Slip stitches — useful for joining and finishing.
Color changes — needed for clean transitions between sage, cream, and gray.
Basic sewing — important when attaching separate crochet components.
If you’re a beginner, none of these techniques should stop you from trying a miniature project. Work slowly and use a stitch marker to keep track of your rounds.
Planning the Iron Shape
A common mistake when crocheting miniature objects is focusing on details before getting the silhouette right.
Start with the overall shape.
The body needs a wider base and a slightly narrower upper section. The front should suggest the familiar tapered shape of an iron rather than becoming a simple rectangle or oval.
The handle should then rise prominently above the body.
If the handle is too small, the finished object may resemble a pouch or handbag instead of an iron.
That’s why proportions matter so much.
Use the Silhouette Test
Place your unfinished project against a plain background and look at it from a short distance.
Ignore the colors and stitches.
Does the outline alone suggest an iron?
If yes, you’re on the right track.
If not, adjust the shaping before adding decorative details.
Creating a Firm Crochet Body
A keychain is handled much more frequently than a decorative amigurumi sitting on a shelf.
That means durability matters.
Use dense stitches and keep your tension consistent throughout the body.
If stuffing is required, add it gradually rather than forcing a large amount inside at the end.
Don’t Overstuff
This is particularly important for the iron shape.
Too much stuffing can turn a nicely tapered body into a rounded ball.
Add enough filling to support the structure, then gently shape the piece between your fingers.
You want the body to feel firm without becoming swollen.
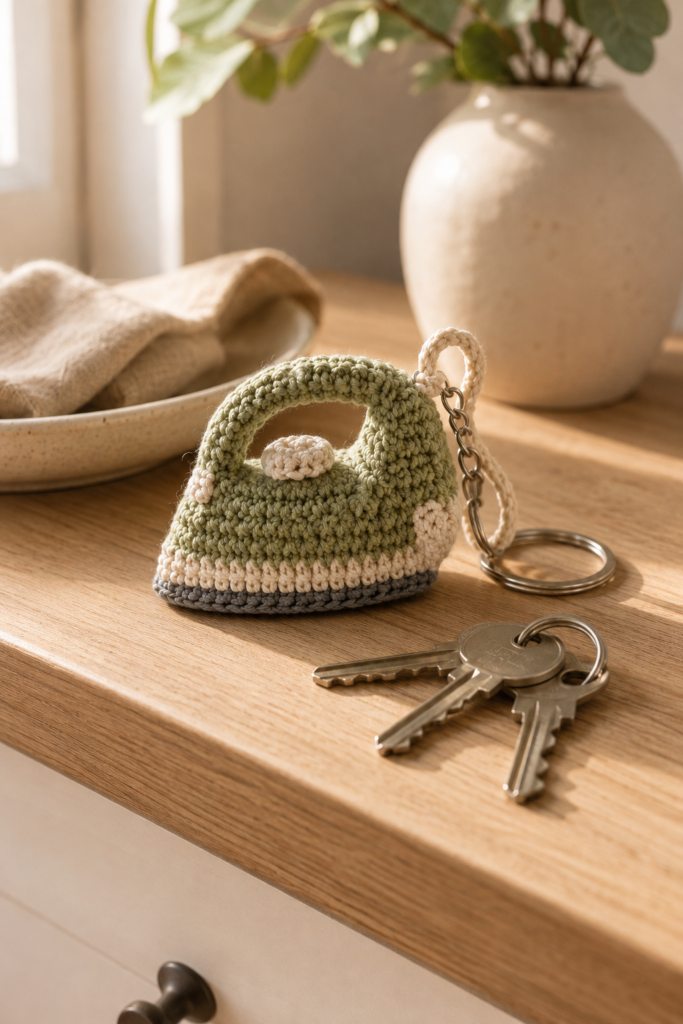
Making the Curved Crochet Handle
The handle is arguably the most important part of the entire project.
It should be thick enough to remain visible but not so bulky that it overwhelms the body.
A good miniature handle should maintain a smooth curve rather than collapsing inward.
Keep Both Attachment Points Secure
Because the handle is visually prominent, uneven placement is easy to notice.
Before permanently attaching it, pin or hold both ends against the body and look at the iron straight on.
Check that:
- the curve looks smooth
- both attachment points feel balanced
- the handle isn’t leaning dramatically to one side
- the opening underneath is large enough to remain visible
Once you’re happy with the position, sew it securely.
If the handle is crocheted as part of the main construction rather than separately, keep checking its shape while you work.
Adding the Cream Top Knob
The little cream knob may be small, but it does useful visual work.
Without it, the top of the iron can look empty.
A small round or slightly flattened crochet piece is enough. The goal isn’t to reproduce every setting on a real iron. It’s simply to suggest a control dial while maintaining the clean handmade aesthetic.
Position it close to the center of the upper body underneath the handle opening.
Before sewing it down, check the placement from both the front and three-quarter views.
Small details look much more obviously crooked on miniature projects.
Creating a Clean Cream Stripe
The cream stripe around the lower portion separates the green body from the gray sole.
A clean color change is essential here.
When switching yarn colors, make the final yarn-over of the previous stitch using the new color. This generally produces a smoother transition than completing the entire stitch in the old shade.
Try to keep the color-change point in a less visible area, such as the back or side.
And don’t pull the new yarn excessively tight.
That can create an unwanted indentation exactly where you want a clean horizontal band.
Adding the Charcoal-Gray Sole
The dark lower edge is another small detail that makes the object read as an iron.
Without it, the piece could easily start looking like a tiny bag.
The gray edge should stay relatively slim compared with the green body.
Think of it as visual grounding rather than another major color block.
A neat, dense row or edging can create the impression of the metal soleplate without making the bottom unnecessarily bulky.
Attaching the Keychain Hardware
This step deserves more attention than it often receives.
Your crochet may be perfect, but if the hardware is attached weakly, the keychain won’t survive everyday use.
Use a Strong Attachment Point
Don’t attach a heavy metal ring to one loose crochet stitch.
Instead, distribute the stress across a stronger crochet loop or reinforced section.
The cream hanging loop used in this design is useful both visually and structurally.
Secure it carefully to the iron and weave the yarn tails through several nearby stitches.
Then attach the metal chain and split ring.
Test It Before Using It
Once assembled, gently pull on the keyring several times.
You’re not trying to damage the project—you simply want to confirm that nothing immediately stretches or loosens.
If the crochet loop starts changing shape, reinforce it before using the keychain.
How to Keep a Mini Crochet Project Looking Professional
Small projects reveal finishing mistakes quickly.
Fortunately, most are easy to avoid.
Weave Ends Thoroughly
Don’t simply cut yarn tails close to the surface.
Weave them through several stitches, change direction, and then trim the excess.
Keep Seams Discreet
When possible, place joining seams toward the back or underside.
Match Your Sewing Yarn
Using matching yarn for assembly makes attachment stitches far less noticeable.
Check Symmetry Frequently
Don’t wait until the final step.
Look at your work from the front, side, and top throughout the project.
Don’t Chase Perfect Machine-Like Stitches
Handmade crochet should look handmade.
Tiny variations in tension are normal and often part of the charm. The goal is consistency and good construction—not making cotton yarn look molded from plastic.
Beginner Tips for Better Results
If this is one of your first miniature crochet projects, work slowly.
The project may be small, but small doesn’t always mean instant.
Keep a stitch marker in the first stitch of every round. Count your stitches regularly rather than discovering several rounds later that an increase was missed.
Another useful habit is to photograph your project as you work.
A quick phone photograph can reveal crooked shaping surprisingly well because you’re seeing the piece from a different perspective.
And if something looks wrong, undoing three rows on a tiny keychain is much easier than trying to disguise a shaping problem at the end.
Common Mistakes and How to Avoid Them
The Body Becomes Too Round
This often happens because of loose tension or excessive stuffing.
Use a smaller hook if necessary and add stuffing gradually.
The Handle Collapses
The handle may be too thin, too loosely crocheted, or attached too close together.
Firm stitches and appropriate spacing will help maintain that recognizable arch.
The Iron Doesn’t Look Like an Iron
Return to the silhouette.
Before changing decorative details, check the body taper, handle size, and dark sole. Those structural elements create recognition.
The Color Changes Look Messy
Plan where each new color begins and keep joins toward a less visible side.
The Keyring Pulls on the Crochet
Reinforce the attachment area rather than relying on a single stitch.
The Finished Keychain Is Too Large
Miniature crochet dimensions can change dramatically with yarn weight.
If you’re aiming for a genuinely small bag charm or keychain, don’t substitute substantially thicker yarn without expecting the finished size to increase.
How Long Does a Crochet Iron Keychain Take?
The answer depends on your experience and construction method.
An experienced crocheter comfortable with small projects may be able to complete a simple miniature keychain in a relaxed afternoon.
A beginner may prefer to spread the project across a couple of sessions.
There’s no benefit in rushing.
On small crochet pieces, careful assembly can take nearly as much concentration as crocheting the components themselves.
Give yourself time to position the handle, knob, and hardware properly.
Those final details are what make the project look finished.
A Great Project for Leftover Yarn
Most crocheters eventually develop a collection of small yarn balls.
They’re too useful to throw away but too small for another full project.
This is exactly where miniature keychains become useful.
Instead of opening new skeins, check your leftovers first.
You may already have enough sage, cream, and gray yarn to complete the entire project.
It’s also an easy way to experiment with alternate color palettes later. Once you’re comfortable with the construction, you could explore other coordinated combinations while keeping the iron silhouette and construction consistent.
Using Your Finished Crochet Iron Keychain
The obvious choice is attaching it to your keys, but that’s certainly not the only option.
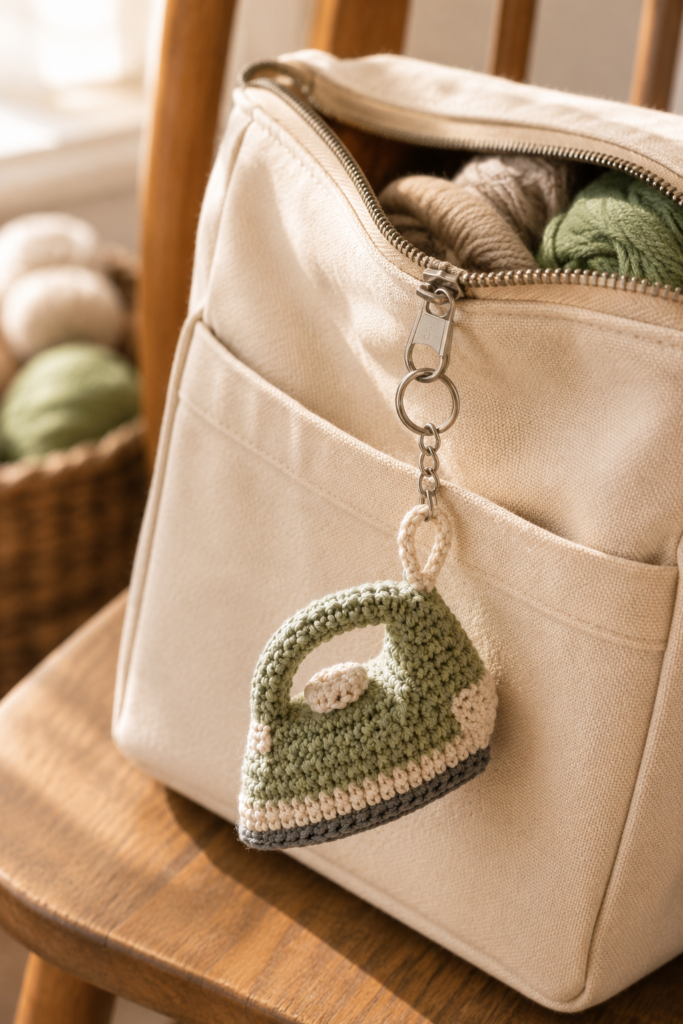
One of my favorite uses for small crochet charms is attaching them to project bags.
If you keep different crochet projects in separate pouches, a handmade charm makes a bag easier to recognize while adding personality.
The iron theme also makes this design especially suitable for a sewing or quilting bag.
It could even work as a decorative zipper pull on a notions pouch.
Because the charm contains metal hardware, however, avoid attaching it somewhere that experiences heavy pulling or constant rough friction.
Turning It Into a Thoughtful Handmade Gift
Tiny handmade gifts can feel surprisingly personal.
This iron keychain would be especially fitting for someone who enjoys:
sewing, quilting, dressmaking, crochet, knitting, fabric crafts, or simply collecting miniature handmade objects.
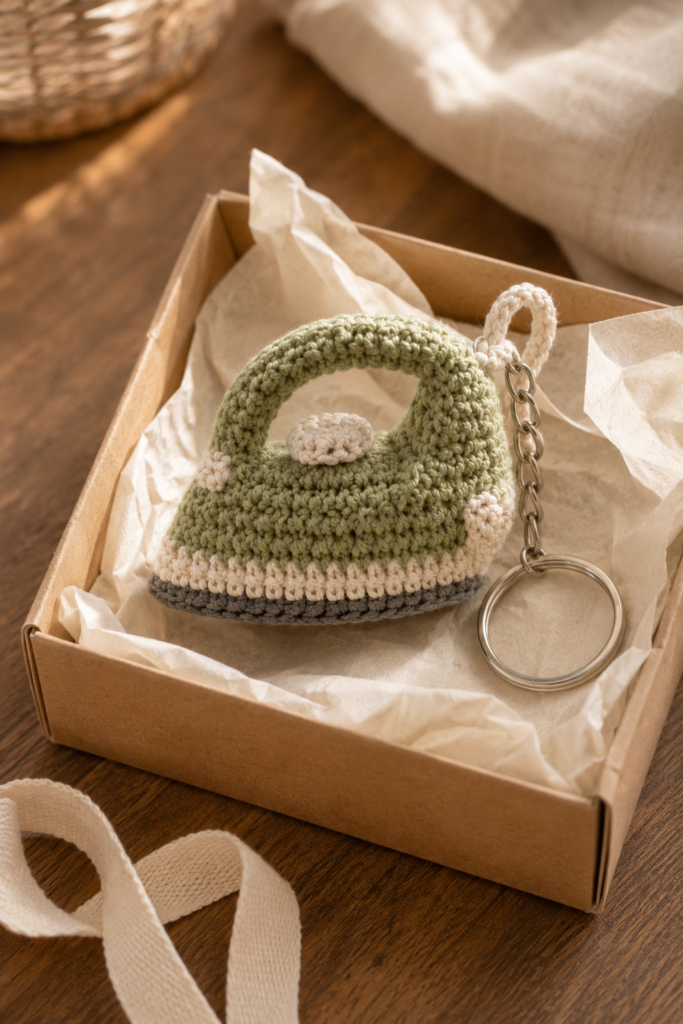
You don’t need elaborate packaging either.
A small kraft box, cream tissue paper, and simple cotton ribbon complement the natural yarn colors beautifully.
If you’re giving it to another crafter, you could pair it with stitch markers, a small tape measure, or a handwritten note.
Keep the presentation simple so the crochet remains the star..
Care and Storage
A crochet keychain naturally receives more handling than most handmade crochet items.
For that reason, gentle care is best.
If the keychain becomes dusty, start with light spot cleaning rather than immediately soaking the entire piece.
Use a clean damp cloth and a tiny amount of mild detergent where necessary.
Avoid harsh scrubbing because it can fuzz the yarn and distort small stitches.
If a deeper wash is required, follow the care instructions for the exact yarn you’ve used.
Dry It Naturally
Don’t twist or wring the crochet.
Gently press out moisture with a towel, reshape the iron with your fingers, and allow it to air-dry completely.
Pay particular attention to the metal keyring and chain. Leaving metal hardware wet for long periods may affect its finish.
Storing Handmade Keychains
If you’re making several keychains ahead of time for gifts, craft fairs, or personal use, keep them somewhere dry and away from prolonged direct sunlight.
A small divided craft box works well.
Try not to stack heavy objects over the crochet handles because they may gradually flatten.
Frequently Asked Questions
Is a crochet iron keychain beginner-friendly?
It can be a good advanced-beginner project. You should ideally know single crochet, increases, decreases, working in rounds, basic color changes, and simple sewing.
What yarn is best for a crochet keychain?
Smooth cotton or cotton-blend yarn is particularly useful because it gives good stitch definition and tends to hold miniature shapes well.
Should I use a smaller crochet hook?
Often, yes. A slightly smaller hook creates firmer fabric, which is helpful for amigurumi-style keychains. Don’t go so small that crocheting becomes uncomfortable.
Does a miniature crochet iron need stuffing?
That depends on its construction. If the body is designed as a three-dimensional stuffed piece, use a small amount of filling. Avoid overstuffing because it can distort the iron shape.
How can I make the handle stay curved?
Use firm stitches and keep the handle proportionate to the body. Secure both ends carefully and check the curve before final attachment.
How do I stop the keychain loop from stretching?
Use tight crochet, reinforce the attachment area, and spread the load across multiple stitches rather than hanging the hardware from one weak stitch.
Can I use acrylic yarn?
Yes. Choose a smooth acrylic rather than an extremely fuzzy variety if you want crisp miniature details.
Can I attach the crochet iron to a project bag?
Absolutely. A project bag is actually one of the nicest places to use this style of keychain, especially for someone who loves sewing or crochet.
Is this a good scrap-yarn project?
Yes. Because each color is required only in small quantities, miniature keychains are excellent projects for leftover yarn.
What makes a small crochet keychain look professional?
Consistent tension, clean color changes, secure seams, carefully positioned details, neatly woven yarn ends, and sturdy hardware attachment make the biggest difference.
Final Thoughts
The charm of the Iron Out Your Keys Stylish Crochet Iron Keychain Pattern isn’t about complicated construction or lots of decoration.
It’s the opposite.
A familiar everyday object is reduced to a handful of recognizable details: a sage crochet body, a bold curved handle, a little cream knob, a contrasting lower stripe, and a dark sole.
That simplicity makes every detail count.
Take your time with the shaping. Keep your stitches firm. Check the handle before attaching it permanently, and give the keychain hardware just as much attention as the crochet itself.
When those little details come together, you end up with something that’s practical, giftable, and unmistakably handmade.
And perhaps best of all, it’s exactly the sort of project that can turn a few leftover balls of yarn into something you’ll actually use.
If you enjoy small crochet projects, save this idea for your next scrap-yarn afternoon—and explore more handmade crochet inspiration and beginner-friendly projects here on StitchNestStudioShop.