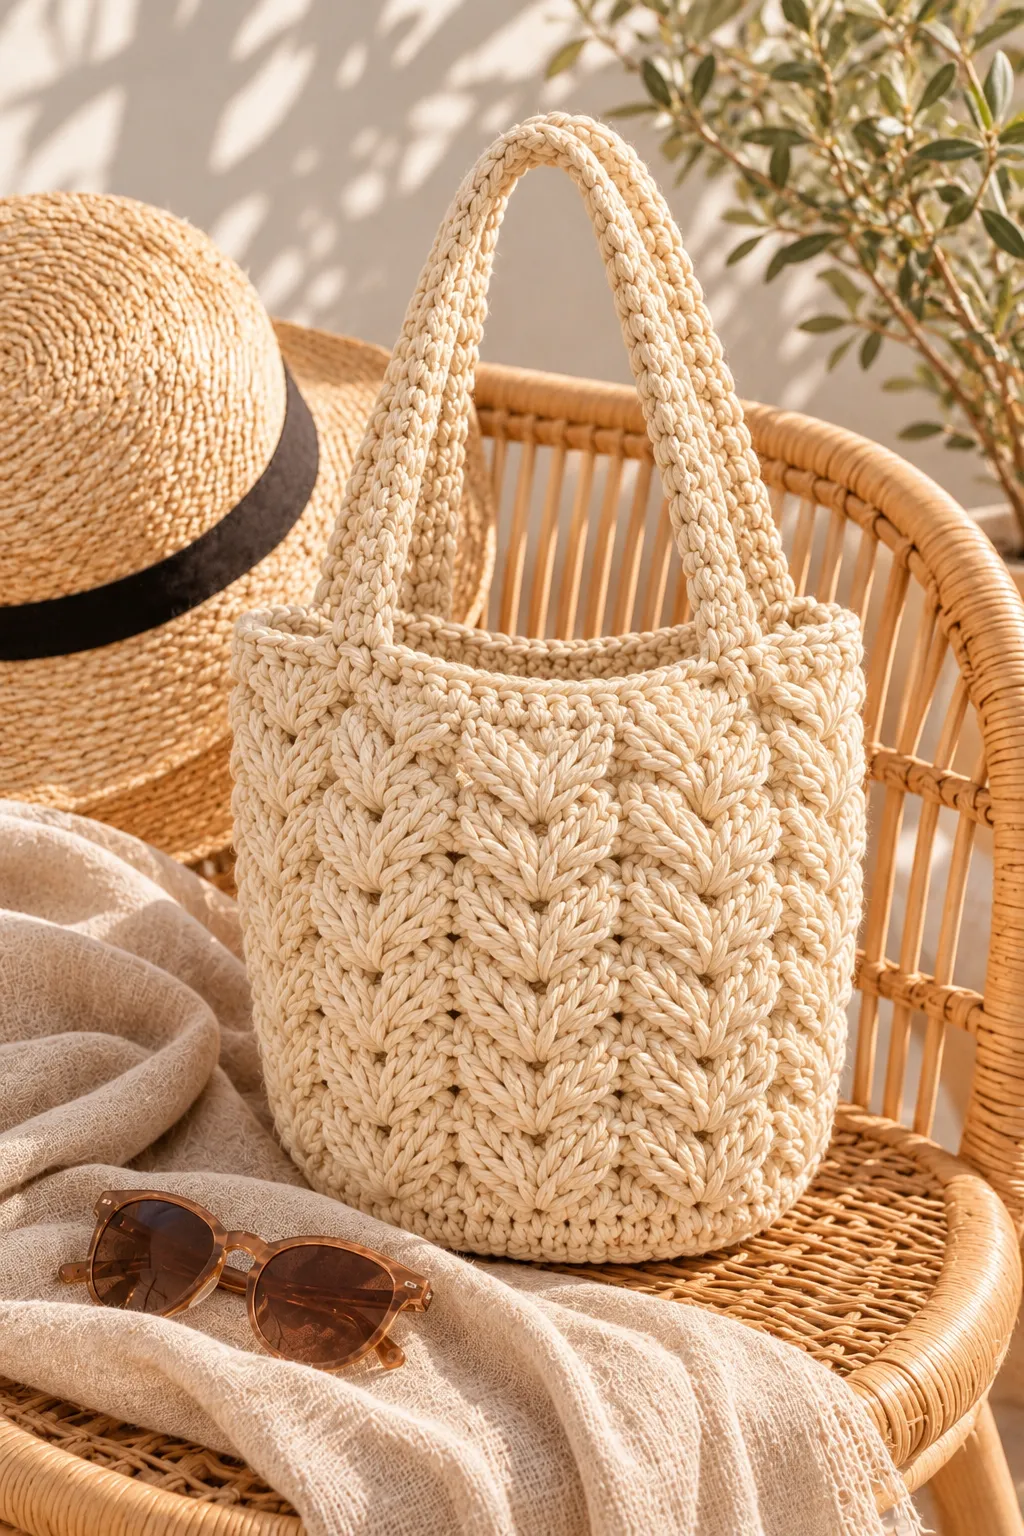
If you have ever wanted a handmade bag that looks like it came from a boutique but works up fast enough to finish over a few evenings, this is the pattern for you. This super easy crochet bag with macrame yarn starts as a simple oval, grows into a sturdy basket shaped body, and finishes with a textured leaf panel and a chunky rolled handle. Nothing in it is difficult. If you can chain, single crochet, and double crochet, you already have every skill you need.
I designed this tote for the kind of crocheter who wants a project that feels rewarding without demanding endless counting. Macrame yarn is thick, firm, and forgiving, so your stitches show clearly and your mistakes are easy to spot and fix. The finished bag stands up on its own, holds your wallet, water bottle, and a small project in progress, and looks lovely in a neutral cream shade that goes with almost everything in your wardrobe. Best of all, the pattern is completely free, and I will walk you through every round in plain language so you never feel lost.
Why Macrame Yarn Is Perfect for Crochet Bags
Before we pick up a hook, it helps to understand why macrame yarn has become such a favorite for bags, baskets, and home décor. Macrame yarn, often sold as macrame cord, is usually made from cotton or a cotton blend that is twisted or braided into a thick, round strand. Unlike soft acrylic or fluffy wool, it has a natural firmness. When you crochet with it, the fabric holds its shape instead of slumping. That is exactly what you want in a bag, where structure matters more than drape.
The second reason is durability. Cotton macrame cord stands up to daily wear. It does not pill easily, it does not stretch out of shape when you load it with heavy items, and it can be washed gently when it picks up a little dirt. A bag made from this cord will keep its good looks for years if you treat it kindly.
The third reason is speed. Because the cord is thick, each stitch covers more ground than a stitch worked with worsted weight yarn. A base that might take an hour with thin cotton takes a fraction of that with macrame cord. For beginners, this is a huge confidence boost, because you see real progress within the first sitting.
Finally, macrame yarn gives beautiful stitch definition. The leaf texture in this pattern looks crisp and sculpted precisely because the cord is round and plump. Thinner yarns can blur raised stitches, but a good macrame cord makes every little leaf pop.
Materials You Will Need
Let me start with the cord, since it is the heart of this project. You will need roughly 300 to 350 yards of 4mm to 5mm cotton macrame cord in a single color. I used a warm cream shade, which gives the bag a calm, natural look, but any solid color works well. If your cord is a single twisted strand, you will notice it can split slightly while you work, so go slowly and make sure your hook picks up the whole strand each time. Braided cord splits less and is a little easier for beginners.
For the hook, a 5.5mm to 6mm hook is a good match for this weight of cord. You want your stitches snug, because a tight fabric is what gives the bag its sturdy structure. If your stitches feel loose or floppy, drop down a hook size. If your hands feel strained pushing the hook through each stitch, go up half a size. A hook with a smooth ergonomic handle makes a big difference, because thick cord asks a little more from your hands than ordinary yarn does.
Beyond the cord and hook, you will need a pair of sharp scissors, a yarn needle with a large eye for sewing the handles and weaving in ends, and a few stitch markers. A stitch marker is essential because this bag is worked in continuous rounds, and you need to know where each round begins. A small safety pin or a scrap of contrasting yarn works just as well if you do not own markers.
Optionally, you can add a fabric lining. A lining is not required, but it keeps small items from poking through the stitches and protects the inside of the bag. Choose a sturdy cotton or canvas, and a needle and thread to sew it in by hand.
Size, Gauge, and Abbreviations
The finished bag measures about 13 inches wide, 10 inches tall not counting the handles, and 5 and a half inches deep. Because macrame cord varies from brand to brand, your size may differ slightly, and that is perfectly fine. Gauge is not critical for a bag like this, but try to keep your stitches tight and even. A good test is to crochet a small circle in single crochet and check that it lies flat and feels firm.
This pattern uses standard US crochet terms. Ch means chain. Sc means single crochet. Hdc means half double crochet. Dc means double crochet. Fpdc means front post double crochet, which is a double crochet worked around the post of the stitch below rather than into the top of it. Blo means back loop only. Sl st means slip stitch. Each round is worked continuously without joining, so mark your first stitch and move the marker up as you go.
Step One: Make the Oval Base
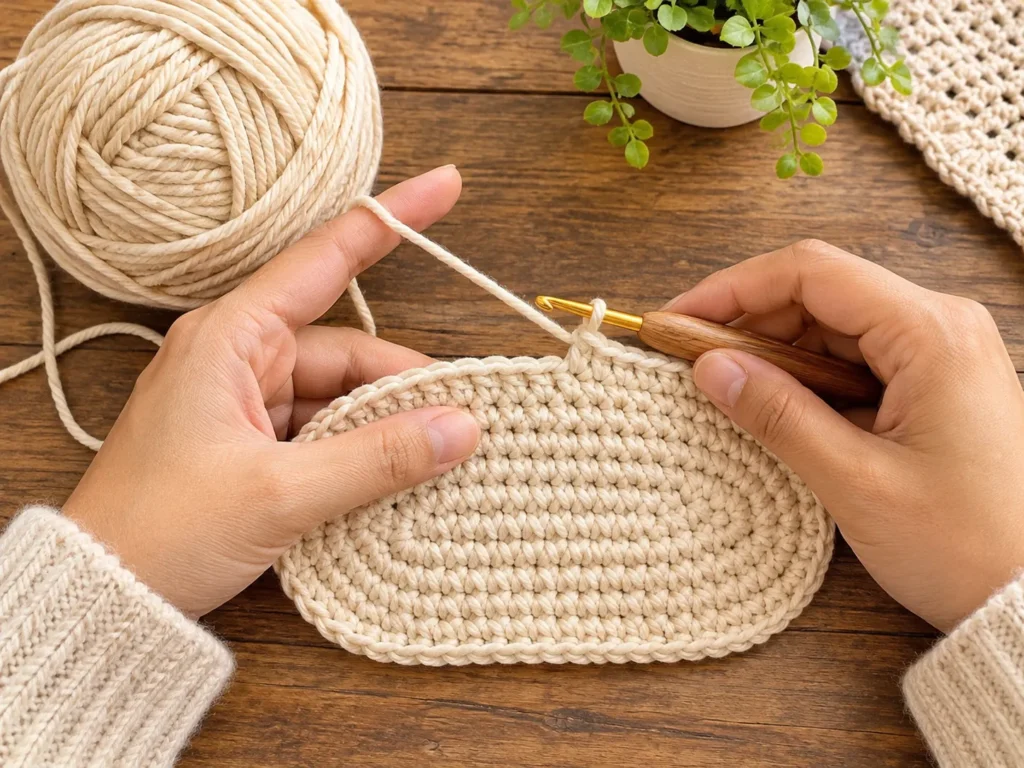
Every great bag begins with a solid foundation. Our base is an oval, which gives the tote its classic basket shape and lets it sit flat on a table without tipping over.
Start by chaining 17. Work 1 sc into the second chain from your hook, then sc in each of the next 14 chains. You should now be at the end of the chain with 15 stitches made. Work 3 sc in the very last chain, which turns the corner. Now rotate your work so you are crocheting along the opposite side of the foundation chain. Work 1 sc in each of the next 14 chains along the underside, and then work 3 sc in the same chain where you made your very first stitch. You now have 36 stitches and a flat, narrow oval. Place a marker in the first stitch of the round.
Round two is where the oval begins to grow. Work 2 sc in each of the 3 stitches at the end, then sc in each of the 15 stitches along the long side. Work 2 sc in each of the 3 stitches at the other end, then sc in each of the remaining 15 stitches. You should now have 42 stitches.
For round three, work sc, then 2 sc in the next stitch, and repeat that pair three times around the first curve. This gives you 9 stitches at the end instead of 6. Then sc in each of the 15 stitches along the side. Repeat the sc and 2 sc pattern three times around the second curve, and sc in the remaining 15 stitches. You should now have 48 stitches.
Round four follows the same idea. At each curve, work sc in each of the next 2 stitches, then 2 sc in the next stitch, and repeat that three times, giving you 12 stitches at each end. Work 15 sc along each long side. You will have 54 stitches.
For round five, at each curve work sc in the next 3 stitches, then 2 sc in the next stitch, repeating three times to get 15 stitches at each end. Keep 15 sc along each side, which brings you to 60 stitches. Your base should now measure approximately 13 inches long and 5 and a half inches wide.
A quick tip from experience: if your oval starts to ruffle, you are adding too many stitches. If it begins to cup upward, you are adding too few. Count your stitches at the end of every round, because one missed increase early on can throw off the whole shape. Laying your work flat and pressing it gently with your hand will tell you quickly whether it is behaving.
Step Two: Build the Basket Shaped Body
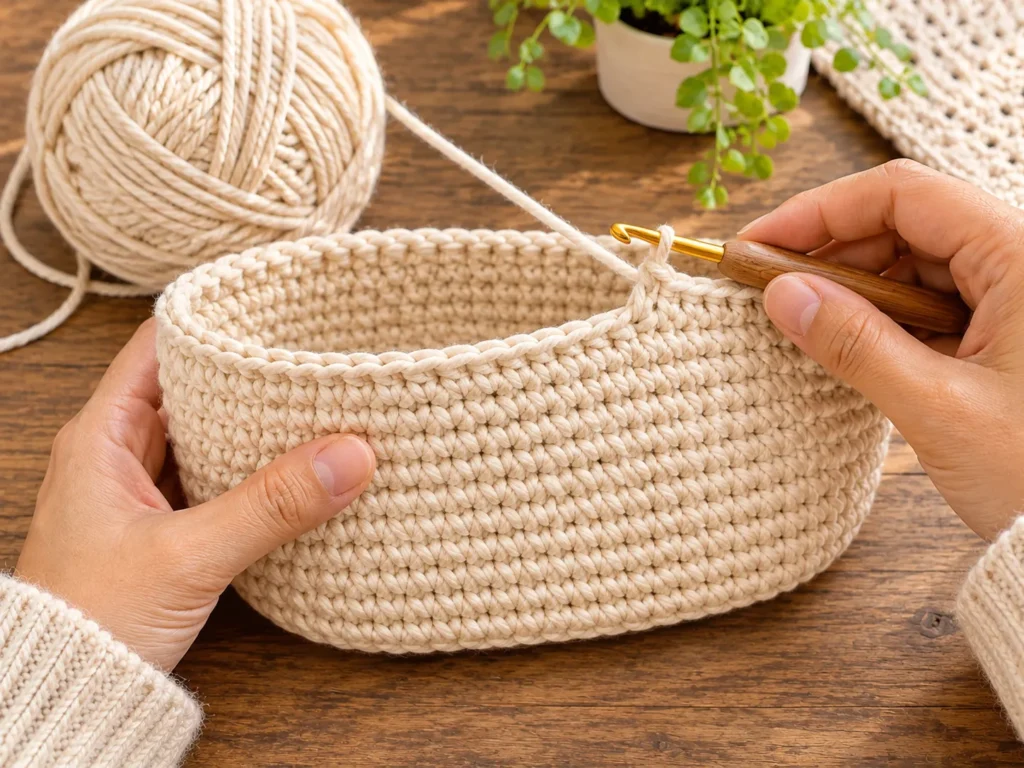
Now comes the satisfying part, where flat becomes three dimensional. For the first round of the body, work sc into the back loop only of every stitch around. This simple trick creates a crisp, defined corner where the base meets the sides, and it gives the bag a natural fold line so the walls stand straight up. You will have 60 stitches at the end of this round.
From here on, work 1 sc in each stitch around, with no increases or decreases. Continue for 5 more rounds. The sides will begin to rise, and you will notice the oval shape holding its form beautifully, thanks to the firm cord. Keep checking that you still have 60 stitches at the end of each round. If you are off by one or two, it is usually because a stitch was skipped near the markers, so recount and fix it before you move on.
This plain section is also a lovely place to practice a consistent tension. Try to keep your stitches the same size from the bottom of the bag to the top. Uneven tension shows up more with thick cord, so relax your shoulders and let the cord glide through your fingers.
By the end of these rounds, you should have a small, sturdy basket about 3 inches tall. If you stopped here, you would already have a handy storage basket for your craft room. Instead, we will keep going and turn it into a proper tote with a decorative panel.
Step Three: Add the Leaf Texture Panel
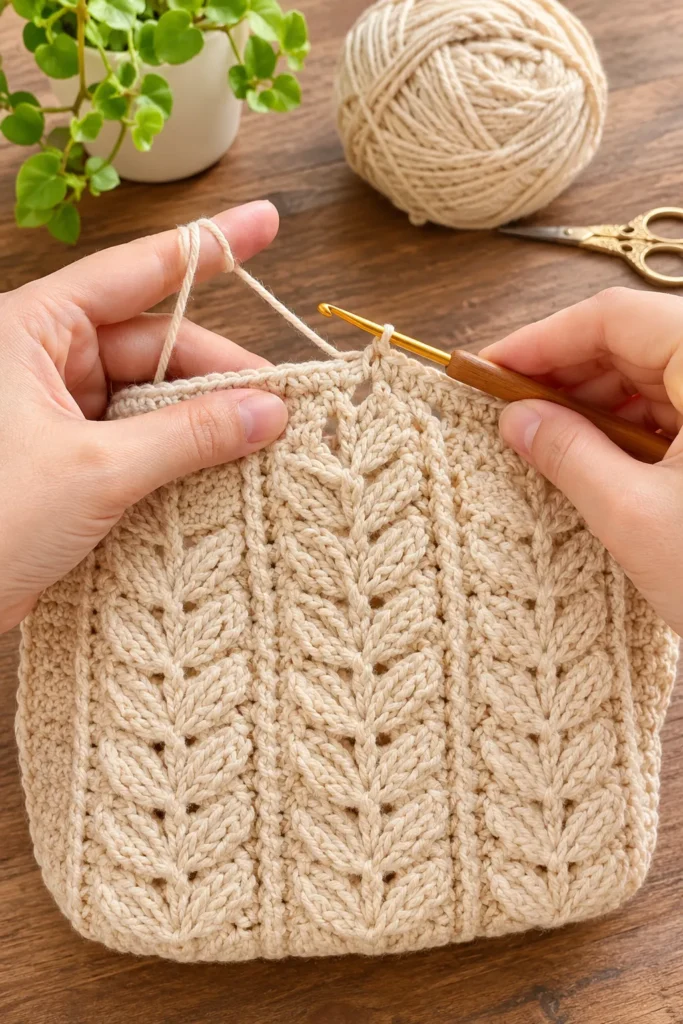
The textured leaf panel is the feature that makes this bag look special, and it is much easier than it appears. The secret is a very simple repeating rhythm of ribs and gentle swells. We divide the 60 stitches into 6 sections of 10 stitches each. Each section has 2 rib stitches followed by 8 leaf stitches. Three sections fall on the front of the bag and three on the back, which gives you the beautiful vertical columns you see in the photos.
Leaf Round A is worked like this. Work 2 fpdc around the next 2 stitches below, which forms the rib. Then work sc in the next stitch, hdc in the next stitch, dc in each of the next 4 stitches, hdc in the next stitch, and sc in the final stitch of the section. Repeat this whole sequence 6 times around. The stitches rise in height toward the middle of each section, which creates a gentle swell that looks like the belly of a leaf.
Leaf Round B is worked the opposite way, so the swell tapers back down. Work 2 fpdc around the 2 rib stitches. Then work dc in the next stitch, hdc in the next stitch, sc in each of the next 4 stitches, hdc in the next stitch, and dc in the final stitch of the section. Repeat 6 times around. The tall stitches are now at the edges and the short ones sit in the middle, which pulls the shape inward and finishes the leaf.
Now alternate Round A and Round B, one after the other, for 12 rounds in total. As the rounds stack, the swells and tapers line up into rows of little leaves climbing up each column, while the fpdc ribs run straight up between them like stems. Every leaf sits on top of the previous one, and the finished look is a rich braided texture that resembles wheat or ferns.
I should mention that this is a simplified approach designed for beginners. Advanced leaf stitches use crossed or slanted clusters that take longer to learn, but this version gives you a very similar sculpted look using only the stitches you already know. If you want the more elaborate version later, you can easily swap it in using the same 10 stitch repeat.
A few practical notes will keep you on track. When working the fpdc, insert your hook from the front, around the post of the stitch in the previous round, then yarn over and pull up a loop, and finish like a normal double crochet. Keep the post stitches snug so the ribs stand tall. The most common slip is working the first fpdc of a round into the wrong stitch, so always find your marker before you begin. If you ever lose your place, look at the previous round and match the ribs, because the columns should always sit directly above each other.
Do not worry if your first few leaves look slightly uneven. Thick cord has a way of settling as you add more rounds, and the pattern evens out beautifully once you reach the middle of the panel. After 12 rounds, the bag will measure around 9 inches tall.
Step Four: Finish the Top Rim
A neat rim gives the whole bag a professional finish. Work 2 rounds of sc, one stitch in each of the 60 stitches, without any ribs or leaves. This straightens the top edge and prepares it for the handles. On the last round, work a slip stitch into the next stitch to join, then cut the cord, leaving a tail about 6 inches long. Pull the tail through the final loop and weave it in securely on the inside of the bag.
If you want the rim to feel extra sturdy, add a third round of sc and then one round of reverse single crochet, sometimes called crab stitch, worked from left to right. It creates a tiny twisted edge that looks like rope and keeps the top from rolling. This is optional, but I love how polished it looks on a tote that will be handled daily.
Step Five: Make the Rolled Handles
Thick handles are what make this bag feel luxurious and comfortable to carry. We make each one as a flat strip, then roll it into a soft tube.
To start, chain 9. Work 1 sc into the second chain from the hook and then sc in each of the next 7 chains, giving you 8 stitches. Chain 1 and turn. From here, work 1 sc into the back loop only of each stitch across, chain 1, and turn. Repeat this row until the strip measures about 24 inches long, or whatever length suits your shoulder. For a hand carry bag, 20 inches is plenty. For a shoulder bag, you might prefer 28 inches. Working into the back loop only makes a gentle ridge on the surface and keeps the strip from stretching.
When the strip reaches the length you want, cut the cord, leaving a tail about 24 inches long for sewing. Fold the strip in half lengthwise so the long edges meet and the ridges face outward. Using the yarn needle and the long tail, whip stitch the edges together all along the length. You now have a soft, rounded tube with a lovely woven texture. If you want a firmer handle, thread a piece of thin rope or a length of cotton batting through the tube before closing the seam.
Make a second handle in exactly the same way.
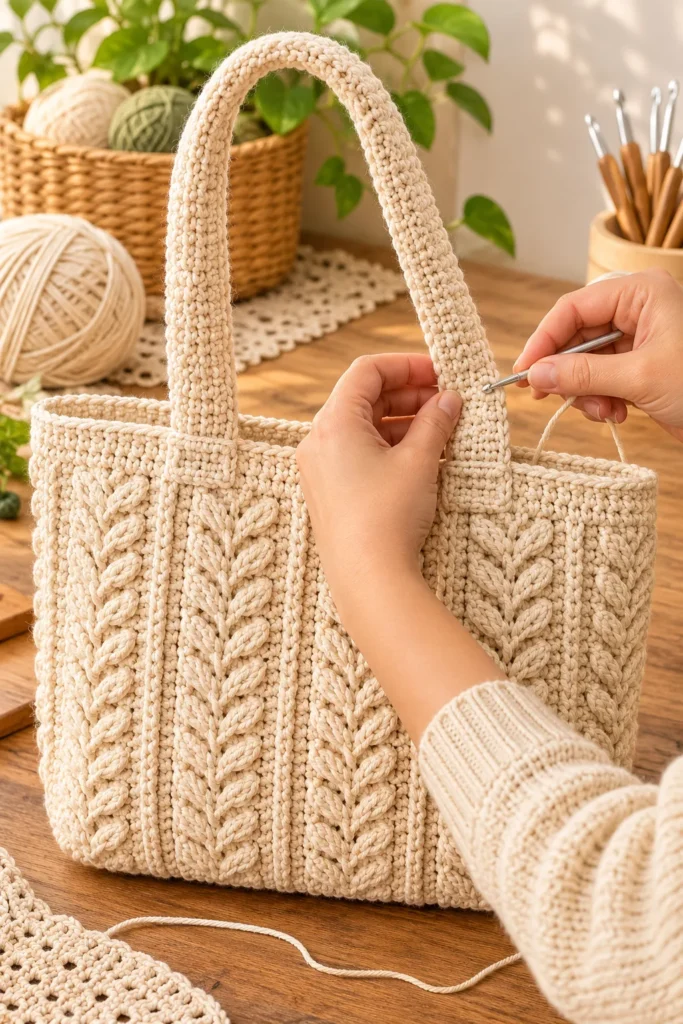
To attach the handles, lay the bag flat so the leaf panels face front and back. Choose the center ribs of the front and back panels, since these sit near the middle of the bag. Place one end of a handle about 2 inches inside the rim, centered over the rib, and place the other end about 3 inches away on the same side. Pin in place. Using the yarn needle and a long length of cord, sew the handle ends securely to the inside wall of the bag, stitching through the handle and the bag several times. For extra strength, sew a small square patch of single crochet over each handle end on the inside, which acts like a reinforcing tab and spreads the weight of the load.
Finishing Touches and Optional Lining
With your handles secure, weave in every remaining end carefully. With thick cord, loose ends can work their way out, so thread each tail through several stitches in different directions before trimming. Give the whole bag a gentle shape by pressing the base flat and letting the sides stand tall.
If you want to line your bag, measure the inside height and the circumference, then cut a rectangle of fabric with an extra half inch on each side for seams. Sew the short ends together to make a tube, and then cut an oval to match the base. Pin the oval to the bottom of the tube and sew it in place. Slip the finished lining into the bag, fold the top edge down, and hand sew it to the inside of the rim with small, neat stitches. A lining adds structure and lets you carry small items without worry.
Washing is simple if you follow a few rules. Spot clean with a damp cloth and mild soap whenever possible. If the whole bag needs washing, hand wash it in cool water, press out the water without wringing, and let it dry flat in the shade. Avoid hanging it by the handles while wet, because the water makes cotton heavy and can stretch the handles out of shape.
Troubleshooting Common Problems
Even the easiest patterns can raise questions, so here are the issues I hear about most often, along with what to do about them.
If your base looks wavy or ruffled, you have added too many increases. Count your stitches at the end of each round and compare to the numbers in the pattern. Pulling out one round and redoing it is far easier than fighting a wavy base later. If the base cups upward like a bowl, you have too few increases, so check that you worked every increase at the curves.
If your cord keeps splitting, slow down and look at each stitch as you insert the hook. Cord that is twisted tends to split more than braided cord. A hook with a rounded head is gentler than one with a sharp, pointed head, so consider switching hooks if splitting bothers you.
If your leaves do not look like leaves, check that the tall stitches of Round A line up above the short stitches of Round B. The pattern relies on that alternation. If the columns drift sideways, you may have lost your place relative to the ribs, so go back to the first fpdc of the round and recount.
If your bag feels floppy rather than sturdy, your tension is probably too loose. Try dropping down a hook size, and be sure to pull each stitch snug. A lining or a piece of plastic canvas cut to fit the base can also add stability.
If the handles feel too short or too long, remember that the handle length is easy to change. Add or remove rows before you fold the strip, and test the length by holding it against your shoulder.
If your hands ache from the thick cord, take breaks often and stretch your fingers. Working with heavy cord can be tough on the wrists, so switch to an ergonomic hook handle and keep your grip relaxed.
Fun Variations to Try
Once you have made the basic tote, you can change it in many ways. Make it taller by adding more leaf rounds, or turn it into a smaller pouch by stopping after 6 rounds. Dye the cord a soft sage, dusty rose, or deep navy to match your wardrobe. Swap the rolled handles for short, flat straps for a more casual look. Add a button loop closure by crocheting a small chain loop at the center of the rim and sewing a wooden button opposite it. You can even use the same oval base and body, without the leaf panel, to make a set of matching storage baskets for your home.
For gifting, a cream bag filled with a skein of yarn, a hook, and a handwritten note makes a heartfelt present for a fellow crafter. For selling at craft fairs, the bag works up quickly enough that you can make several in a weekend, and its natural look appeals to a wide audience.
Frequently Asked Questions
People often ask whether macrame cord can be used instead of regular yarn for this pattern. Yes, but the result will change. Regular yarn will give a softer, drapier bag, while macrame cord gives structure. If you use a lighter yarn, hold two or three strands together to mimic the thickness.
Another common question is how much cord to buy. Plan on about 300 to 350 yards for the bag and handles, and always buy a little extra to be safe. Cord from different dye lots can show slightly different shades, so purchase everything at once.
Many crocheters also ask whether this is truly beginner friendly. It is, as long as you can work single crochet, half double crochet, double crochet, and front post double crochet. The front post stitch is the only unusual one, and a quick video tutorial will show you how in a few minutes.
People also wonder how long the project takes. Most crocheters finish the base and body in a single afternoon, the leaf panel in one or two evenings, and the handles in another sitting. Expect around 10 to 14 hours in total, depending on your speed.
Finally, readers often ask whether they can sell items made from this pattern. You are welcome to sell your finished bags, and I would be grateful if you credit this blog and link back to the pattern when you share your work.
Final Thoughts
This super easy crochet bag with macrame yarn proves that handmade does not have to mean complicated. With a simple oval base, a sturdy body, a textured leaf panel, and chunky rolled handles, you end up with a tote that is beautiful, practical, and made entirely by your own hands. Every stitch teaches you something, and by the time you weave in the last end, you will have a bag you can carry with real pride.
I would love to see your version, so share your finished bag and tell me which color you chose. Happy crocheting, and enjoy every stitch.