There is a moment every crocheter reaches when scarves and hats stop feeling like a challenge and a sweater starts whispering from the back of the mind. You scroll past a beautiful cardigan or a bold colorblock pullover and think, I wish I could make that. The honest answer is that you can, and it is far less scary than it looks.
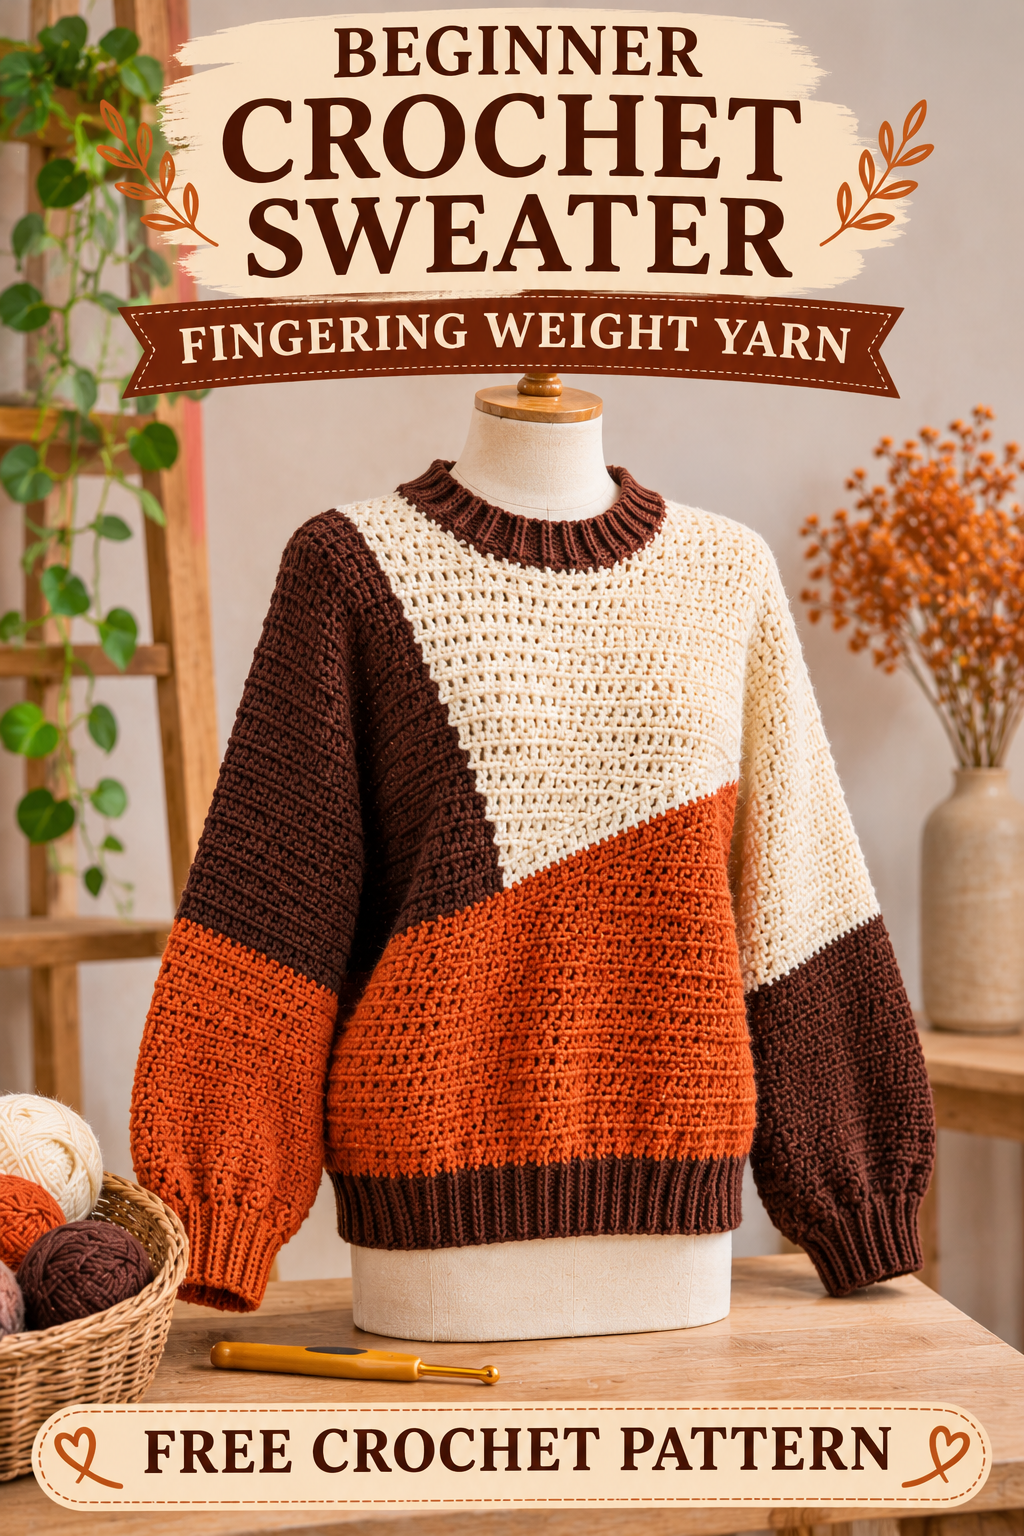
This colorblock sweater is built from simple rectangles, one basic stitch and a few clever color changes. There is no complicated shaping, no armhole curves to calculate and no lace to count. What you get is a roomy, slouchy pullover in cream, rust and chocolate brown, with chunky ribbed edges and big drop shoulder sleeves. It looks like something from a boutique, yet every stitch in it is something you can learn in an afternoon.
In this guide I will walk you through the whole process, from picking yarn to sewing on the neckline. I will tell you what to expect, where beginners usually get stuck and how to fix problems before they turn into frustration. It is a long project, and I will be upfront about that, but it is a relaxing one, and the finished sweater is worth every row.
Why This Sweater Works for Beginners
The secret to a beginner friendly sweater is simplicity of construction, and this design has plenty of it. The body is two flat rectangles, one for the front and one for the back. The sleeves are two slightly tapered rectangles. The ribbing is made from long, narrow strips. Everything is sewn together at the end, so you never have to worry about working in the round or keeping track of complicated increases.
The stitch is just as friendly. The whole sweater is worked in half double crochet, one of the first stitches most crocheters learn. It is quick to work, it creates a dense and cozy fabric, and it hides small tension wobbles very well. If you can chain, make a half double crochet and turn your work, you have the skills to finish this.
The colorblock design looks advanced, but it relies on a single technique: changing yarn colors in the middle of a row. Once you try it a few times, it feels natural. Even if your lines are not perfectly crisp, the textured fabric and the bold colors forgive small imperfections and give the sweater a handmade charm.
Yarn, Hook and Materials
The sweater in the photos is made with fingering weight yarn, which gives a soft, drapey fabric that does not feel heavy even though the sweater is oversized. You will need about 1,800 yards in total, which works out to roughly 600 yards each of cream, rust orange and chocolate brown. Wool blends and soft cotton blends are both good choices. Choose a yarn with a little bit of spring, because it makes the ribbing bounce back and helps the sweater keep its shape.
If you are shopping for the first time, look for a smooth, tightly plied yarn. Fuzzy or loosely spun yarns can hide your stitches, which makes it harder to see mistakes and harder to count rows. Make sure all three colors come from the same yarn line so they behave the same way when washed.
You will need a 4 mm (US G/6) crochet hook. A comfortable ergonomic handle is a good investment, because you will spend many hours with it. Beyond that, gather a tapestry needle for sewing seams, a measuring tape, scissors, a handful of stitch markers and three small bobbins or clothespins to hold the colors while you work the color changes. A blocking mat and pins are helpful at the end.
The gauge is about 20 stitches and 15 rows over 4 inches in half double crochet. Please make a swatch before you begin. A sweater is the one project where gauge truly matters, since a difference of even one stitch per inch changes the finished size by several inches.
Understanding the Size and Fit
This pattern makes an oversized, relaxed sweater with a finished chest measurement of about 44 inches. It is designed to fit a bust of 34 to 40 inches comfortably, with a slouchy drop shoulder look. The body is about 24 inches long, and the sleeves are about 21 inches long including the cuff.
If you want a different size, the math is easy. Each panel is 22 inches wide and has 110 stitches, which is five stitches per inch. For a narrower sweater, subtract five stitches for every inch you want to remove from the panel width. For a wider one, add five for every inch. Keep the total an even number of stitches so the foundation chain works out.
Before you start, hold a sweater you already love against your body and measure it flat from side to side, then from hem to shoulder. Use those numbers to adjust. A crochet sweater should be comfortable first and pretty second, so trust your own measurements over the pattern.
Step 1: Make the Ribbed Hem Band
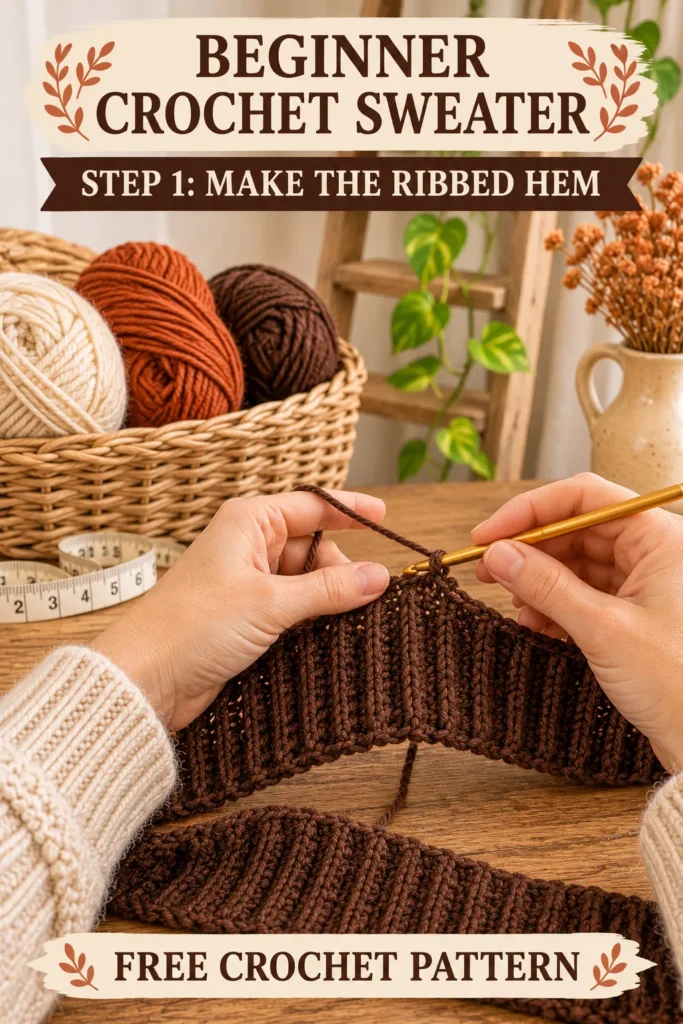
Every sweater starts at the bottom, and this one begins with a chocolate brown ribbed band that gives the hem its neat, snug finish. The band is worked as a long strip, which you will later turn sideways so the ridges run up and down like knitted ribbing.
Begin by chaining 13 with your brown yarn. Work a half double crochet into the third chain from your hook and into each chain across, which gives you 11 stitches. Chain 2, turn, and work a half double crochet into the back loop only of each stitch across. Back loop only simply means you insert the hook under the loop that is farthest from you instead of both loops. This leaves a little ridge on the front of the fabric, and those ridges create the ribbed look.
Repeat that row until the strip has 100 rows, which measures about 20 inches. It is slightly shorter than the body on purpose. When you attach the body later, the ribbing will pull in gently and hug the hips. Count your rows with a stitch marker every 20 rows so you do not lose track.
Make two bands, one for the front and one for the back. It is tempting to rush through them, but take your time and keep your tension consistent. A band that is too tight will not stretch over your hips, and one that is too loose will look baggy. If your edge stitches look uneven, chain loosely at the start of each row and keep the first stitch relaxed.
When both bands are done, weave in the loose ends at the starts and finishes of each strip. Doing it now saves you from fussing with these ends later, once they are buried under the body fabric.
Step 2: Crochet the Body Panels in Color Blocks
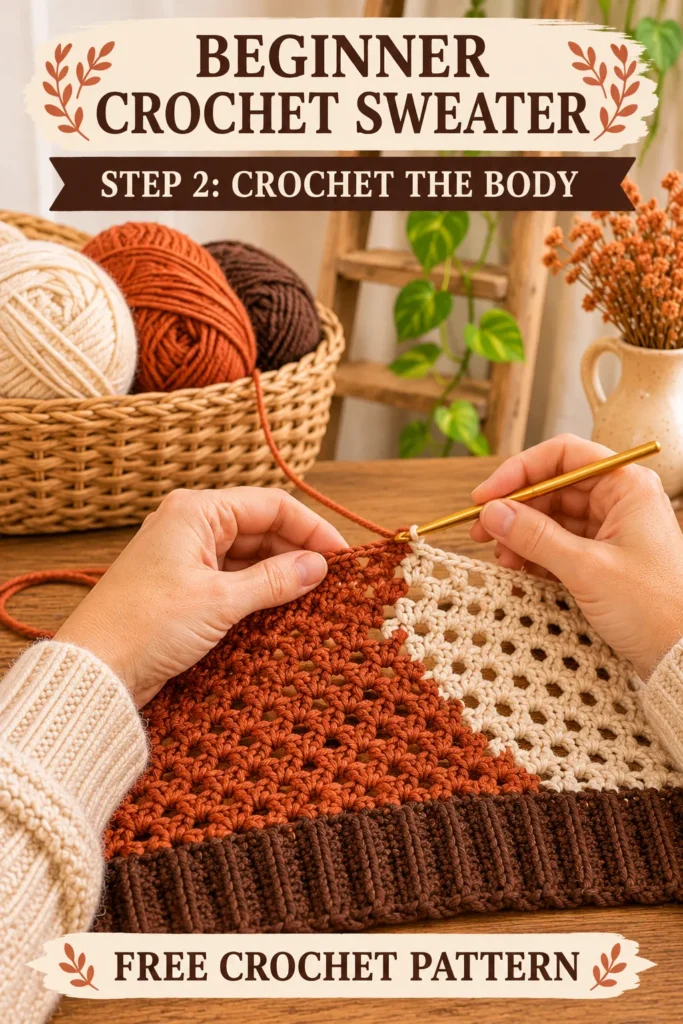
This is the part that makes the sweater special. You will work the body panels upward from the ribbed band, one row at a time, changing colors to create the bold diagonal blocks.
Turn one brown band so a long edge faces up. Join your rust yarn at the right corner, chain 2, and work 110 half double crochet stitches evenly along the edge. Because the band has 100 rows, you will need about one stitch per row end, plus an extra stitch at every tenth row to reach 110. Chain 2, turn, and continue with a half double crochet in each stitch across. From now on, every row is simply chain 2, turn, and half double crochet in each stitch, with 110 stitches in every row.
Work the first 24 rows entirely in rust. This gives you a solid base and lets you settle into the rhythm. After that, the color change begins, and a little planning helps. I recommend sketching the front on graph paper with 110 squares across and 79 rows up, then coloring in the blocks. It takes ten minutes and saves hours of confusion.
Here is the logic. The rust color forms the bottom part of the sweater, and its upper edge climbs diagonally from the left to the right. Starting at row 25, move the point where rust meets the next color about seven stitches to the right every two rows. By around row 56, the rust line reaches the right edge. Above that line is cream, which fills the upper body.
On the left side, a chocolate brown wedge fills the space beside the cream. For the first rows of the diagonal, the brown sits directly against the rust. Once the rust line passes stitch 40, at around row 36, keep the brown section at 40 stitches wide, then narrow it by about four stitches every five rows until it is only about six stitches wide at the top of the panel. This creates the slanted edge you see in the photos.
To change colors in the middle of a row, work the last stitch of the old color until two loops remain on the hook. Then pull the new color through to finish the stitch. Drop the old color, let it hang on the wrong side and carry on with the new one. Use a small bobbin for each color so the strands do not tangle. At the color boundary, twist the two yarns around each other once on the wrong side. This stops little holes from forming along the diagonal line.
When the front measures about 18 inches above the ribbing, which is around row 67, it is time to shape the neckline. Work 35 stitches, then leave the center 40 stitches unworked and work the remaining 35 on a second set of yarn. Continue each shoulder separately for another 12 rows, which brings the panel to 79 rows. Fasten off.
For the back panel, keep things simple. Work 38 rows in rust, then switch to cream for the remaining rows, with no diagonal and no neckline split. A calm back makes the front the star and speeds up the project. If you want a bolder look, mirror the front design instead.
Step 3: Work the Sleeves
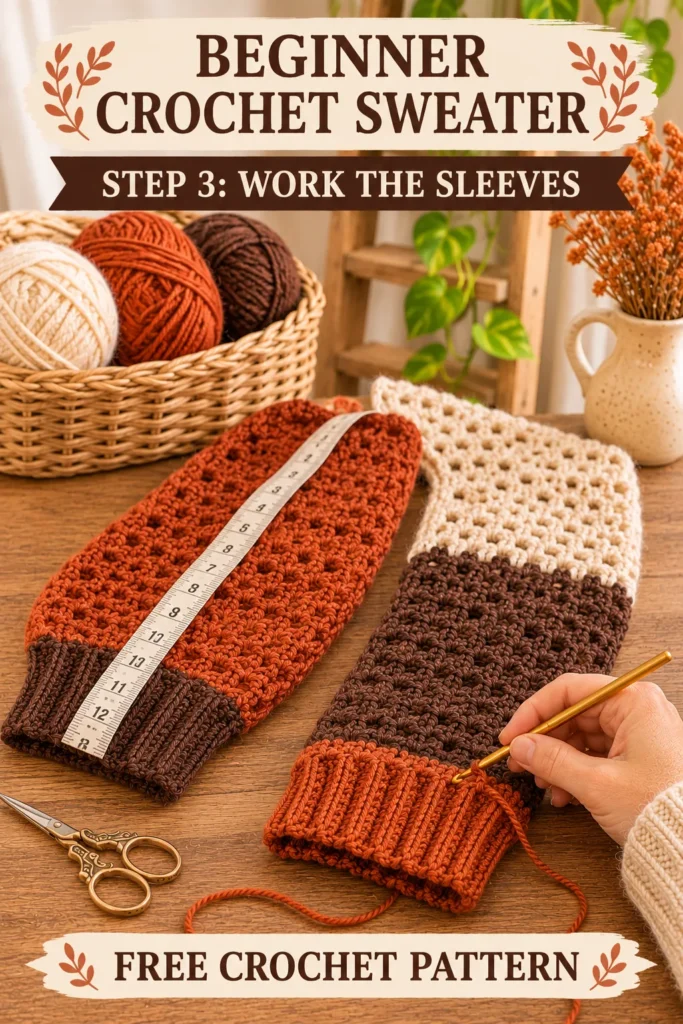
The sleeves are worked flat from the top down, which makes them easy to size and try on as you go. Start with your first sleeve color and chain 92. Work a half double crochet into the third chain from the hook and across, giving you 90 stitches. This is the wide top that will sit against the drop shoulder.
Continue in half double crochet, and decrease one stitch at each end of the row every fourth row. To decrease, work a half double crochet two together by pulling up a loop in each of the next two stitches, then pulling through all three loops. Repeat this decrease 17 times at each end, and you will end up with 56 stitches after 68 rows. The sleeve tapers gently, which gives you the full, rounded shape that you see in the photos.
For the colorblock effect, change colors halfway down the sleeve, at about row 34. Make one sleeve brown on top and rust on the bottom, and the other cream on top and brown on the bottom. You can also swap these around to suit your yarn stash. Changing colors across a whole row is much easier than the diagonal on the body, so this is a good place to practice.
On the final row, work 16 evenly spaced half double crochet two together decreases to bring the stitch count down to 40. This slight gathering makes the lower sleeve puff gently over the cuff. Fasten off and leave a long tail for sewing.
For each cuff, chain 13 and work a ribbed strip exactly like the hem band, with 11 stitches and 40 rows. This measures about 8 inches, which matches the 40 stitches along the bottom of the sleeve. Choose a cuff color that either matches the lower sleeve or stands out in contrast. A rust cuff against a cream sleeve, for example, gives a lovely pop.
Step 4: Join the Shoulders and Seam the Sweater
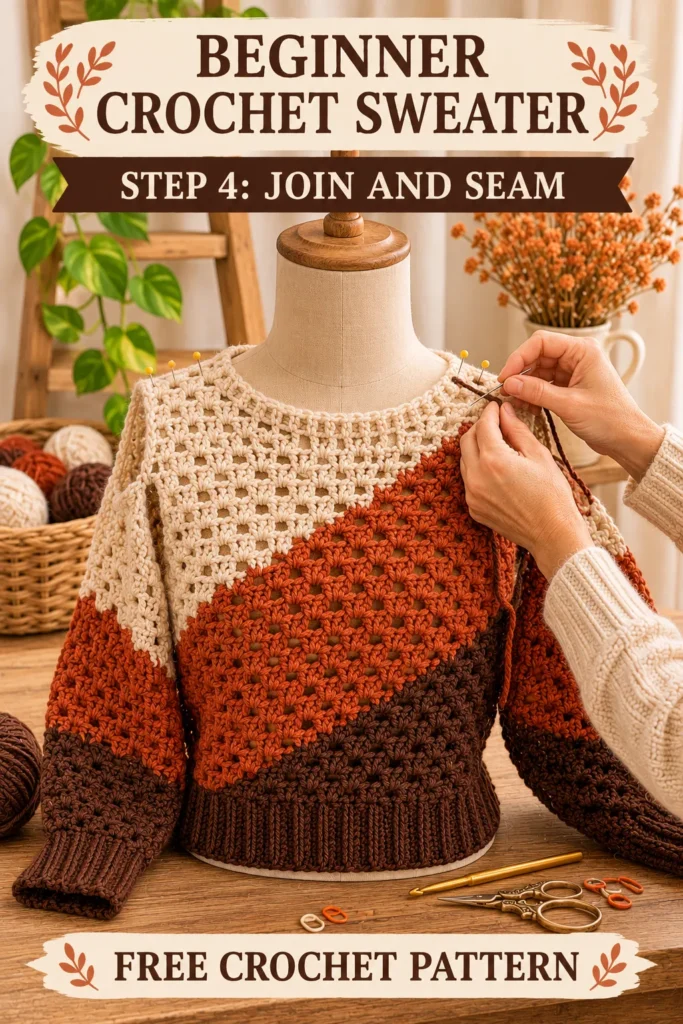
With all the pieces finished, the sweater finally begins to look like a sweater. Lay the front and back flat with the right sides facing up, and weave in any remaining loose ends before you sew. It is much easier to do this now than after the pieces are joined.
Place the front on top of the back with right sides together. Pin the shoulders, matching the 35 stitches on each side, and leave the 40 stitches in the middle open for the neck. Use a tapestry needle and a matching yarn to sew each shoulder with a whip stitch or a mattress stitch. Keep your stitches snug but not tight, since the seam needs to stretch a little with the fabric.
Next, attach the sleeves. Measure 9 inches down from the shoulder seam on both the front and back, and place a marker at each point. Pin the top edge of a sleeve, which is 18 inches wide, between the markers and sew it into place. Take your time here, and pin generously. Because the sleeve is a flat rectangle, it should sit neatly in the armhole without any gathering. Repeat for the other sleeve.
Now fold the sweater so the front and back line up, and sew the side seams from the hem band up to the underarm. Then continue along the underside of each sleeve, down to the cuff end. Match the colors and the stripes as you go, so the color changes line up on both sides. If one side looks a little off, it is almost always easier to unpick a few stitches and redo them than to live with it.
Finally, sew the cuffs to the bottom of each sleeve by easing the sleeve edge to the ribbed strip. Join the short ends of the strip into a ring with a slip stitch seam first, then sew the ring around the edge. The slight gathering creates that pretty, puffy sleeve.
Step 5: Add the Neckline and Finish
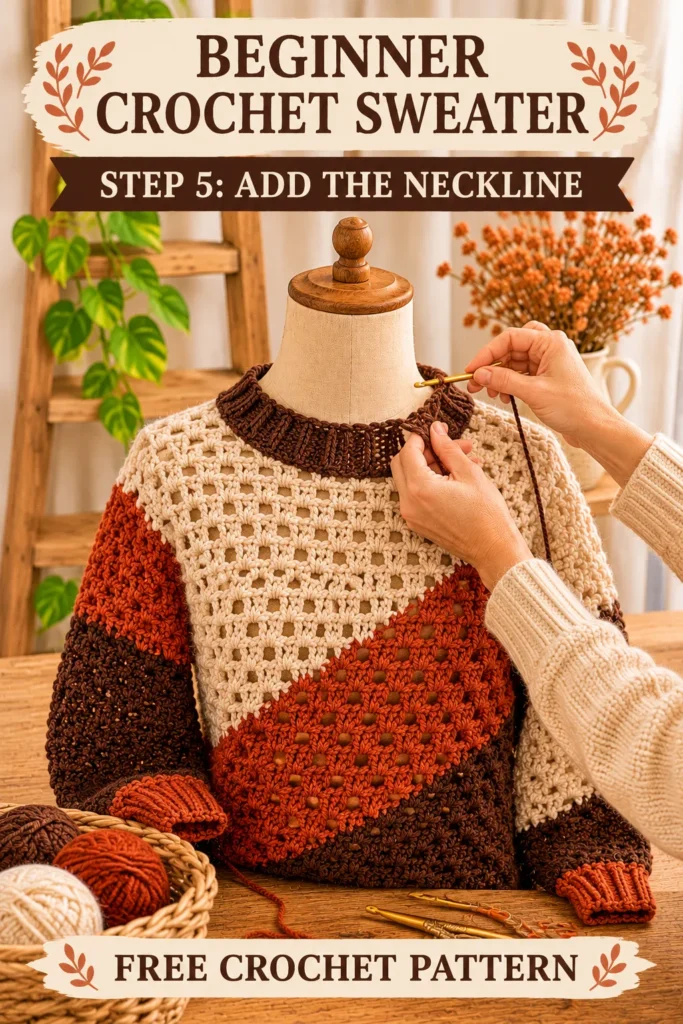
The neckline is the finishing touch, and it frames your face, so it deserves a bit of care. Measure around the neck opening with a flexible tape, going along the front and back edges. You will likely get about 24 inches. Subtract two inches so the collar will sit snugly against your neck, and aim to crochet a strip about 22 inches long.
Using chocolate brown, chain 9 and work a ribbed strip with 7 stitches in back loop half double crochet, just like the hem bands, until it reaches 22 inches. This takes about 100 rows. Seam the short ends together with a slip stitch to form a ring. Pin the ring evenly around the neckline, matching the center front and the center back, then sew it in place with small, even stitches. The collar should pull the neckline in just a little, which keeps it from stretching out over time.
Give the whole sweater a final look. Check each seam for gaps, weave in any stray yarn tails and trim the ends. Try it on, and if the collar feels tight, loosen a few stitches. If it feels loose, you can sew a thin strand of clear elastic along the inside of the collar for extra support.
Blocking Your Sweater
Blocking changes how your finished sweater looks and feels. Fill a basin with lukewarm water and a little wool wash, then submerge your sweater and let it soak for 20 minutes. Do not wring it. Press it gently between towels to remove extra water, then lay it flat on a blocking mat or a clean towel.
Shape the body and sleeves to the measurements you want, and pat the seams flat. Let it dry completely, which can take two or three days for a thick crocheted garment. Blocking evens out the stitches, softens the seams and makes the color transitions look smooth and tidy.
Troubleshooting Common Problems
If your edges are getting wider or narrower as you work, you have probably added or skipped a stitch at the turning chain. Count your stitches every ten rows and treat the turning chain as a nonstitch. If you find a mistake, it is much easier to rip back a few rows than to try to fix it later.
If there are small holes along the color change line, you probably forgot to twist the yarns together. You can close small holes by threading the tail through the gap on the wrong side and tightening gently. Next time, twist the yarns at every color change.
If your sweater turns out too small, check your gauge first. A tight swatch means you should go up a hook size. If the sweater is already finished, soaking it and blocking it a little wider can add a bit of room. For a sweater that is too big, a smaller hook or a narrower panel width is the answer for your next attempt.
If the ribbing looks floppy, make the strips shorter or choose a hook one size smaller. Ribbing should be firmer than the body, so a smaller hook gives it extra snap.
If your seams look bulky, try using a flat mattress stitch instead of a whip stitch. It joins edges side by side and stays flat against the fabric. A little patience here makes the whole sweater look more professional.
Make It Your Own
This pattern is easy to customize. Swap in your favorite three colors, whether that is soft pastels, deep winter jewel tones or classic neutrals. For a calmer look, make the body solid and use color only on the sleeves and ribbing. To make a cropped version, shorten the body to 18 inches and decrease the number of rows between the hem and the neckline.
If you want a summery version, use a cotton fingering yarn and replace some half double crochet rows with a mesh stitch of single crochet and chain one. This creates the airy, open look you can see in the cream panel of the photos, and it makes the sweater lighter and cooler.
Caring for Your Crochet Sweater
Hand wash your sweater in cool water with a mild detergent, and press out the water without wringing. Dry it flat, away from direct heat, and reshape it as it dries. Do not hang it, because the weight of the wet yarn can stretch the fabric. Store it folded in a drawer or a breathable bag. If you notice small pills, remove them gently with a fabric shaver.
Frequently Asked Questions
Is this really a good first sweater?
Yes. The pieces are all simple rectangles, and the stitch is basic. The only skill beyond the basics is changing colors, which you can practice on a swatch first.
How long does it take to crochet this sweater?
Most crocheters need 40 to 60 hours, depending on speed. That works out to about a month if you crochet an hour or two each day.
Can I use thicker yarn?
You can. Worsted weight yarn will work up much faster, but you will need to recalculate the stitch counts with a new gauge swatch. Use the same method of five stitches per inch as a guide and adjust.
How much yarn will I need in total?
About 1,800 yards of fingering weight yarn for the size shown. Buy an extra skein of your main color in case of mistakes.
Can I make this sweater for a child?
Absolutely. Measure the child, divide the chest measurement by two and multiply by five to find your stitch count. Shorten the length and sleeve measurements accordingly.
Your Colorblock Sweater Is Ready to Wear
A crochet sweater may feel like a mountain at the start, but when you break it into small steps, it becomes a series of simple tasks. A ribbed band, a few color changes, a couple of sleeves and a neat collar are all it takes. Each step builds your confidence, and by the end you will have a garment made entirely by your own hands.
Take your time, enjoy the colors and let the stitches grow row by row. When you finally pull the sweater over your head, you will know exactly how much care went into it. If you make this sweater, I would love to see your version. Share a photo and tell me which colors you chose. Happy crocheting!