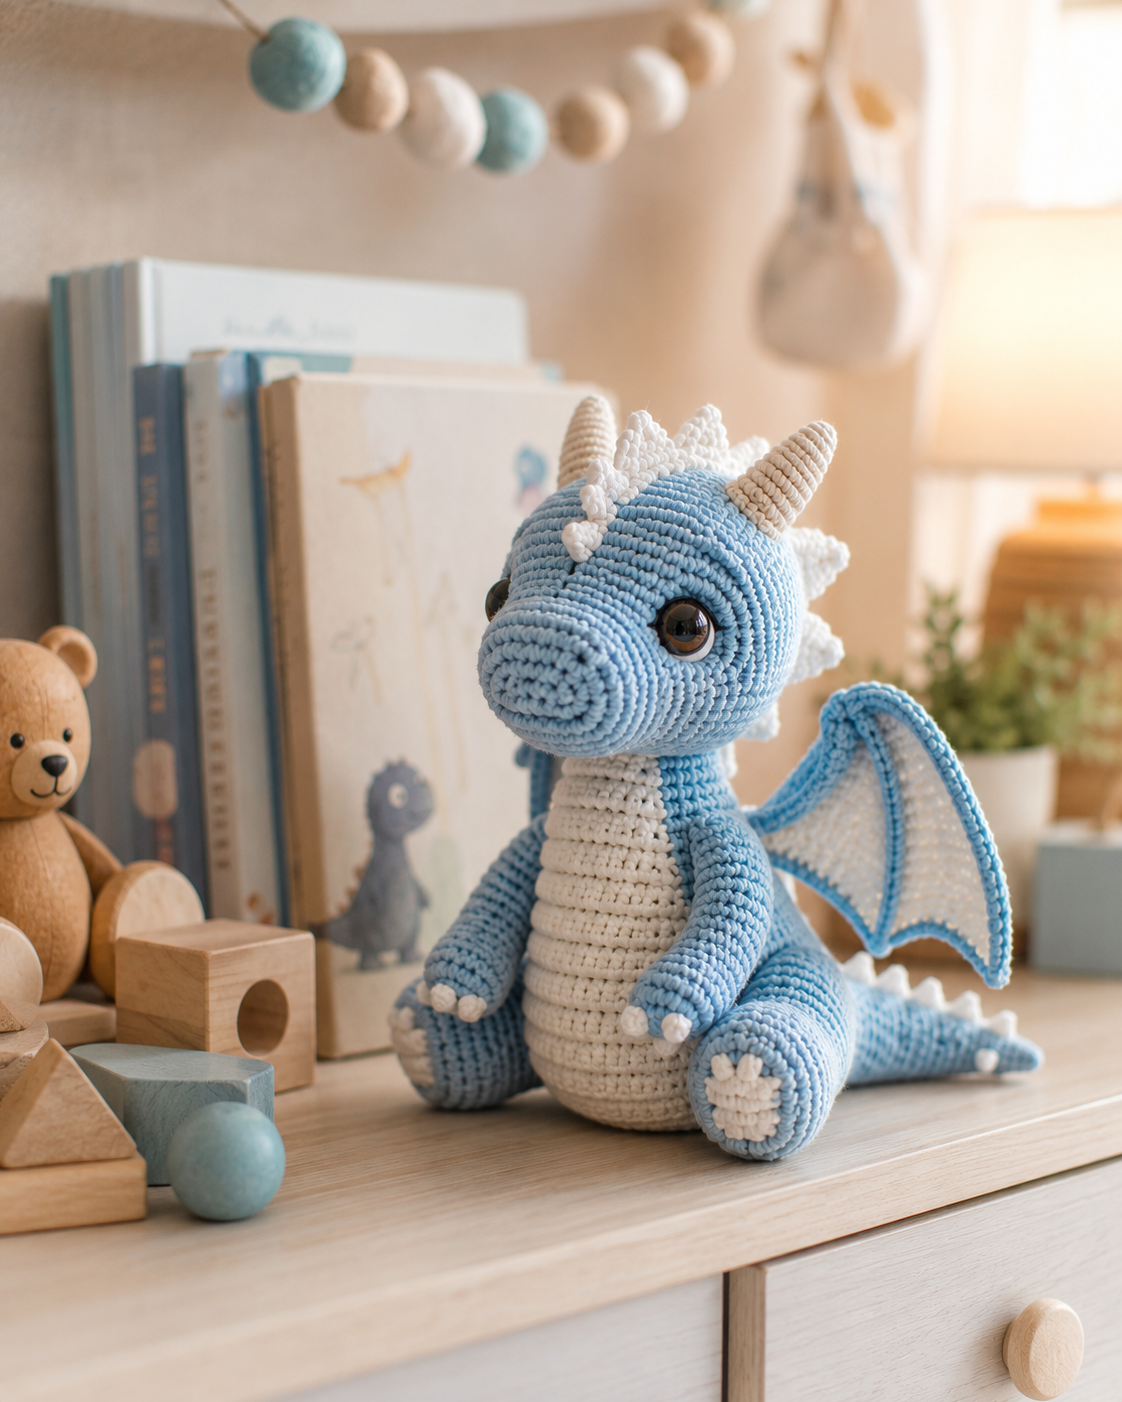
There is something wonderfully satisfying about watching a ball of yarn slowly turn into a creature with personality. A few rounds become a head, a simple tube becomes a tail, and suddenly there is a little dragon sitting on your table looking back at you.
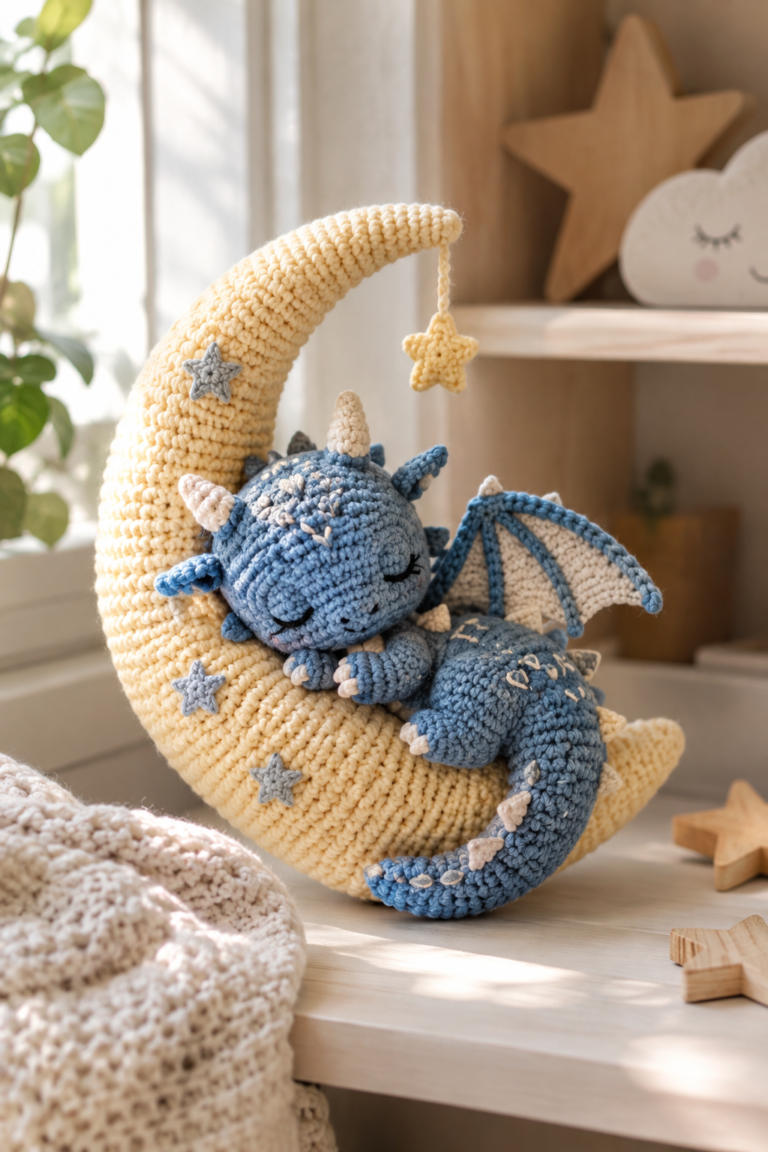
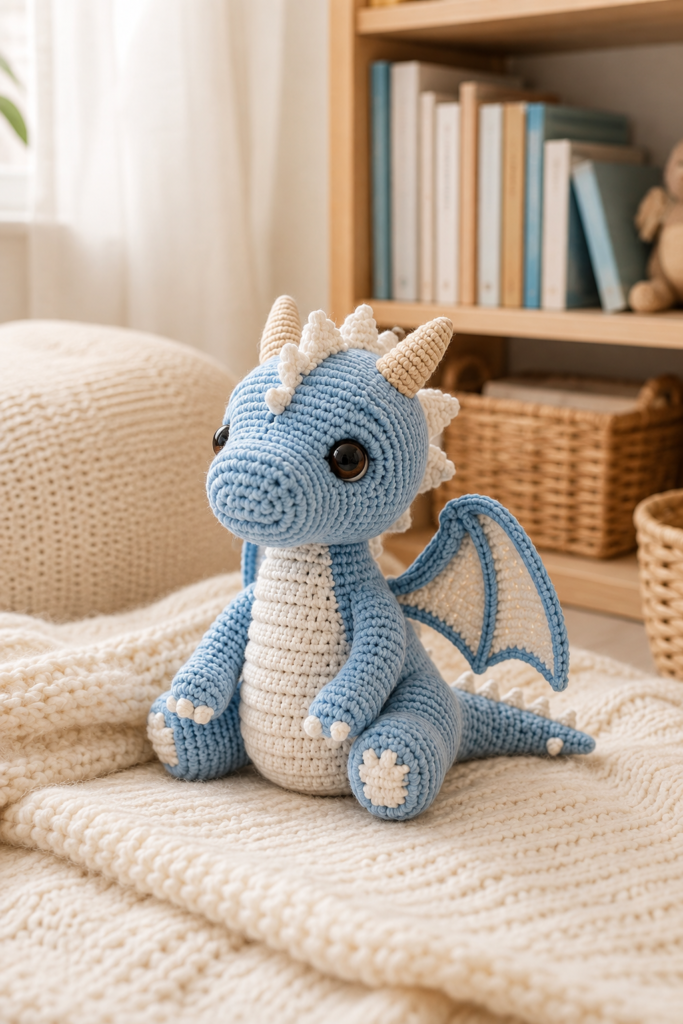
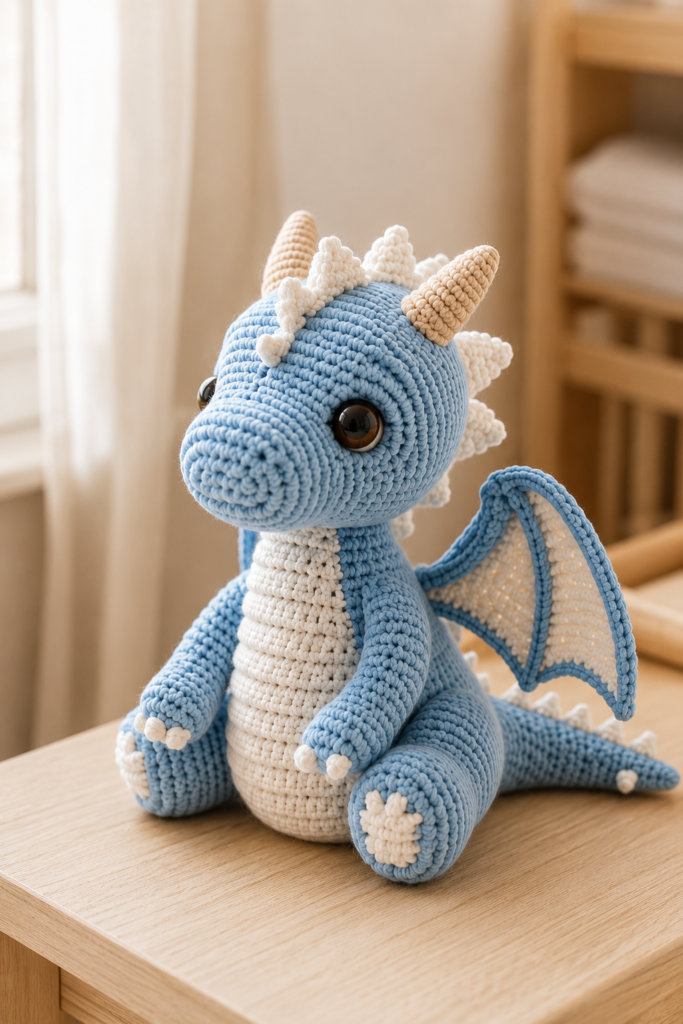
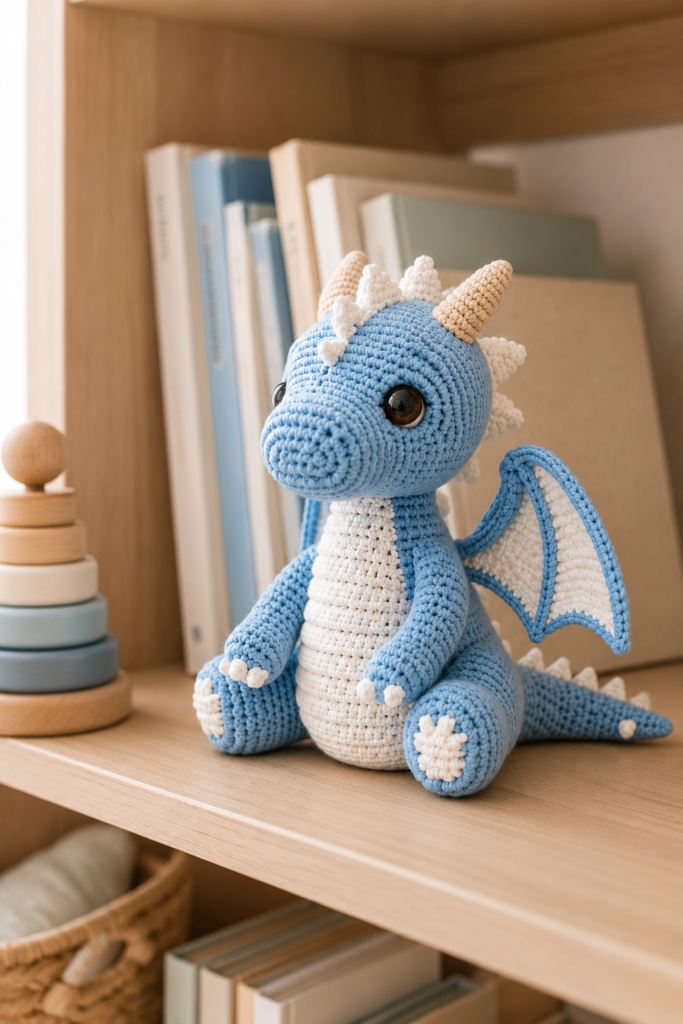
This powder-blue and cream crochet dragon is a lovely example of why handmade amigurumi can feel so special. It has the features we expect from a mythical dragon—horns, wings, back spikes, a long tail, and tiny claws—but everything has been softened into a friendly, nursery-style design.
The oversized head and rounded muzzle give it a gentle expression, while the cream belly and wing panels break up the blue beautifully. The chunky feet help the finished dragon sit securely, and those little horns and spikes add just enough fantasy detail without making the project look overly complicated.
If you have been wanting to crochet a dragon but have felt intimidated by all the shaping and separate pieces, this guide will help you understand how to approach a project like this logically. We’ll cover yarn choices, hook size, shaping, stuffing, wings, horns, assembly, finishing, common mistakes, and practical ways to make your finished dragon look neat and balanced.
Table of Contents
- What Makes This Crochet Dragon Special?
- Is a Crochet Dragon Beginner-Friendly?
- Materials to Consider
- Choosing Yarn for a Crochet Dragon
- Choosing the Right Crochet Hook
- Understanding the Dragon’s Construction
- Getting the Head and Muzzle Right
- Creating a Stable Body
- Making the Cream Belly Panel
- Crocheting the Arms and Legs
- Making the Horns and Spikes
- Creating Wings That Hold Their Shape
- Shaping the Tail
- Stuffing Your Dragon Properly
- Eye Placement and Expression
- Assembly and Positioning
- How to Make Your Dragon Look Professional
- Common Problems and How to Fix Them
- Time-Saving Tips
- Color Ideas
- Care and Storage
- Frequently Asked Questions
- Final Thoughts
What Makes This Crochet Dragon Special?
The first thing that gives this dragon its personality is its proportion.
Instead of trying to reproduce the long, angular anatomy of a realistic fantasy dragon, the design uses classic amigurumi proportions: a large head, compact body, short arms, chunky feet, and a seated pose.
That immediately makes the dragon feel approachable.
The powder-blue yarn also changes the mood of the character. Paired with warm cream, it creates a soft nursery palette rather than the darker reds, blacks, and greens often associated with fantasy dragons.
Several features are especially important to the design:
- large rounded head
- projecting crochet muzzle
- two tapered cream horns
- small cream head and back spikes
- glossy brown-toned eyes
- long cream belly panel
- short arms with tiny claws
- oversized seated feet
- structured blue-and-cream wings
- tapered tail
These details work together. Remove too many of them and the character can start looking like a generic dinosaur.
That is an important lesson whenever you crochet recognizable creatures: focus on silhouette first and decorative detail second.
A dragon does not need dozens of complicated embellishments. It needs the right combination of recognizable features.
Is a Crochet Dragon Beginner-Friendly?
A dragon like this sits somewhere between a simple amigurumi project and a more detailed character build.
I would describe it as most comfortable for an advanced beginner to intermediate crocheter.
The individual techniques are not necessarily difficult. The challenge comes from combining multiple components neatly.
You should ideally be comfortable with:
- magic rings
- single crochet
- increases
- invisible or standard decreases
- working continuously in rounds
- counting stitches
- changing colors
- stuffing
- sewing crochet pieces together
- weaving in ends
The wings and accurate assembly may require a little more patience.
If This Is Your First Amigurumi
Don’t feel that you need to complete everything in one sitting.
Break the dragon into smaller jobs.
One session might be the head. Another could be the body. On another evening, make the horns and spikes.
Treating each component as its own small project makes a detailed amigurumi much less intimidating.
Materials to Consider
The exact quantities will depend on the yarn weight, hook size, desired finished size, and pattern you’re following, but a dragon in this style typically requires a fairly straightforward supply list.
Yarn
You’ll need:
Main Color — Powder Blue
This will make up most of the dragon, including the head, muzzle, body, arms, legs, tail, and outer wings.
Contrast Color — Warm Cream or Ivory
Use this for the belly, inner wings, horns, spikes, claws, and foot details.
The soft contrast is one of the strongest visual features of this particular dragon.
Other Supplies
Keep these nearby:
- appropriate crochet hook
- stitch markers
- yarn needle
- sharp scissors
- polyester fiberfill
- pins
- row counter if you use one
- safety eyes or your preferred eye treatment
Pins are particularly helpful for a dragon because there are several pieces that need symmetrical positioning.
Choosing Yarn for a Crochet Dragon
For a detailed amigurumi project, I prefer yarn that gives clear stitch definition.
Cotton
Cotton creates crisp stitches and can produce beautiful definition around the muzzle, horns, claws, and wing edges.
The downside is that it may feel firmer in your hands during a long project.
Cotton Blend
A cotton-blend yarn can be a comfortable compromise.
You can still achieve excellent stitch definition while gaining a little softness and flexibility.
Smooth Acrylic
A good-quality smooth acrylic can also work well and is often economical for a larger amigurumi.
Try to avoid yarn with a heavy fuzzy halo if you want the small details to remain crisp.
Why Yarn Consistency Matters
Use yarns of similar weight for the blue and cream sections.
If the cream yarn is substantially thicker, the belly panel, horns, spikes, and wing interiors can become disproportionately large.
Even yarns labeled as the same weight can behave differently, so compare the strands before beginning.
Choosing the Right Crochet Hook
Amigurumi is generally crocheted more tightly than garments.
You want fabric dense enough that stuffing doesn’t show through.
That often means choosing a hook slightly smaller than the manufacturer’s general recommendation for the yarn.
There isn’t one perfect hook size for every crocheter because tension varies considerably.
Test Your Fabric
Crochet a small sample.
Stretch it gently between your fingers.
If large holes open between the stitches, try a smaller hook.
If you’re struggling to push the hook through every stitch and your hands quickly become sore, you’ve probably gone too small.
The goal is firm fabric, not painful crochet.
Understanding the Dragon’s Construction
A detailed dragon becomes much easier when you stop seeing it as one complicated object.
Think of it as a collection of manageable components.
You essentially have:
The core structure
- head
- muzzle
- body
- arms
- legs
- tail
The dragon details
- horns
- head/back spikes
- wings
- claws
- belly panel
The expression
- eyes
- muzzle positioning
- overall head shape
Each component has a job.
The body provides stability. The head creates personality. The wings and horns communicate “dragon.” The legs establish the seated pose.
Once you understand those roles, assembly becomes much more deliberate.
Getting the Head and Muzzle Right
The head is the visual center of this dragon.
A large rounded head creates the friendly amigurumi appearance, while the projecting muzzle makes the face unmistakably dragon-like.
Stuff the Head Gradually
Don’t wait until the final few rounds to push in a huge amount of stuffing.
Instead, add small portions as you work.
Push stuffing toward the sides and crown before filling the center.
This helps maintain a smooth shape.
Pay Attention to the Muzzle
The muzzle should project clearly without becoming oversized.
Before permanently attaching a separately crocheted muzzle, pin it into position.
Then look at the head from:
- straight ahead
- the left side
- the right side
- slightly above
A muzzle that looks perfect from the front can sometimes tilt noticeably when viewed from the side.
Correct it while it is still pinned.
Creating a Stable Body
Because the dragon is designed to sit, the body and legs need to work together.
The body should be firm enough to support the large head without becoming rigid.
A rounded lower body helps establish that comfortable seated silhouette.
Check the Neck Area
One common issue with large-headed amigurumi is a weak neck.
If the neck isn’t firm enough, the head may gradually lean forward.
Make sure the upper body is adequately stuffed before attaching the head.
Some patterns use additional structural techniques for large-headed toys, but always follow the construction method specified by the pattern you’re using.
.
Making the Cream Belly Panel
The cream belly creates a strong vertical line through the center of the dragon.
It also prevents the large blue body from becoming visually flat.
Depending on the pattern, the belly may be created through color changes or as a separate piece.
If you’re attaching a separate belly panel, pin it thoroughly before sewing.
Keep It Centered
Use the muzzle and center of the head as visual guides.
The belly should appear to continue naturally down the center of the character.
Check the bottom edge before sewing too. A panel can begin perfectly centered at the neck and slowly drift sideways as you attach it.
Crocheting the Arms and Legs
The arms are deliberately smaller than the legs.
That difference creates the seated baby-dragon proportion.
Arms
Stuff the arms lightly if the construction calls for stuffing.
Overstuffed arms can become stiff and stick away from the body.
The tiny cream claws should remain subtle.
Legs
The legs do much more structural work.
Large rounded thighs and feet help stabilize the dragon.
Before sewing them permanently, position both legs with pins and set the dragon upright.
Does it sit without rolling sideways?
Does the body lean?
Are both feet at approximately the same angle?
This quick test can save you from removing tightly sewn pieces later.
Making the Horns and Spikes
The cream horns provide contrast against the powder-blue head and immediately add fantasy character.
Small tapered shapes require especially consistent tension because changes are very noticeable.
Stuff Horns Carefully
If the horns require stuffing, use tiny amounts.
Overstuffing can turn a tapered horn into a thick cone.
You want the base supported while allowing the tip to remain defined.
Horn Placement
Never attach one horn completely before deciding where the second belongs.
Pin both.
Look at the dragon from the front.
Then look from above.
Symmetry doesn’t necessarily mean measuring everything to the millimeter, but the pair should feel visually balanced.
Head and Back Spikes
The smaller cream spikes create a line leading from the crown toward the back.
Their spacing is important.
Try to establish a smooth visual rhythm rather than allowing several spikes to bunch together.
Creating Wings That Hold Their Shape
The wings are among the most beautiful parts of this dragon—and probably the components that deserve the most patience.
The reference design uses blue outer structure with cream inner wing sections.
That contrast makes the wings easy to read even against the blue body.
Avoid Floppy Wings
Wing structure depends heavily on:
- yarn choice
- hook size
- stitch density
- edging
- construction method
- attachment
If your fabric is much looser than intended, the wings may droop.
Use consistent tension and follow the intended edging carefully.
Block Only When Appropriate
Some crochet wing constructions benefit from light blocking, but the fiber matters.
Always follow the care instructions for your yarn and avoid excessive heat, particularly with synthetic fibers.
Attach Wings Last—or Nearly Last
I prefer determining the seated posture before finalizing wing placement.
Once the head, body, and legs are correctly positioned, it becomes easier to see where the wings should sit.
Pin both wings before sewing.
Make sure one isn’t noticeably higher than the other.
Shaping the Tail
The tail adds balance to the overall silhouette.
It should taper gradually and extend naturally behind the seated dragon.
Stuffing should usually become lighter as you approach the narrow end if the pattern calls for a stuffed tail.
Too much stuffing near the tip can make the tail look bulky.
Before attaching it, consider how the dragon will sit on a shelf.
The tail shouldn’t force the body forward or prevent the legs from resting naturally.
Stuffing Your Dragon Properly
Stuffing is one of the most underestimated amigurumi skills.
More stuffing does not automatically produce a better toy.
Use Small Pieces
Pull fiberfill into small portions before inserting it.
Small amounts are easier to distribute evenly.
Large clumps can create lumps.
Fill the Edges First
For larger shapes like the head and body, guide stuffing toward the outer edges before packing the center.
Avoid Overstuffing
Overstuffing can:
- stretch stitches
- expose filling
- distort proportions
- flatten shaping
- create an overly hard toy
The dragon should feel firm enough to maintain its shape but still look soft and handmade.
Eye Placement Changes Everything
The eyes are one of the most powerful design choices in amigurumi.
Moving them by only a small amount can completely change the expression.
The master dragon uses large glossy eyes positioned to create a gentle, curious appearance.
Before securing safety eyes permanently, double-check their position if your construction method allows it.
Look at the face from a normal viewing distance rather than holding it inches from your eyes.
Important Safety Note
If you’re making the dragon for a baby or very young child, consider embroidered eyes instead of relying on detachable components.
Safety eyes are commonly used in amigurumi, but “safety eye” does not mean appropriate for every age or every use.
For nursery décor, older recipients, or display pieces, follow the product manufacturer’s guidance and the intended use of your finished item.
Assembly: Where Good Crochet Becomes a Great Finished Dragon
You can crochet every component beautifully and still lose some of that quality through rushed assembly.
Give this stage time.
Pin Before Sewing
Pin:
- head
- legs
- arms
- muzzle
- horns
- wings
- tail
- belly panel if separate
- major spikes when appropriate
You don’t necessarily need to pin everything simultaneously, but don’t rely on guesswork.
Work From Large Pieces to Small Pieces
A practical assembly order is usually:
- establish the head and body relationship
- position the legs
- position the arms
- confirm the seated posture
- attach the tail
- position the wings
- finish horns, spikes, claws, and smaller details as appropriate to your pattern
The exact order can vary, but the principle remains useful: establish the silhouette before perfecting the decoration.
How to Make Your Crochet Dragon Look Professional
Professional-looking amigurumi isn’t necessarily about using expensive materials.
Usually, it comes down to consistency and patience.
Count Your Stitches
One missed increase early in a head can change the shape several rounds later.
Count regularly.
Use a Stitch Marker
Continuous rounds can be surprisingly difficult to track by eye.
Mark the first stitch of each round.
Make Invisible Decreases Neatly
When the pattern permits, invisible decreases can reduce the obvious gaps created by traditional decreases.
Keep Color Changes Tidy
The blue-and-cream palette relies on clean contrast.
Messy joins are particularly visible when working with pale yarn.
Hide Yarn Tails Securely
Don’t simply trim tails close to the surface.
Weave them through the interior or several appropriate stitches before trimming.
Step Away From the Project
This sounds simple, but it works.
Place the dragon on a table and walk a few feet away.
From that distance, you’ll notice:
- leaning horns
- uneven wings
- mismatched legs
- crooked belly panels
- off-center muzzles
much faster than when the project is directly under your nose.
Common Crochet Dragon Problems and How to Fix Them
Problem: The Head Keeps Falling Forward
Possible causes include insufficient neck support, a loosely stuffed upper body, or an overly heavy head.
Check the stuffing and attachment before trying to disguise the problem with the arms or wings.
Problem: One Wing Sits Higher
Remove the pins and reposition both wings simultaneously.
Don’t use the first attached wing as an unquestionable reference if its placement wasn’t checked carefully.
Problem: Stuffing Shows Through
Your tension may be too loose, your hook may be too large, or the piece may be overstuffed.
Problem: The Muzzle Looks Crooked
Pin it again and inspect the face from the front, side, and above.
Use the eyes and center of the belly as alignment references.
Problem: The Dragon Won’t Sit Properly
Check the leg and tail placement.
One leg positioned farther forward can cause the entire body to lean.
Problem: The Wings Are Too Floppy
Compare your yarn, hook, and tension with what the pattern expects. Loose fabric produces less structural support.
Problem: The Horns Look Too Thick
They may be overstuffed or worked at looser tension than intended.
Time-Saving Tips That Don’t Sacrifice Quality
Saving time doesn’t mean rushing.
It means avoiding unnecessary corrections.
Make Matching Pieces Together
When making two arms, two legs, two horns, or two wings, work them close together rather than finishing one and returning to the second several days later.
Your tension is more likely to remain consistent.
Count Before Moving On
Thirty seconds spent checking a round can save twenty minutes of unraveling later.
Keep Finished Pieces Together
A small project basket or zip pouch prevents horns and tiny claws from disappearing.
Leave Useful Sewing Tails
When the pattern calls for sewing a piece onto the body, leaving an appropriately long yarn tail can eliminate an extra join.
Photograph Your Placement
Before removing pinned pieces, take a quick photograph.
If something shifts during sewing, you’ll have a visual reference.
Color Ideas Without Losing the Dragon’s Character
The powder-blue and cream combination works beautifully because it creates a calm, gentle fantasy look.
If you’re using this dragon as inspiration for your own project, coordinated two-color palettes often work particularly well.
For example:
Sage + Cream
Soft and woodland-inspired.
Dusty Lavender + Ivory
A dreamy fantasy combination.
Muted Teal + Oatmeal
Slightly richer while remaining gentle.
Soft Gray + Cream
Minimal and neutral.
Whatever palette you choose for your own project, keep enough contrast between the body and details.
If the belly, horns, spikes, and wing membranes are too close to the body color, some of the dragon’s most attractive features can disappear visually.
Is This a Good Handmade Gift?
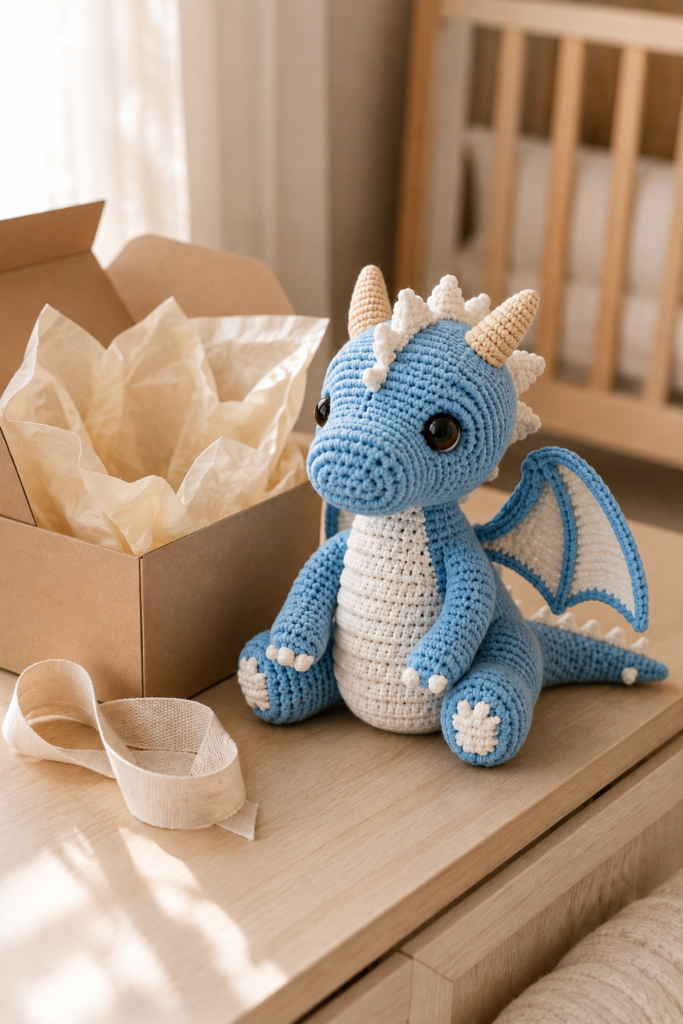
Definitely—especially for someone who loves fantasy creatures or handmade décor.
A crochet dragon can work beautifully as:
- a birthday gift
- nursery décor
- a fantasy-themed room accent
- a keepsake
- a handmade gift for a dragon lover
- a shelf companion
- a special crochet project for yourself
If you’re giving the dragon to a child, however, design choices should be based on the child’s age and intended use.
A decorative nursery item and a toy intended for active play have different requirements.
Small detachable components deserve particular attention.
Care and Storage
A handmade dragon deserves gentle care.
The best cleaning method depends on the yarn, stuffing, eyes, and any other materials you’ve used, so always check the care information for your specific supplies.
For Light Dust
A clean, soft cloth or gentle surface dusting may be enough.
For Small Marks
Spot cleaning is often preferable to washing the entire dragon.
Use cool or lukewarm water and a small amount of mild detergent where appropriate for the yarn.
Avoid aggressive rubbing.
If Washing Is Necessary
Follow the yarn manufacturer’s instructions.
Remember that the finished amigurumi contains more than yarn. Stuffing, eyes, and any internal structure also need to tolerate the cleaning method.
Reshape While Drying
After cleaning, gently restore the:
- muzzle
- head
- belly
- legs
- wings
- tail
Allow the dragon to dry completely before storing it.
Storage
Store finished crochet away from damp areas and prolonged direct sunlight.
If it will be stored for a long time, avoid crushing the wings or horns underneath heavier items.
Frequently Asked Questions
Is a crochet dragon difficult to make?
A detailed crochet dragon is more involved than a basic ball-shaped amigurumi, but the project becomes manageable when divided into individual components. Advanced beginners who are comfortable with increases, decreases, working in rounds, stuffing, and sewing pieces together can work toward a design like this.
What yarn is best for crochet dragons?
Smooth cotton, cotton-blend, and good-quality acrylic yarns can all work. Choose yarn with clear stitch definition and use similar yarn weights for the main and contrasting colors.
What crochet stitch is commonly used for amigurumi?
Single crochet is widely used because it creates dense, sturdy fabric suitable for stuffed shapes.
Why can I see stuffing through my crochet?
Your hook may be too large, your tension may be loose, or you’ve added too much stuffing. Try creating denser fabric rather than simply reducing the amount of filling dramatically.
How do I make both wings the same size?
Use the same hook and yarn, count carefully, and make the second wing soon after the first while your tension is still similar. Compare them before attachment.
How can I stop the dragon’s head from leaning?
Firm, even stuffing through the upper body and neck area and secure head attachment are important. Follow the structural instructions in your chosen pattern rather than relying on the arms or wings to support the head.
Should I stuff crochet horns?
It depends on their construction and size. Small horns may need little or no stuffing, while larger designs may benefit from a tiny amount. Follow the pattern and avoid overstuffing tapered pieces.
Can I make the dragon with plush yarn?
You can make dragon amigurumi with plush yarn, but changing yarn weight significantly changes the finished dimensions and may obscure smaller details. A pattern designed for smooth yarn may need adaptation.
Are safety eyes suitable for babies?
For items intended for babies or very young children, embroidered facial features are generally a more cautious design choice than detachable components. Always consider the recipient’s age and intended use.
How do I make crochet wings less floppy?
Use the yarn weight and hook size appropriate for the pattern, maintain firm tension, and complete any structural edging carefully. Wing construction matters just as much as the yarn itself.
How long does a crochet dragon take?
It varies greatly. A detailed dragon has multiple components, so expect it to take considerably longer than a simple amigurumi. Working in short sessions often produces better results than rushing through assembly.
Can I use leftover yarn?
Small amounts of leftover yarn can be excellent for horns, claws, spikes, and other details. The main body will usually require a more consistent supply so you don’t unexpectedly run out of the same dye lot.
Final Thoughts
The most enjoyable part of making a crochet dragon isn’t necessarily the moment you finish it.
It’s watching the personality emerge along the way.
At first, you have a collection of slightly strange-looking crochet pieces. Then the muzzle is positioned. The horns go on. The wings find their place. The chunky feet settle into a seated pose.
Suddenly, you aren’t looking at separate pieces anymore.
You’re looking at your dragon.
The biggest advice I can give for a project like Crochet Your Own Mythical Dragon Friend Today is not to rush the finishing stages. Crochet carefully, but assemble even more carefully.
Use smooth yarn that shows your stitches. Keep your tension consistent. Stuff gradually. Pin pieces before sewing. Check your dragon from multiple angles, and give the wings, horns, muzzle, and legs the attention they deserve.
Those details are what turn a collection of crochet shapes into a character.
And when you’re finished, you’ll have something that carries the little irregularities and choices that make handmade crochet so much more interesting than something produced by a machine.
Save this dragon idea for your next amigurumi project, and explore more crochet inspiration on StitchNestStudioShop when you’re ready for another handmade adventure.