Winter changes the way a kitchen feels. The windows fog up, a pot of soup sits on the stove, and somebody is always pulling a tray of cookies out of the oven. In that kind of kitchen, a handmade potholder is useful and pretty at the same time.k
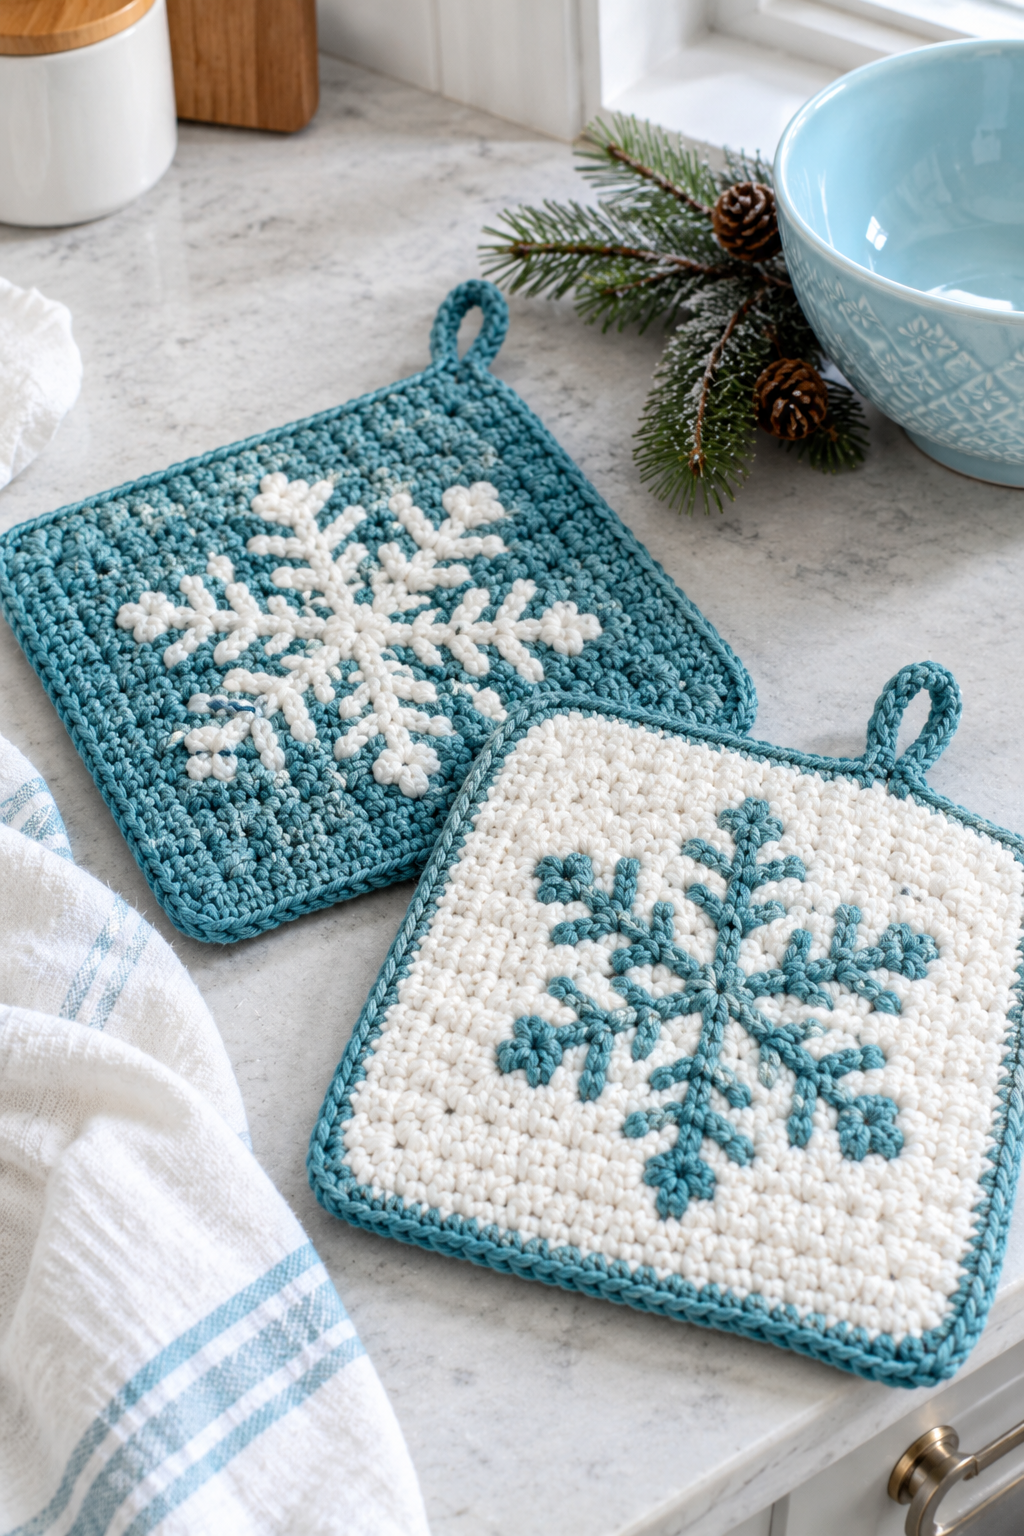
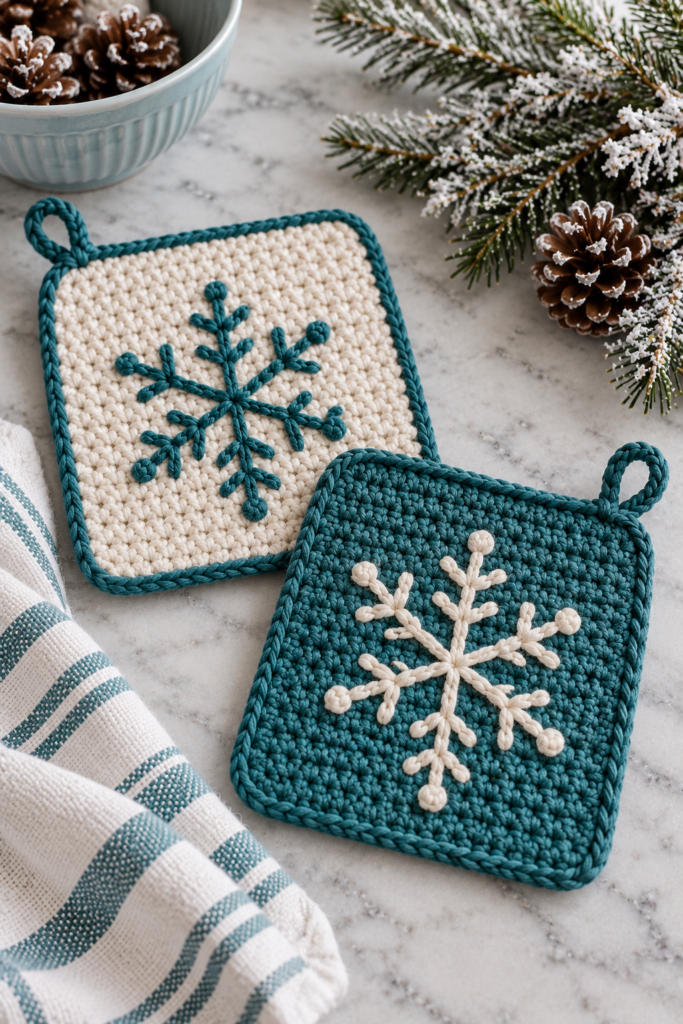
This post gives you three free winter potholder crochet patterns. The main one is a snowflake potholder in teal and cream, worked in thick cotton with a simple embroidered snowflake on the front. It has a thick double layer, a little hanging loop, and a rope-style edge. The other two are a striped cabin potholder and a round hot pad, which are quicker and use the same basic skills.
Every pattern here works with plain single crochet. If you can chain, single crochet, and slip stitch, you can make all three. The snowflake itself is embroidered after the crochet is done, so you don’t have to count tricky colorwork charts or carry yarn across the back of your work.
Skill level: Beginner to confident beginner
Time: About 3 to 4 hours per potholder
Finished size: Roughly 7 by 7 inches, plus the hanging loop
Why Winter Is the Perfect Time to Crochet Potholders
Most people crochet more in cold months. The evenings are long and the yarn is warm in your lap. Potholders are also one of the most satisfying small projects you can make, for a few reasons.
They are small, so you see progress quickly. A scarf can take weeks, but a potholder can be done in one or two sittings. They use very little yarn, so they are a good way to finish off those half-used balls of cotton in your stash. And they are practical. Nobody receives a handmade potholder and says “what am I supposed to do with this?”
They also make some of the easiest handmade gifts for the holidays. A pair of snowflake potholders tied with a ribbon and tucked next to a jar of cocoa mix looks thoughtful and costs very little. If you sell at craft fairs or online, potholders are a classic seller from October through January, because people are shopping for hostess gifts, teacher gifts, and stocking stuffers.
What Makes a Crochet Potholder Actually Safe to Use
Before the pattern, a few honest words about safety. A potholder that looks lovely but burns your fingers is just a coaster. These are the things that matter most.
Use 100% cotton yarn. Cotton handles heat much better than acrylic. Acrylic yarn can melt when it touches a hot pan, and that can stick to your skin. Even a blend with a lot of acrylic is risky. Look for the words “100% cotton” on the label, and if you aren’t sure, skip it for kitchen use.
Make it thick. A single layer of crochet has lots of tiny gaps, and heat passes straight through them. That is why this pattern uses two separate panels joined together. The double thickness is what gives you real protection. If you want extra insulation, you can slip a layer of cotton batting between the two panels before joining them. Make sure the batting is also 100% cotton, and avoid anything with polyester fill.
Keep the stitches tight. Use a hook one size smaller than the yarn label suggests. Dense fabric traps more air and blocks more heat. That is the opposite of what you want for a drapey scarf, but it is exactly right here.
Keep it dry. A damp potholder conducts heat much faster than a dry one and can give you a steam burn. If yours gets wet, swap it for a dry one.
Know its limits. Handmade potholders are great for moving a casserole dish, lifting a lid, or setting a hot pan on the counter. They are not a replacement for a proper oven mitt when you are reaching deep into a very hot oven. Treat them as helpers for everyday use, and check the heat with a quick touch test on the outside before you grab anything.
Materials You Will Need
The materials list is short, and you probably own most of it already.
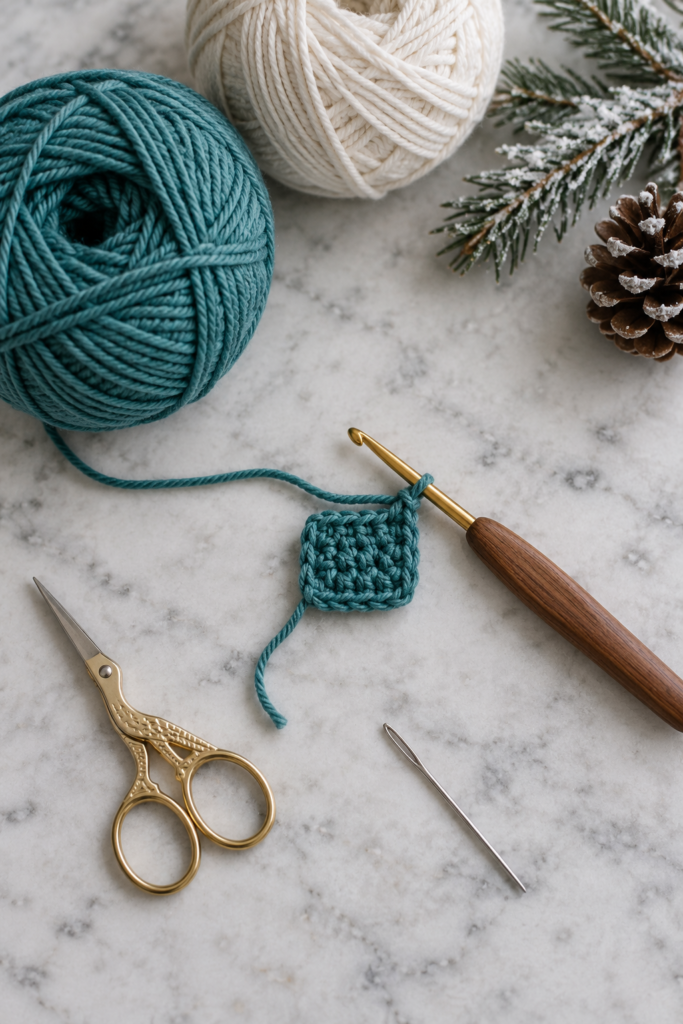
Yarn: Worsted weight (category 4) 100% cotton. For the main snowflake potholder you need about 100 yards of your main color and about 50 yards of a contrasting color for the edging and embroidery. A 2 oz or 3 oz ball of each color is more than enough for one potholder, and often enough for a pair. The photos in this post use a deep teal and a soft cream, which is a very wintery pairing.
Hook: 4.0 mm (size G-6). If you crochet loosely, go down to a 3.5 mm hook. The fabric should feel firm and a little stiff when you squeeze it.
Other tools:
- Yarn needle (tapestry needle) with a big eye
- Sharp small scissors
- Stitch markers (optional, but handy for marking the center)
- A water-soluble marker or a few pins to mark your snowflake
- Optional: a square of 100% cotton batting, about 6.5 by 6.5 inches
Gauge: About 16 single crochet stitches and 18 rows equal 4 inches. Gauge isn’t critical for a potholder, but if your square comes out noticeably smaller or larger than 7 inches, adjust your hook size.
Abbreviations (US Terms)
- ch = chain
- sc = single crochet
- sl st = slip stitch
- st(s) = stitch(es)
- inc = increase (2 sc in the same stitch)
- rev sc = reverse single crochet (also called crab stitch)
Pattern 1: The Snowflake Winter Potholder
This is the star of the post. You will crochet two flat squares, embroider a snowflake onto one of them, join them together with a border, and finish with a rope-style edge and a hanging loop.
Step 1: Make the First Panel

Using your main color and 4.0 mm hook:
Foundation: Ch 31.
Row 1: Sc in the 2nd ch from the hook and in each ch across. (30 sc)
Row 2: Ch 1, turn. Sc in each st across. (30 sc)
Rows 3 to 32: Repeat Row 2.
Your panel should now measure about 7 inches wide and about 7 inches tall. If it looks a little short, add a row or two until it is square. Fasten off and weave in your ends.
A small tip: the first and last stitch of each row are the ones people most often miss. Place a stitch marker in the last stitch of Row 1 and move it up every few rows. That way you will never end up with 29 or 31 stitches by accident, and your edges stay straight.
Step 2: Make the Second Panel
Repeat Step 1 exactly. For the cream potholder with the teal snowflake, both panels are cream. For the teal potholder with the cream snowflake, both panels are teal.
If you want a back that is different from the front, this is a fun place to play. A solid back in the contrast color looks great and gives a little surprise when the potholder is flipped over.
Step 3: Embroider the Snowflake
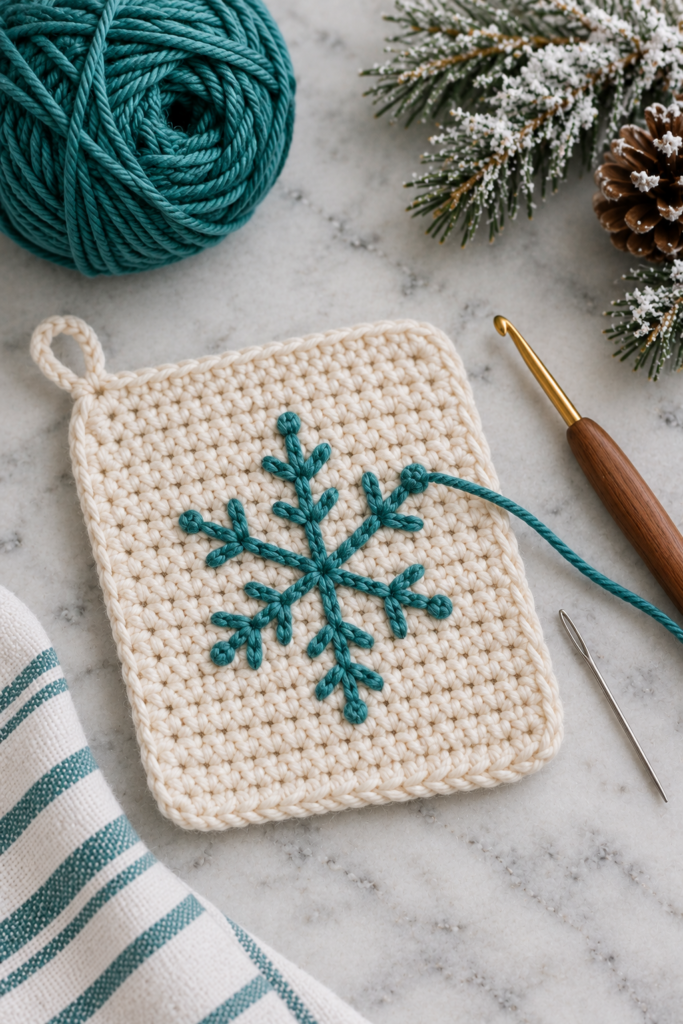
Do the embroidery on one panel while it is still flat and before you join the layers. This is much easier than stitching on a finished potholder.
Mark the center. Fold the panel in half both ways and press lightly to find the middle, or count 15 stitches across and 16 rows up and mark that spot with a pin.
Plan your lines. A snowflake has six arms. Imagine a clock face. Your arms point to 12, 2, 4, 6, 8, and 10 o’clock. The easiest way to keep them even is to mark the end of each arm with a pin first, about 1.75 inches out from the center. Then you are just connecting the dots.
Stitch the arms. Thread your yarn needle with your contrast color, about 40 inches long. You will stitch the arms in a chain stitch embroidery, which creates a small braided line that looks very much like a crocheted chain sitting on the surface. Here is the method:
- Bring the needle up from the back at the center point.
- Insert the needle back down right next to where it came out, and bring it up again about a quarter of an inch along the arm, keeping the yarn loop under the needle tip.
- Pull gently so the loop lies flat. That makes one chain stitch.
- Repeat, always inserting the needle inside the previous loop, until the arm reaches your end pin.
If you prefer to use your crochet hook, you can create almost the same look with surface slip stitching. Hold the yarn at the back of the panel, insert the hook between stitches, pull up a loop, and slip stitch your way along the arm. Both ways give you a neat chained line. Choose whichever feels more natural for your hands.
Add the little branches. Each arm gets a small pair of branches, shaped like a tiny V or a feathered arrow. About two thirds of the way out along each arm, stitch two short chains, one angled to the left and one to the right. Keep them short, about two chain stitches each. If you want a fuller snowflake, add a second pair closer to the center.
Finish the tips with beads. In the photos, each arm ends with a small round dot. You can make these with tiny circular chain stitches or with a French knot wrapped twice around the needle. Both look good. The dots give the snowflake that soft, old-fashioned ornament feel.
Secure the yarn. When you finish, flip the panel over and weave the tail through the back of your stitches. Don’t pull too tight. Embroidery that is too tight makes the fabric pucker.
Step 4: Join the Two Panels
Place the panels with wrong sides together so that the embroidery faces outward on the front and the back panel faces outward on the back. If you are using batting, slide it between the two layers now. Line up the edges and clip them in place with a few stitch markers or pins.
Attach your contrast color yarn in any corner using a sl st, working through both panels at once.
Round 1: Ch 1. Sc evenly around the entire edge, working through both layers. Place 1 sc in each stitch along the top and bottom, and 1 sc per row end along the sides. Work 3 sc in each corner so the corners lie flat and round out nicely. Join with a sl st to the first sc. You should have roughly 30 sc per side plus the corner stitches.
Don’t panic if your count is a few stitches off. What matters is that the edge is firm and even. If a side seems to ripple, you have too many stitches. If it pulls in, you have too few.
Step 5: Add the Hanging Loop
Choose the corner where you want the loop. In the photos, the loop sits at the upper left corner.
Loop: Ch 12. Sl st into the same corner stitch to form a ring. Work 18 to 20 sc into the ring until it is fully covered. Sl st to the base of the loop to close it.
The exact number of sc depends on how tightly you chain. You want the ring to be completely filled without bunching. If it ruffles, take out a stitch or two and try again.
Step 6: Work the Rope Edge
This is the detail that makes the potholder look professional. The twisted, braided look of the border is a reverse single crochet, sometimes called crab stitch.
Round 2: Ch 1, but do not turn. Working from left to right (if you are right-handed), insert your hook into the next stitch to the right, yarn over and pull up a loop, then yarn over and pull through both loops on the hook. Continue all the way around the edge, including around the loop.
It feels strange at first because you are working backward. Go slowly. After a few stitches, your hand will pick up the rhythm. The result is a twisted rope that gives the edge extra thickness and a clean finish. Join to the first stitch with a sl st, fasten off, and weave in all the ends.
Give your potholder a gentle steam or a light press with a damp cloth so the stitches settle. Then it is ready to use or to wrap as a gift.
Pattern 2: Cabin Stripe Winter Potholder
If you want something faster, with no embroidery, this striped variation is perfect for beginners. It uses the exact same size and construction as the snowflake potholder, but the color is built into the rows.
Colors: Choose two or three colors. Navy, cream, and a rusty red look like a cozy cabin blanket. Teal, cream, and gray look more like a snowy morning.
Panel: Ch 31. Work Row 1 as written above. Then work Rows 2 to 32, changing color every 4 rows. To change color, work the last sc of the old color until two loops remain on the hook, then pull the new color through. Carry the unused color up the side of your work for a neat stripe, or cut and weave in as you go if you prefer.
Make two panels, join, and edge exactly as in Pattern 1, Steps 4 to 6. For a modern look, use the same color for the border as for one of the stripes.
This one is great for using up scraps. A set of four mismatched striped potholders in coordinating colors looks charming in a kitchen basket.
Pattern 3: Round Winter Hot Pad
A round hot pad is handy under a teapot, a casserole, or a cup of cocoa. It works well in the same colors as the other two patterns, so you can make a set.
Round 1: Make a magic ring. Ch 1, work 6 sc into the ring. Pull the tail tight and join with a sl st. (6 sc)
Round 2: Ch 1. Work 2 sc in each st around. (12 sc)
Round 3: Ch 1. Sc in the next st, inc repeat around. (18 sc)
Round 4: Ch 1. Sc in the next 2 sts, inc repeat around. (24 sc)
Round 5: Ch 1. Sc in the next 3 sts, inc repeat around. (30 sc)
Round 6: Ch 1. Sc in the next 4 sts, inc repeat around. (36 sc)
Round 7: Ch 1. Sc in the next 5 sts, inc repeat around. (42 sc)
Round 8: Ch 1. Sc in the next 6 sts, inc repeat around. (48 sc)
Round 9: Ch 1. Sc in the next 7 sts, inc repeat around. (54 sc)
Round 10: Ch 1. Sc in the next 8 sts, inc repeat around. (60 sc)
Your circle should now measure about 7 inches across. If you want it bigger, keep going with one more stitch between increases on each round. Make a second circle the same way, hold them together, and work a round of sc through both layers. Finish with a round of rev sc for the rope edge.
A small hint: work with your hook slightly tighter than normal, and keep your tension even. Round pieces curl easily if the increases aren’t spread out, so keep your increase points shifting a little around the circle rather than stacking them in lines.
Embroidery Tips for a Cleaner Snowflake
The snowflake looks delicate, but it is forgiving. These are the small things that make the biggest difference.
Use a slightly thinner yarn if you can. Worsted cotton works, but a lighter cotton, like a sport weight, gives a more refined line. If you only have worsted, just keep your chain stitches a little longer.
Practice on a scrap swatch. Crochet a small square and try one arm before you commit to the real panel. It takes five minutes and saves you from picking out stitches later.
Keep your tension relaxed. Embroidery that is pulled tight distorts the crocheted fabric underneath. Aim for stitches that lie flat on the surface.
Measure, don’t guess. Snowflakes look best when the arms are even. A paper template with six lines drawn at 60 degree angles, laid over the panel, helps you place your pins precisely. You can also use the crochet stitches themselves as a grid. Counting four stitches in and four stitches up makes a natural diagonal.
Work from the center outward. Always begin at the middle and move toward the tips. That way any small mistakes land at the ends, not in the center where the eye goes first.
Color Ideas for Winter Potholders
Color is where you can really make these your own. Here are some combinations that suit the season.
Teal and cream. The pairing used in the photos. It feels fresh and a little vintage, and it looks lovely with white or striped kitchen towels.
Navy and white. Classic winter. A navy panel with a white snowflake looks crisp and elegant.
Forest green and ivory. A holiday favorite without being too obvious. It works with both Christmas and general winter decor.
Soft gray and mustard. For a modern farmhouse look, gray with a mustard snowflake adds a warm pop.
Dusty pink and cream. If you like something gentler, this combination is cheerful and sweet.
Cranberry and cream. The most festive of the group. It brings to mind hot cider and woolly mittens.
When you plan a set, choose one main color and one contrast color, then swap them between the two potholders. One potholder is cream with a teal snowflake, and the other is teal with a cream snowflake. They look like a matched pair but never identical.
Troubleshooting Common Problems
My square is not square. This is the most common issue. If your piece comes out wider than tall (or the other way), the fix is just adding or removing rows. Count your rows against your stitches, and adjust before you fasten off. Blocking lightly with a damp cloth can also help true up the shape.
The edges are wavy. Too many stitches along the border will make it ruffle. Pull out a section, then work a few fewer sc along the side. A good rule is about 1 sc per row end.
The corners curl or look pointed. Make sure you are working 3 sc in each corner stitch. If the corner still looks pointed, add a fourth sc or work the corner into a different stitch so the curve is rounder.
The fabric feels too soft or floppy. Your hook is too big for your yarn. Switch down a size, or hold your yarn with a little more tension. A potholder should feel almost stiff.
The snowflake looks lopsided. Check that your arms are all the same length. If one is shorter, pick out only that arm and redo it. Use pins to mark the tips before you start stitching, and compare each arm to the first.
The back of my embroidery is messy. Don’t worry. In this pattern, the back of the embroidered panel sits against the inner layer and never shows. Just make sure the tails are secure so nothing catches.
The loop looks twisted. Before you work into the chain ring, make sure the chain isn’t twisted. Hold it flat, then join with your slip stitch.
How to Care for Handmade Crochet Potholders
Cotton is easy to look after, which is another reason it is the right choice.
Washing: Machine wash on a gentle cycle in cool or warm water. Place your potholders in a mesh laundry bag to protect the loop and the embroidery. If you have used a deep color like teal, wash it separately the first time, in case of dye bleeding.
Drying: Lay flat to dry, or tumble dry on low. Cotton can shrink a little in high heat, and your potholder will lose some of its square shape.
Stains: Treat a stain as soon as you can. Cooking spills are common, and a little mild soap and cool water usually lifts them.
Replacing: Potholders wear out. If the stitches look thin, or the fabric has stiffened and darkened from heat, it is time to make a new one. That is a good excuse to try another color.
Gifting and Selling Your Potholders
If you are making these as gifts, think about the presentation. Roll a pair together and tie with twine, add a sprig of faux pine or a small paper tag, and you have a gift that looks like it came from a boutique. Pair them with a wooden spoon, a jar of cocoa, or a tea towel for a bigger set.
If you sell your work, a few suggestions:
- Photograph in natural light. A marble or white wood surface, a little greenery, and a striped towel are all you need.
- Price for your time and materials. A handmade potholder with embroidery is a labor of love. Don’t underprice it.
- Offer sets. Pairs and sets of four sell better than single potholders.
- Include care instructions. A small card with washing tips adds value and makes buyers feel confident.
- Mention safety honestly. State that the potholder is made from 100% cotton and is meant for everyday kitchen use.
You are welcome to sell items you make from this free pattern. Please credit StitchNestStudio as the pattern source and don’t copy or republish the written pattern itself.
Frequently Asked Questions
Can I use acrylic yarn for potholders?
It is not recommended. Acrylic can melt under high heat, which makes it unsafe in the kitchen. Use 100% cotton, which stands up to heat much better.
How much yarn do I need for one potholder?
About 150 yards total for a double-layer potholder with an embroidered design. That is roughly 100 yards of the main color and 50 yards of the contrast color.
What hook size should I use?
A 4.0 mm hook works for most worsted cotton. If your stitches look loose, go down to 3.5 mm. You want a dense, firm fabric.
Can I make these without embroidery?
Absolutely. The striped version in Pattern 2 skips the embroidery completely. You can also leave the front plain for a simple, modern look.
Is this pattern beginner friendly?
Yes. It uses single crochet, chains, and slip stitches. The reverse single crochet edge feels new at first, but it is a very short step, and the result is worth learning it for.
How long does it take?
Most people finish one in 3 to 4 hours, spread across one or two evenings. The embroidery adds about 30 to 45 minutes.
Can I add batting for more protection?
Yes. A layer of 100% cotton batting between the two panels adds heat resistance. Just keep the batting slightly smaller than the panels so it doesn’t poke out of the edge.
Can I use a different stitch for more texture?
You can. Working in the back loop only gives a ribbed look, and a half double crochet makes the panel work up faster. Keep in mind that taller stitches make a looser fabric, so use a smaller hook to compensate.
Are these potholders machine washable?
Yes, if you used 100% cotton. Wash in a mesh bag on a gentle cycle and lay flat to dry.
Final Thoughts
There is something very satisfying about making a thing with your hands and then actually using it every day. A winter potholder is a small project, but it carries a little warmth into the kitchen, and a snowflake stitched in teal or cream turns an ordinary tool into something you enjoy picking up.
Start with the snowflake pattern if you want the full experience, or try the striped version if you need a quick win. Make a few, keep one, and give the rest away. And when you have finished your first set, I would love to see how it turned out, so share your colors and your snowflake variations. Happy stitching, and stay cozy this winter.