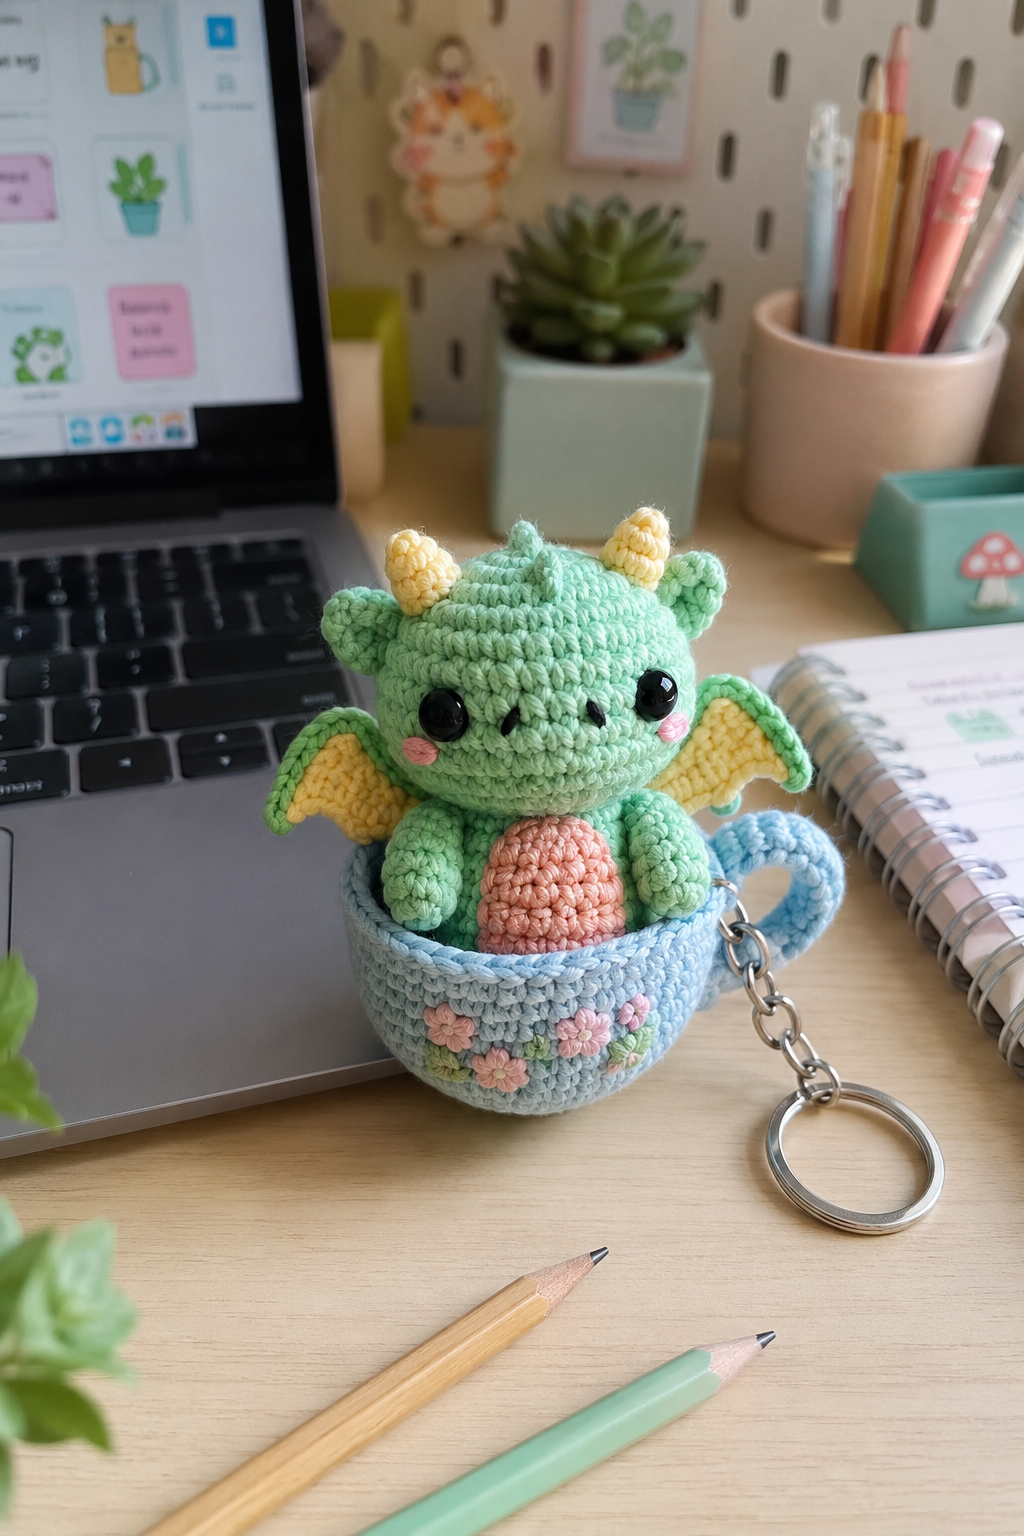
Tiny crochet projects have a special kind of charm, especially when they bring a little bit of fantasy to life. This Free Amigurumi Teacup Dragon Keychain Crochet Pattern pairs a cute little dragon with a cozy crocheted teacup, creating a miniature project that works beautifully as a keychain, bag charm, desk decoration, or thoughtful handmade gift.
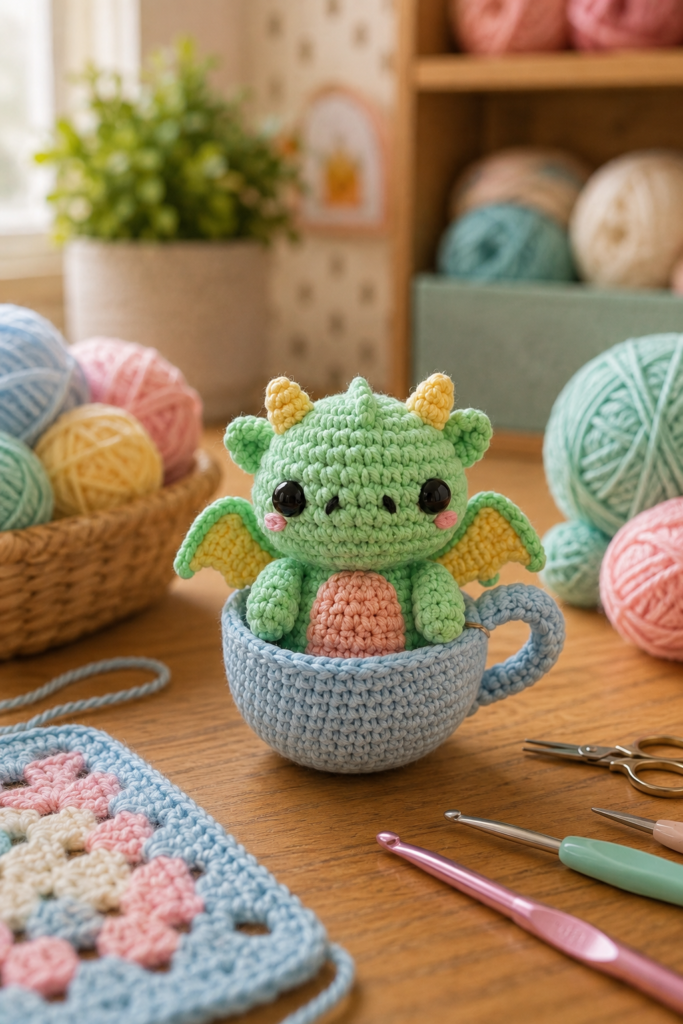
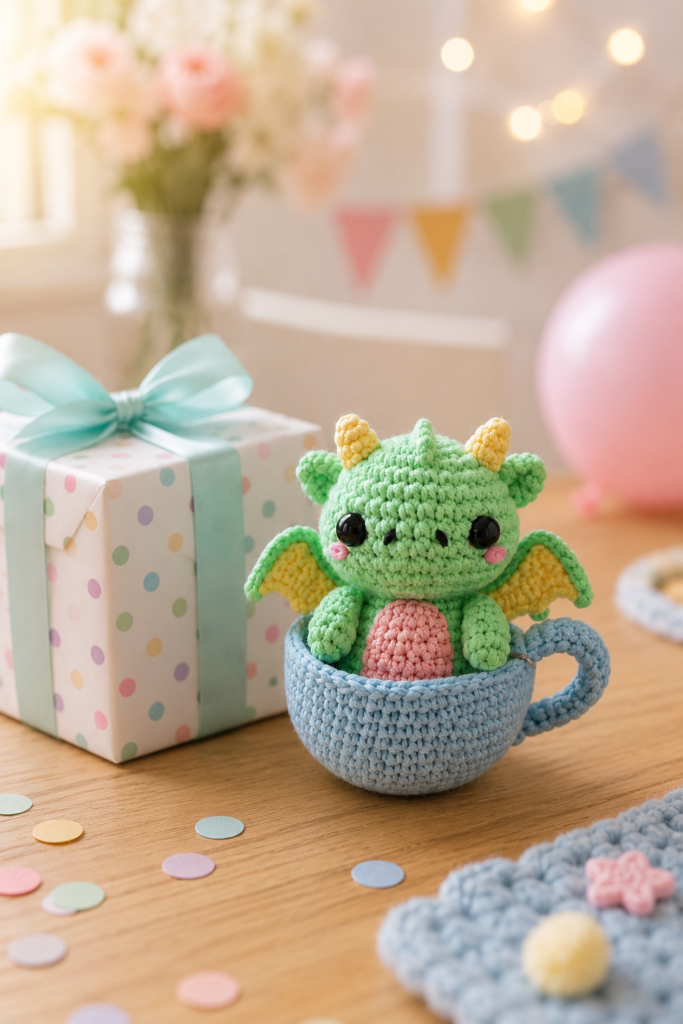
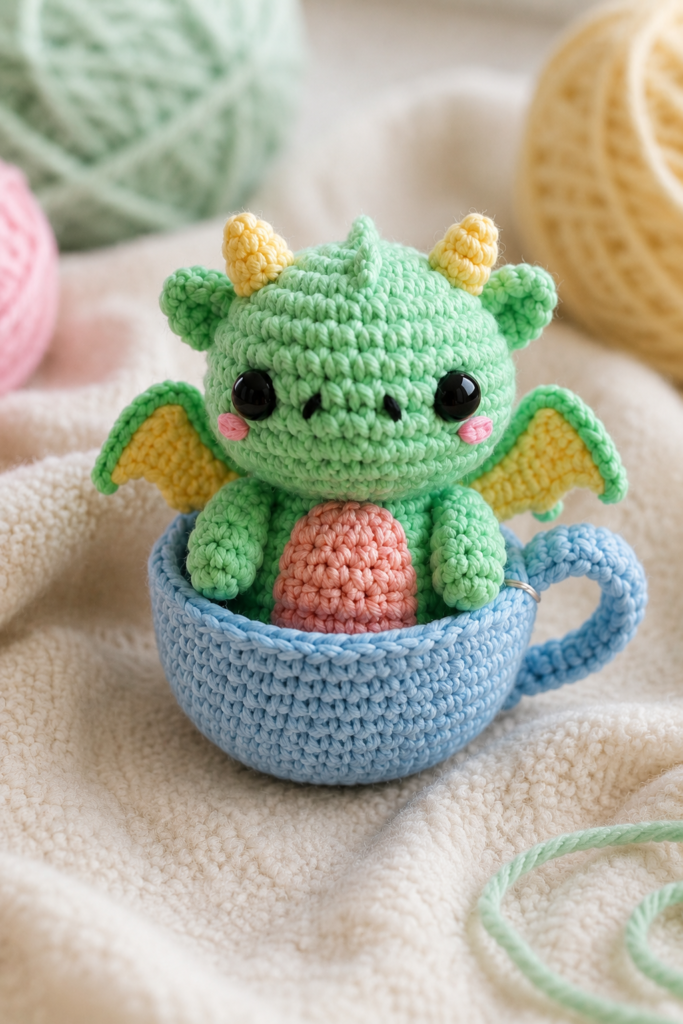
The design features a soft mint-green dragon nestled inside a light-blue crocheted teacup. The dragon has large glossy black eyes, tiny cream-yellow horns, rounded ears, colorful wings, little arms and legs, and a soft pink belly. Its matching teacup has a chunky handmade texture and a curved handle, giving the finished piece a warm and whimsical look.
What makes this project especially fun is the attention to the little details. From shaping the dragon’s face and body to positioning its wings, limbs, and facial features, each part helps bring the character to life. The teacup is designed to hold the dragon comfortably, creating a cute miniature scene that feels like something straight out of a storybook.
Table of Contents
- Why This Teacup Dragon Is So Cute
- What You Will Need
- Choosing Yarn for Amigurumi
- Understanding the Teacup Dragon Design
- Crocheting the Dragon
- Making the Dragon Head
- Adding the Horns and Facial Details
- Making the Wings
- Creating the Arms and Legs
- Crocheting the Teacup
- Making the Teacup Handle
- Assembling the Dragon and Cup
- Adding Keychain Hardware
- Beginner Tips
- Common Mistakes
- How to Get a Professional Finish
- Color Ideas
- Care and Storage
- Frequently Asked Questions
- Final Thoughts
Why This Teacup Dragon Is So Cute
The appeal of this project comes from the contrast between the two main pieces.
The dragon is soft, rounded, and expressive, while the teacup gives it a little place to sit. Together, they create a miniature scene instead of simply being another small amigurumi character.
The mint-green body works especially well with the pale blue cup. The cream-yellow horns add a warm contrast, while the pink belly introduces another soft color without making the design look busy.
The oversized black eyes are also important. They give the dragon the classic cute amigurumi appearance and make the character immediately recognizable.
What Makes the Design Stand Out?
Several details work together:
- Mint-green crocheted dragon
- Large glossy black eyes
- Small cream-yellow horns
- Rounded facial shape
- Green-and-yellow wings
- Pink belly
- Tiny arms and legs
- Light-blue crocheted teacup
- Curved teacup handle
- Chunky visible crochet stitches
- Soft pastel color palette
None of these details has to be complicated on its own. The magic comes from putting them together at a small scale.
What You Will Need
One advantage of miniature crochet is that you don’t need a huge amount of yarn.
Main Supplies
For a design like the reference, gather:
- Mint or pastel-green yarn
- Light-blue yarn
- Cream or pale-yellow yarn
- Pink or peach yarn
- Yellow yarn for wing interiors
- Black safety eyes or black embroidery thread
- Polyester fiberfill
- Crochet hook suitable for your yarn
- Tapestry needle
- Stitch markers
- Scissors
- Keychain ring
- Suitable connecting ring or clasp
You may also want a small ruler or measuring tape so you can compare matching pieces as you work.
What Crochet Skills Are Helpful?
This project is best for a crocheter who already knows basic amigurumi techniques.
You should ideally be comfortable with:
- Magic ring
- Single crochet
- Increasing
- Decreasing
- Working in continuous rounds
- Changing colors
- Stuffing small shapes
- Sewing crochet pieces together
- Weaving in ends
If you’re a beginner, practicing a small sphere before starting the dragon can make the project much easier.
Choosing Yarn for Amigurumi
For small amigurumi, yarn choice affects both appearance and construction.
A smooth cotton or cotton-blend yarn is a good choice because the stitches remain easy to see. It also gives small pieces a neat, structured appearance.
Avoid very fuzzy yarn if you’re still learning amigurumi. Fuzzy fibers can make it difficult to identify individual stitches.
Why Cotton Works Well
Cotton yarn tends to give:
- Clear stitch definition
- A firm fabric
- Good shape retention
- A neat handmade appearance
- Better visibility of small details
Acrylic can also be used, especially if you prefer a softer finished piece. Just remember that different fibers can produce noticeably different sizes even when you use the same hook and stitch counts.
This is why making a small gauge sample is useful.
Understanding the Teacup Dragon Design
Before crocheting, break the finished piece into separate components.
The project can be viewed as:
Dragon
- Head
- Body
- Arms
- Legs
- Horns
- Wings
- Facial details
Teacup
- Base
- Cup walls
- Rim
- Handle
Finishing
- Dragon placement
- Keychain attachment
- Final shaping
This makes the project much less intimidating.
Instead of trying to create the entire finished keychain at once, you’re making several small pieces and bringing them together at the end.
Crocheting the Dragon
The dragon’s body is primarily made from rounded amigurumi shapes.
The most important thing here is consistent tension.
If your tension changes dramatically between rounds, the head may become uneven or the body may not fit naturally into the cup.
Work slowly and count your stitches regularly.
Keep the Fabric Firm
Amigurumi usually looks best when the crochet fabric is tight enough that stuffing isn’t visible through the stitches.
If you can clearly see the fiberfill between stitches, try using a smaller hook or tightening your tension slightly.
Don’t go too far in the other direction, though. If the stitches become extremely difficult to work into, your hook may be too small for the yarn.
Making the Dragon Head
The head is the focal point of the character.
The reference design uses a rounded head with a wide, friendly face.
When shaping the head, aim for a smooth curve rather than a sharply pointed or elongated shape.
Stuffing the Head
Add stuffing gradually as you crochet.
Place small amounts around the sides and gently shape the fiberfill with your fingers.
Don’t pack the stuffing in all at once.
A useful technique is to rotate the piece as you stuff it. This helps distribute the filling more evenly and prevents one side from becoming noticeably fuller.
The finished head should feel firm but still have a soft handmade quality.
Adding the Horns and Facial Details
The little cream-yellow horns provide a strong contrast against the mint-green head.
Because they are small, they should be firmly attached.
Before sewing them permanently, place both horns on the head and check their position from the front.
Eye Placement
Eye placement is one of the easiest ways to accidentally change an amigurumi’s personality.
The reference design uses large black eyes.
Don’t attach them immediately after deciding on the first position.
Instead:
- Place the eyes temporarily.
- Look at the dragon from straight ahead.
- Check the distance between them.
- Check their height.
- Compare both sides.
- Make adjustments if necessary.
- Attach them securely.
A difference of only a few stitches can make the dragon look completely different.
Making the Wings
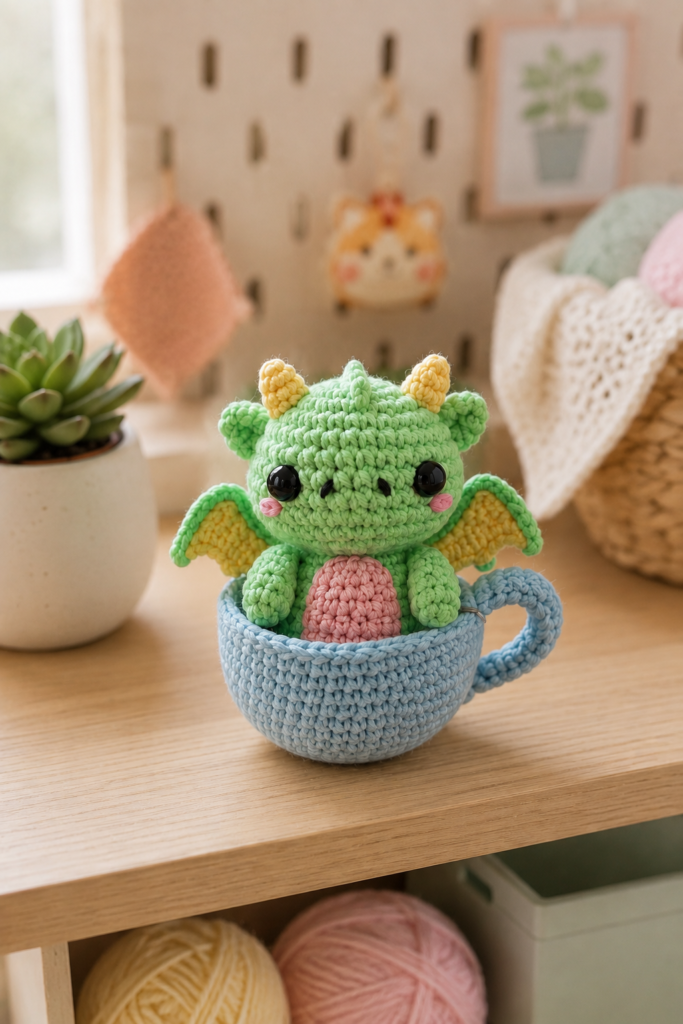
The wings give the dragon its fantasy character.
The reference uses a green outer edge with a warm yellow interior.
When making small wings, focus on creating matching shapes.
Make the first wing, then use it as a visual reference for the second.
They don’t have to be machine-perfect. Handmade projects naturally have small differences. What matters is that they look balanced when attached.
Wing Placement
Before sewing, position both wings against the body.
Look at the dragon from:
- Front
- Side
- Slightly above
The wings should sit at approximately the same height.
If one is noticeably higher, reposition it before sewing.
Creating the Arms and Legs
The arms and legs are small, so they can be some of the fiddliest parts of the project.
The best approach is to make the matching pieces together.
For example, make both arms one after another instead of making one arm today and the second one several days later.
This helps you maintain similar tension.
Positioning the Legs
The dragon needs to sit comfortably inside the cup.
This means the legs should not be positioned too far outward.
Before sewing them permanently, place the dragon inside the cup and see how the body naturally sits.
This is one of those moments where assembly should guide the finishing details.
Don’t assume the perfect position before testing the actual pieces together.
Crocheting the Teacup
The teacup is just as important as the dragon.
Its job isn’t simply to look cute—it also needs to support the character.
The cup should have a stable base and enough height for the dragon to sit naturally without disappearing inside it.
Building the Base
The base should remain relatively flat.
If your circle begins to curl upward too early, check your increases and tension.
If it becomes wavy, you may have too many increases for your yarn and hook combination.
This is where counting and consistent tension are especially useful.
Building the Cup Walls
Once the base is established, the walls can be worked upward.
The reference uses a light-blue yarn and a dense crochet texture.
Keep the sides even as you work.
A crooked cup can be difficult to correct during final assembly.
Making the Teacup Handle
The handle is one of the most recognizable details of a teacup.
It also happens to be one of the more delicate components.
A simple crocheted cord or shaped strip can be formed into a curved handle and attached securely to the side of the cup.
The Handle Should Be Strong
Because the finished piece is intended to work as a keychain, avoid creating a handle that is only loosely sewn to the cup.
Make several secure passes with your needle through the attachment area.
However, the keychain hardware itself should be attached to an appropriate reinforced point rather than relying solely on the decorative cup handle.
Assembling the Dragon and Cup
This is where all your separate pieces become one finished design.
Start by placing the dragon inside the cup without sewing it.
Check:
- How deep it sits
- Whether the head is centered
- Whether the wings are visible
- Whether the arms sit naturally
- Whether the body is stable
- Whether the cup rim hides too much of the dragon
Take a moment to look at it from several angles.
Don’t Rush This Step
Many crochet projects look slightly different once assembled.
A component that looked perfectly positioned on its own can appear crooked once attached to another piece.
Use pins before sewing.
This gives you a chance to make adjustments without having to undo your finished seams.
Adding Keychain Hardware
If you’re turning the project into a true keychain, the attachment point needs special attention.
The hardware will experience pulling and movement every time the keychain is used.
A decorative yarn loop may look fine but can eventually loosen if it isn’t reinforced.
A Better Attachment
Attach the keychain ring to a secure, reinforced section of the crocheted structure.
Sew through multiple stitches and make several passes.
After attaching it, gently test the connection before putting the finished piece into regular use.
Don’t yank it hard. The purpose of the test is simply to make sure the attachment isn’t obviously loose.
Beginner Tips
Miniature crochet can be challenging because the pieces are small.
These tips can make the process easier.
Use a Stitch Marker
When working continuous rounds, a stitch marker helps you identify the beginning of each round.
Count Regularly
Don’t wait until the end of a component to discover that your stitch count has changed.
Check your count throughout the piece.
Keep Matching Pieces Together
When making two wings, two arms, or two legs, make them consecutively.
This helps maintain similar tension and size.
Photograph Your Progress
This is a surprisingly useful technique.
Take a quick photo of your dragon from the front.
Photos can reveal uneven eyes, wings, or facial details that aren’t obvious when you’re looking directly at the project.
Use Good Lighting
Small stitches can be difficult to see.
Natural daylight or a good craft lamp can make the process much easier on your eyes.
Common Mistakes
The Dragon Doesn’t Fit the Cup
If the dragon is too large, don’t force it into the cup.
The problem may come from yarn weight, hook size, stuffing, or the proportions of the body.
Test the fit before final assembly.
The Head Looks Lumpy
Uneven stuffing is often responsible.
Remove some filling if necessary and redistribute it.
The Eyes Look Uneven
This is extremely common.
Position them temporarily before permanently attaching them.
The Wings Sit at Different Heights
Pin both wings before sewing.
Check them from the front rather than relying only on side views.
The Cup Loses Its Shape
The cup may need firmer crochet tension or more structured construction.
Avoid overstuffing a cup unless the design specifically calls for it.
How to Get a Professional Finish
A polished amigurumi isn’t necessarily one with absolutely perfect stitches.
Instead, professional-looking crochet usually comes from careful finishing.
Before calling the project complete, inspect:
- Face
- Horn placement
- Wing alignment
- Arm placement
- Leg placement
- Cup shape
- Handle attachment
- Keychain connection
- Loose yarn ends
- Overall balance
Trim only after securing your ends properly.
Take your time with sewing.
In miniature crochet, good finishing can make a bigger difference than adding more decoration.
Color Ideas
The pastel combination shown in the reference is especially soft, but you can experiment with other palettes.
Classic Mint Dragon
- Mint green
- Light blue
- Cream
- Soft pink
- Pale yellow
Lavender Dragon
- Lavender
- Baby blue
- Cream
- Blush pink
- Soft yellow
Blue Fantasy Dragon
- Sky blue
- Navy
- White
- Pale yellow
- Peach
Forest Dragon
- Sage green
- Cream
- Brown
- Soft yellow
- Dusty pink
When changing colors, try to maintain one dominant shade and two or three supporting colors. Too many competing colors can make such a small design look crowded.
Where Can You Use a Crochet Teacup Dragon?
This little dragon doesn’t have to live on a keyring.
It can also work as:
- Backpack charm
- Purse accessory
- Zipper pull
- Desk decoration
- Shelf decoration
- Handmade gift
- Crochet collection piece
- Fantasy-themed room décor
If you are making several, different color combinations can turn the project into a small family of dragons.
Care and Storage
Because this design contains small details, gentle handling is important.
Avoid pulling on:
- Horns
- Wings
- Arms
- Legs
- Keychain connection
- Cup handle
For dust, use a soft brush or gently wipe the surface according to the care instructions of your yarn.
If the piece becomes dirty, follow the washing instructions for the specific yarn used. Don’t assume every yarn can be safely machine washed.
When storing the dragon, keep it somewhere dry and avoid placing heavy objects on top of it.
Frequently Asked Questions
Is this teacup dragon crochet pattern beginner-friendly?
The individual shapes can be manageable for a confident beginner, but the complete project is easier if you already understand basic amigurumi construction, increases, decreases, stuffing, and sewing.
What yarn is best for a crochet dragon?
Smooth cotton or cotton-blend yarn is a good option for this type of miniature amigurumi because it provides clear stitch definition and helps the small details stand out.
What size crochet hook should I use?
Use a hook appropriate for your selected yarn while aiming for a firm amigurumi fabric. The exact hook size may vary depending on your yarn and personal tension.
Can I make the dragon a different color?
Yes. The dragon can be customized with almost any coordinated color palette. Keep the cup and dragon sufficiently different in color so the character remains easy to see.
How do I make the crochet dragon fit inside the cup?
The proportions of the dragon and cup need to be planned together. Test-fit the dragon before final assembly and adjust the placement or stuffing if necessary.
Can I use embroidered eyes?
Yes. Embroidered eyes can replace safety eyes. This also gives you more control over the size and expression.
How do I make the keychain stronger?
Use a suitable keychain ring and reinforce the attachment point through several crochet stitches. Check the connection periodically if the finished item is used frequently.
Can I sell finished crochet dragons made from this design?
That depends on the specific pattern’s licensing terms if you are using a published pattern. If you’re publishing your own original pattern, clearly state your terms regarding finished items and pattern redistribution.
Final Thoughts
The Free Amigurumi Teacup Dragon Keychain Crochet Pattern is a lovely miniature project for anyone who enjoys cute fantasy-inspired crochet.
What makes it memorable isn’t one complicated technique. It’s the combination of the mint-green dragon, tiny horns, expressive eyes, colorful wings, pink belly, and light-blue teacup. Together, those details create a little character that feels like it has its own personality.
If you’re making this design, concentrate on the fundamentals first: firm and consistent stitches, careful shaping, even stuffing, balanced facial placement, and strong assembly.
The smaller the project, the more noticeable the finishing becomes.
Take your time with the eyes. Test the dragon inside the cup before sewing. Check the wings from the front. Reinforce the keychain attachment. These little checks can make a major difference in the final result.
And most importantly, have fun with the colors. A tiny teacup dragon is already an imaginative idea, so there is plenty of room to create your own pastel fantasy version.
If you love miniature crochet, save this idea for your next project and keep a little space in your craft basket for another tiny dragon adventure.