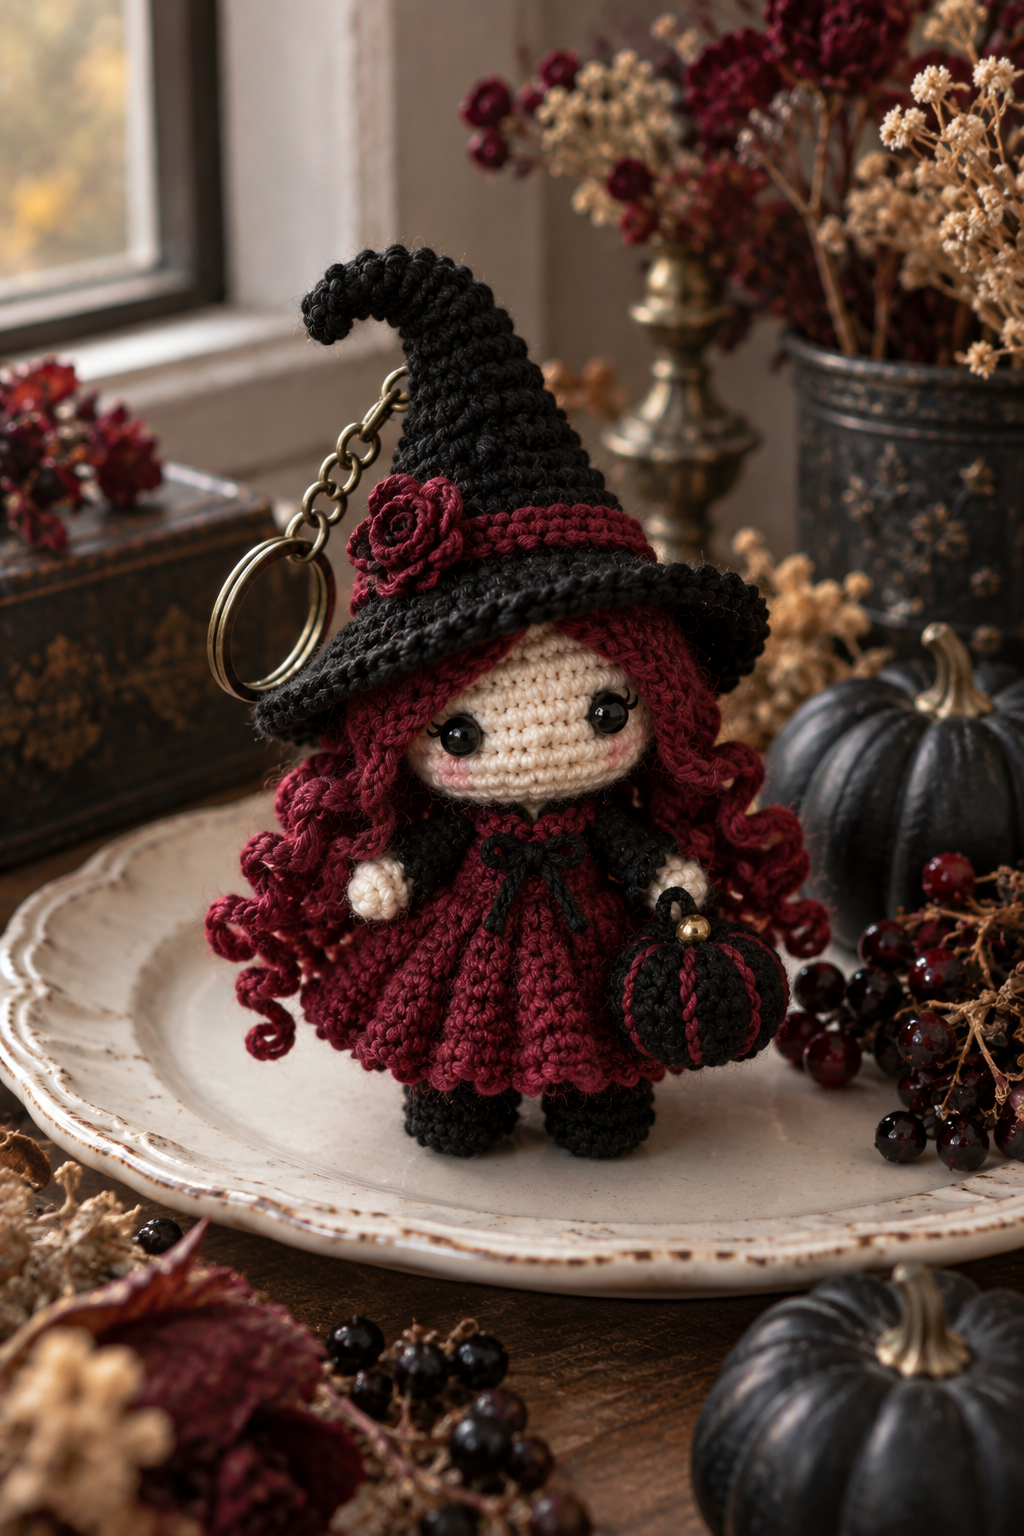
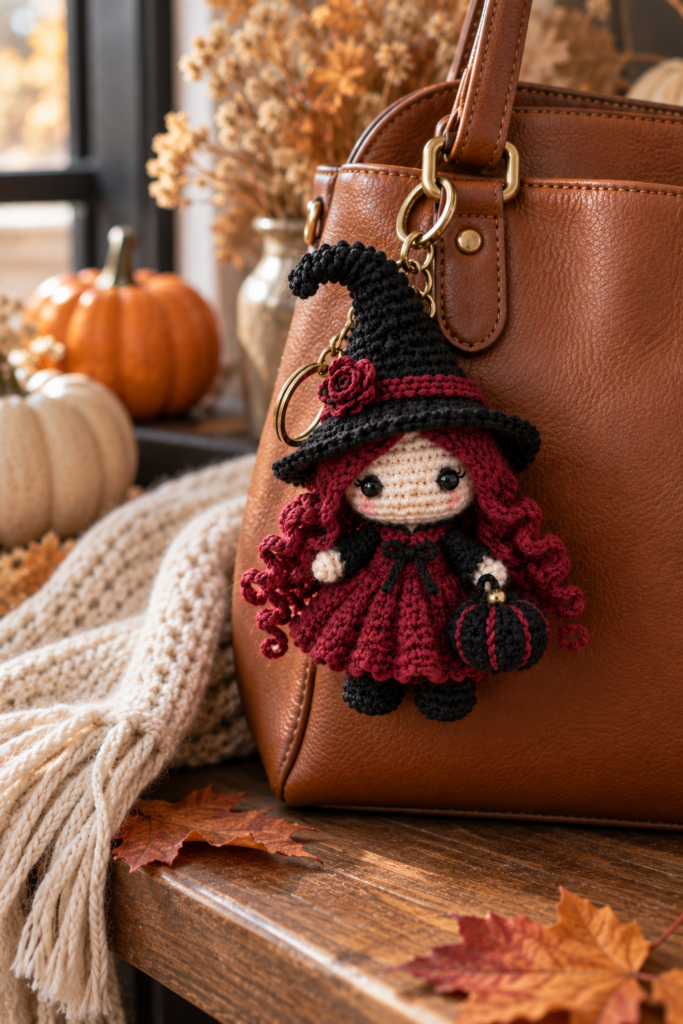
If you love handmade Halloween accessories, this Charming Halloween Amigurumi Witch Keychain DIY is a fun project to add a little spooky personality to your keys, handbag, backpack, or seasonal décor. The finished witch combines classic Halloween colors—black and deep burgundy—with a soft handmade crochet texture, curly yarn hair, a crooked witch hat, and a tiny pumpkin accessory.
What makes this project especially appealing is its size. Unlike a large amigurumi, a keychain-sized crochet witch can be completed with relatively small amounts of yarn and makes an excellent handmade gift, craft-fair item, stocking stuffer, or Halloween accessory.
Table of Contents
- Why Make a Crochet Witch Keychain?
- What Makes This Design Special?
- Materials You’ll Need
- Choosing the Right Yarn
- Understanding the Construction
- How to Approach the Project Step by Step
- How to Make the Keychain Sturdy
- Common Crochet Mistakes and How to Avoid Them
- Beginner Tips for Better Amigurumi
- How to Attach the Keyring Safely
- Decorating and Gifting Ideas
- Care and Storage
- Frequently Asked Questions
- Final Thoughts
Why Make a Crochet Witch Keychain?
A small Halloween crochet project is a great choice when you want something festive without committing to a large blanket, wall hanging, or full-size amigurumi.
This witch keychain is particularly versatile. You can use it as:
- A keychain
- A handbag charm
- A backpack accessory
- A Halloween party favor
- A handmade gift
- A craft-fair product
- A seasonal decoration
- A small stocking stuffer
- A crochet gift for a witch or Halloween lover
The compact size also makes it practical for using leftover yarn. Small quantities of black, burgundy, cream, and accent colors can go a surprisingly long way.
The most important consideration with a project this small is proportion. When an amigurumi is only a few inches tall, even a small change in tension can noticeably affect the final shape.
That is why it is better to focus on consistent tension and neat shaping rather than simply trying to crochet as quickly as possible.
What Makes This Design Special?
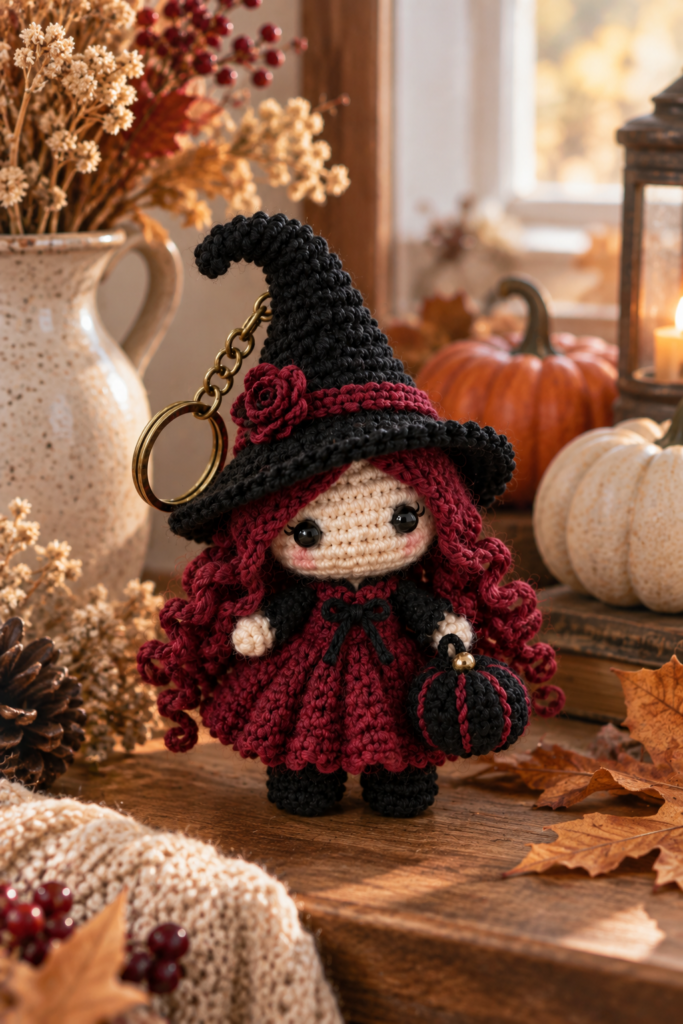
The character in the reference design has a distinctive handmade appearance rather than looking like a generic Halloween doll.
The main visual elements include:
- A soft cream-colored crocheted face
- Large glossy black eyes
- Subtle rosy cheeks
- Long curly burgundy-red yarn hair
- A tall, crooked black witch hat
- A burgundy hat band
- A small crochet rose
- A burgundy-and-black dress
- Tiny black shoes
- A miniature black-and-burgundy pumpkin
- A brass-colored chain and circular keyring
The combination of burgundy, black, cream, and warm autumn tones gives the witch a slightly vintage Halloween character while keeping the finished piece cute rather than frightening.
For anyone creating a similar project, the lesson is useful: you do not need dozens of colors to create a memorable amigurumi. A carefully selected palette and a few recognizable details can do most of the visual work.
Materials You’ll Need
The exact material quantities depend on the final size and construction method, but a project of this type generally requires a small selection of crochet supplies.
Yarn
Choose yarn in approximately these color groups:
- Cream or light beige for the face and hands
- Black for the hat, shoes, and darker details
- Burgundy or deep red for the hair and dress
- Black and burgundy for the pumpkin
- Small amounts of black yarn for decorative details
Crochet hook
For amigurumi, a relatively small crochet hook is normally used with the selected yarn. The goal is to create firm stitches with minimal gaps, especially when stuffing is involved.
Do not automatically choose a hook based only on the yarn label. Your tension matters.
If your stitches are loose and stuffing becomes visible, try a smaller hook.
Stuffing
Use a good-quality polyester fiberfill. Stuff gradually rather than filling the entire piece at once.
Overstuffing can stretch the crochet fabric and distort the character’s shape.
Eyes
Safety eyes can create the glossy appearance seen in the reference design. If the item is intended for a young child, however, embroidered eyes are a safer alternative.
Keychain hardware
You will need:
- A metal keyring
- A small chain or connector
- A secure attachment point
Choose hardware that is proportionate to the finished doll. Heavy hardware can pull on a small crochet piece and affect how it hangs.
Other useful tools
- Tapestry needle
- Scissors
- Stitch marker
- Pins, if needed
- Fiberfill stuffing
- Small pliers for attaching the keyring hardware
Choosing the Right Yarn
Yarn choice has a major effect on the appearance of miniature amigurumi.
For a character like this, a smooth yarn with clear stitch definition is usually easier to work with than a fluffy or highly textured yarn.
A smooth worsted-weight or lighter yarn can work depending on the intended finished size, but always check your tension.
Why smooth yarn works well
It allows you to see:
- Individual stitches
- Increases
- Decreases
- Shaping
- Hair curls
- Small decorative details
Very fuzzy yarn can hide mistakes, but it can also make small pieces difficult to crochet accurately.
For the burgundy hair, a yarn that holds its shape well is especially useful because the curls are an important part of the character’s personality.
Understanding the Construction
Before starting, it helps to think of the witch as a collection of smaller components rather than one complicated project.
A character like this can be divided conceptually into:
- Head and face
- Hair
- Witch hat
- Body and dress
- Arms
- Legs and shoes
- Pumpkin accessory
- Decorative details
- Keychain attachment
This approach makes troubleshooting much easier.
If the finished witch does not look balanced, you can identify the problem instead of assuming the entire project is wrong.
For example, if the face looks too large, the issue may be head-to-body proportion. If the hat overwhelms the character, the problem may be the hat height or brim width rather than the body.
How to Approach the Project Step by Step
This design is best approached in stages.
1. Crochet the Main Body
Start with the main character structure according to your chosen amigurumi construction.
Keep your stitches firm and consistent.
The body should be compact enough to support the dress, hair, hat, and accessories without becoming floppy.
Important tip
Do not rush the increases and decreases.
A single missed increase or decrease can change the symmetry of a small amigurumi much more noticeably than it would in a large crochet project.
Use a stitch marker to identify the beginning of each round.
2. Shape the Face
The face is one of the most important visual areas.
The reference character has a soft cream face with large glossy black eyes and subtle pink cheeks.
When positioning the eyes, check their placement before permanently securing them.
Step back and look at the face from a distance.
If the eyes are too close together, too high, or uneven, the entire expression can change.
This is one of the easiest mistakes to prevent.
3. Add the Hair
The burgundy curls are a major feature of this witch.
Instead of treating the hair as a simple solid cap, focus on creating loose, recognizable curls that frame the face.
Try to keep the curls visually balanced on both sides.
They do not have to be mathematically identical—handmade character is part of the charm—but the overall silhouette should feel intentional.
4. Build the Witch Hat
The crooked black hat gives the character its unmistakable Halloween identity.
The hat includes:
- A tall pointed shape
- A curved tip
- A wide brim
- Burgundy trim
- A small crochet rose
The hat should be firm enough to maintain its shape without becoming overly stiff.
If the point repeatedly falls flat, check your stitch tension and internal support rather than adding excessive stuffing.
5. Create the Dress
The burgundy dress provides most of the character’s color and volume.
Black details around the upper portion create contrast, while the fuller lower section gives the witch her recognizable silhouette.
When working on a small skirt or dress, consistent stitch tension is particularly important.
Uneven tension can make one side of the skirt appear fuller than the other.
6. Add the Pumpkin Accessory
The small black-and-burgundy pumpkin is an important finishing detail.
Because it is tiny, clean color changes and firm stitching will make a noticeable difference.
A small decorative element can sometimes take as much visual attention as a much larger component, so do not treat the pumpkin as an afterthought.
How to Make the Keychain Sturdy
This is one of the most important practical considerations.
A crochet doll can look beautiful but still fail as a keychain if the attachment point is weak.
The metal hardware should be attached to a structurally secure part of the crochet piece, not simply through a loose loop of yarn.
Good practice
Reinforce the attachment area with secure stitching and weave the yarn tail through several nearby stitches.
Avoid relying on a single loose strand.
Remember that a keychain experiences more pulling and movement than a decorative amigurumi sitting on a shelf.
Common Crochet Mistakes and How to Avoid Them
Mistake 1: Using a hook that is too large
Large gaps between stitches can allow stuffing to show through.
Solution: Try a smaller hook or tighten your tension.
Mistake 2: Overstuffing the body
Too much stuffing can stretch the stitches and make the character look uneven.
Solution: Add small amounts gradually and shape the body with your fingers as you work.
Mistake 3: Uneven eye placement
Even a one- or two-stitch difference can dramatically change an amigurumi’s expression.
Solution: Test the eye placement before permanently securing the eyes.
Mistake 4: Losing track of rounds
Small amigurumi projects are especially vulnerable to accidental increases and decreases.
Solution: Use a stitch marker and count regularly.
Mistake 5: Making the hat too heavy
A very large or heavily stuffed hat can pull the character backward.
Solution: Keep the hat proportional and make sure the base is securely attached.
Mistake 6: Weak keyring attachment
A decorative loop may not withstand everyday use.
Solution: Reinforce the attachment area and test the connection gently before using the finished piece.
Beginner Tips for Better Amigurumi
If this is your first amigurumi project, don’t worry if your first attempt isn’t perfectly symmetrical.
Miniature crochet requires more precision than many beginners expect.
Focus on these fundamentals:
Keep your tension consistent
Consistency matters more than speed.
Count your stitches
Do not rely solely on visual estimation.
Use stitch markers
They save time and prevent repeated counting.
Sew slowly
Small pieces often need careful positioning before permanent attachment.
Check the silhouette
Hold the finished pieces together before sewing them permanently.
This lets you identify proportion problems early.
Take progress photographs
Photographing your project from the front can reveal asymmetry that is difficult to notice while holding it close.
How to Attach the Keyring Safely
Once the crochet character is complete, attach the chain and circular keyring securely.
Use a strong connector ring or chain suitable for everyday movement.
Before considering the project finished, gently pull the keyring in several directions.
You are not trying to break it—you are checking whether the attachment point shifts, stretches, or pulls away from the crochet fabric.
If it moves noticeably, reinforce it before using the keychain.
This simple test can prevent the disappointment of losing a handmade piece later.
Decorating and Gifting Ideas
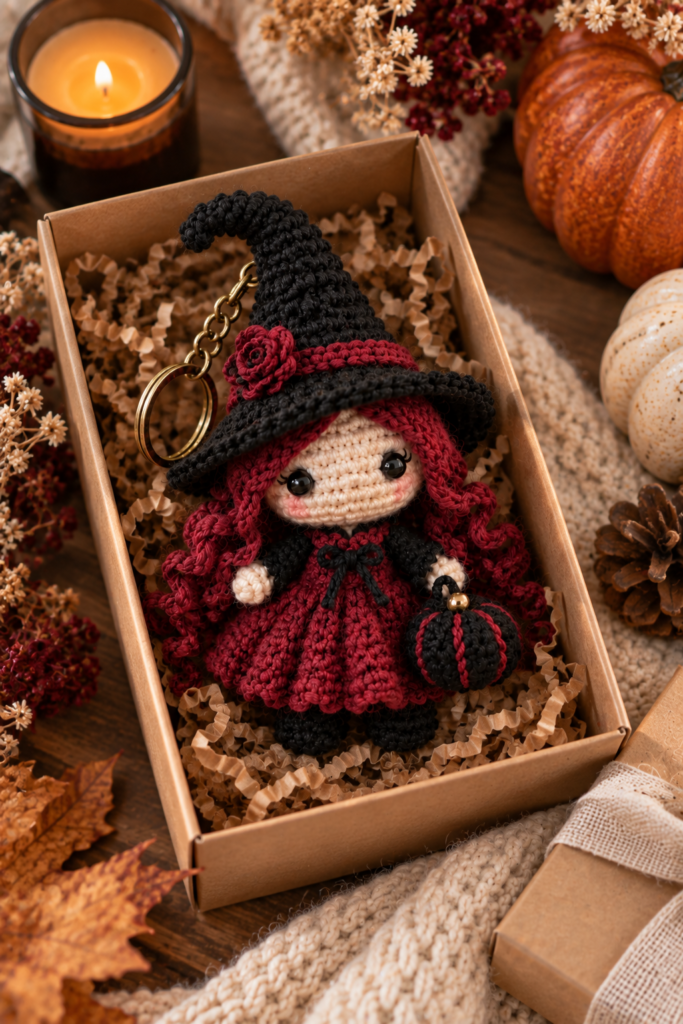
A crochet witch keychain makes a particularly good autumn gift because it is small, inexpensive to package, and easy to personalize.
For a polished presentation, place the finished piece inside a kraft gift box with:
- Natural crinkle paper
- Cream or burgundy ribbon
- Dried flowers
- A small seasonal card
- Neutral autumn wrapping
Keep the packaging simple. The handmade crochet work should remain the focus.
The same presentation can also work beautifully for craft fairs and online product photography.
Care and Storage
Crochet accessories are durable when handled properly, but they still need protection from moisture, excessive friction, and rough handling.
Keep the keychain dry
Avoid leaving it in damp environments for extended periods.
Clean gently
If the yarn becomes dusty, use gentle surface cleaning rather than aggressive scrubbing.
For washable yarn, always follow the yarn manufacturer’s care instructions.
Protect the hair
The curled yarn hair can become tangled if the keychain is stored loosely with other accessories.
Keep it in a small fabric pouch or separate compartment when possible.
Store seasonally
If you only use the witch during autumn and Halloween, store it somewhere clean and dry when the season ends.
A simple storage box can prevent dust accumulation and protect the crochet details.
Frequently Asked Questions
Is a crochet witch keychain suitable for beginners?
Yes, if you already understand basic crochet techniques such as working in the round, increasing, decreasing, joining pieces, and sewing amigurumi components together. Beginners may find the small size challenging because miniature projects require accurate stitch counting.
What yarn is best for an amigurumi witch?
A smooth yarn with good stitch definition is generally the easiest choice. Cream, black, and burgundy create a classic Halloween palette, while cotton or cotton-blend yarns can provide a crisp handmade appearance.
How long does a crochet witch keychain take to make?
The time varies considerably depending on experience, yarn weight, hook size, construction method, and the amount of decorative detail. A beginner may need several sessions, while an experienced amigurumi maker can work considerably faster.
Can I use this as a handbag charm?
Yes. The small format and metal keyring make this style suitable as a handbag or backpack charm, provided the attachment point is securely reinforced.
How do I stop my amigurumi from looking loose?
Use a smaller hook if necessary and maintain firm, consistent tension. Visible stuffing is usually a sign that the stitches are too loose or the piece has been overstuffed.
Why does my amigurumi face look different from the reference?
Facial proportions depend heavily on eye placement, head shape, yarn thickness, hook size, and tension. Measure or count eye placement carefully and check the expression before permanently attaching the eyes.
Can I sell finished crochet witches?
That depends on the specific pattern’s copyright and licensing terms. If you are working from someone else’s pattern, check the designer’s stated commercial-use policy before selling finished items. Your own original design is subject to different considerations, but copyright and trademark rules can still apply to character-based designs.
A Simple Way to Improve Your Finished Witch
If your first version looks slightly different from your inspiration image, don’t immediately remake everything.
Look at these five areas first:
Face → Are the eyes positioned evenly?
Hair → Does the curl distribution frame the face?
Hat → Is the height proportional to the body?
Dress → Does the skirt have an even silhouette?
Keyring → Is the attachment secure and visually balanced?
These five checks solve many of the most common problems in miniature crochet design.
Why Handmade Details Matter
One of the best qualities of amigurumi is that it doesn’t need to look machine-perfect.
Small variations in yarn texture, stitch tension, and shaping can give a handmade piece its personality.
The goal is not to eliminate every tiny imperfection. The goal is to make sure the important structural details are intentional.
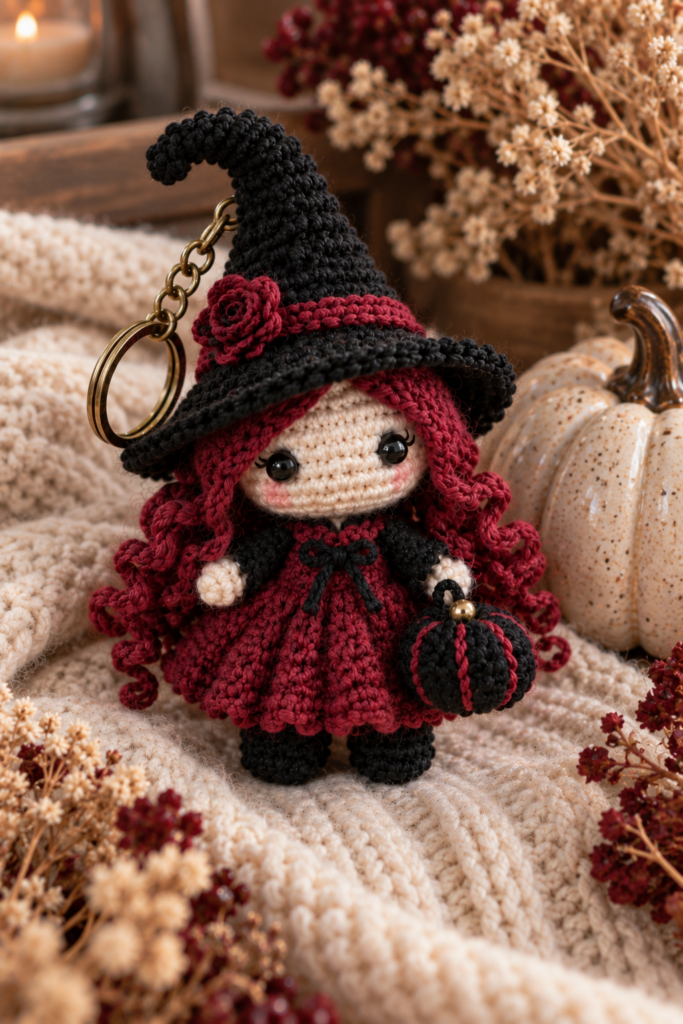
For a character like this, those details are the crooked hat, expressive eyes, curly burgundy hair, layered dress, tiny pumpkin, and sturdy keyring.
When those elements work together, the result feels like a finished character rather than simply a collection of crocheted pieces.
Final Thoughts
This Charming Halloween Amigurumi Witch Keychain DIY is a wonderful example of how a small crochet project can have plenty of personality.
The combination of a crooked black witch hat, burgundy curls, textured dress, glossy eyes, and tiny pumpkin creates a distinctive Halloween-inspired character without requiring an enormous project.
If you’re new to amigurumi, concentrate first on consistent tension, accurate stitch counting, balanced shaping, and careful assembly. Those fundamentals will improve almost every small crochet project you make afterward.
And if you’re an experienced crocheter, this type of project is a great opportunity to experiment with color combinations, hair texture, miniature accessories, and gift presentation while keeping the finished piece compact and practical.
Whether you make one for yourself, create a handmade Halloween gift, or build a collection of seasonal crochet accessories, the most rewarding part is seeing those small stitches become a character with its own personality.
Save this project for your next Halloween crochet session, gather your black and burgundy yarn, and start creating something handmade and wonderfully witchy.