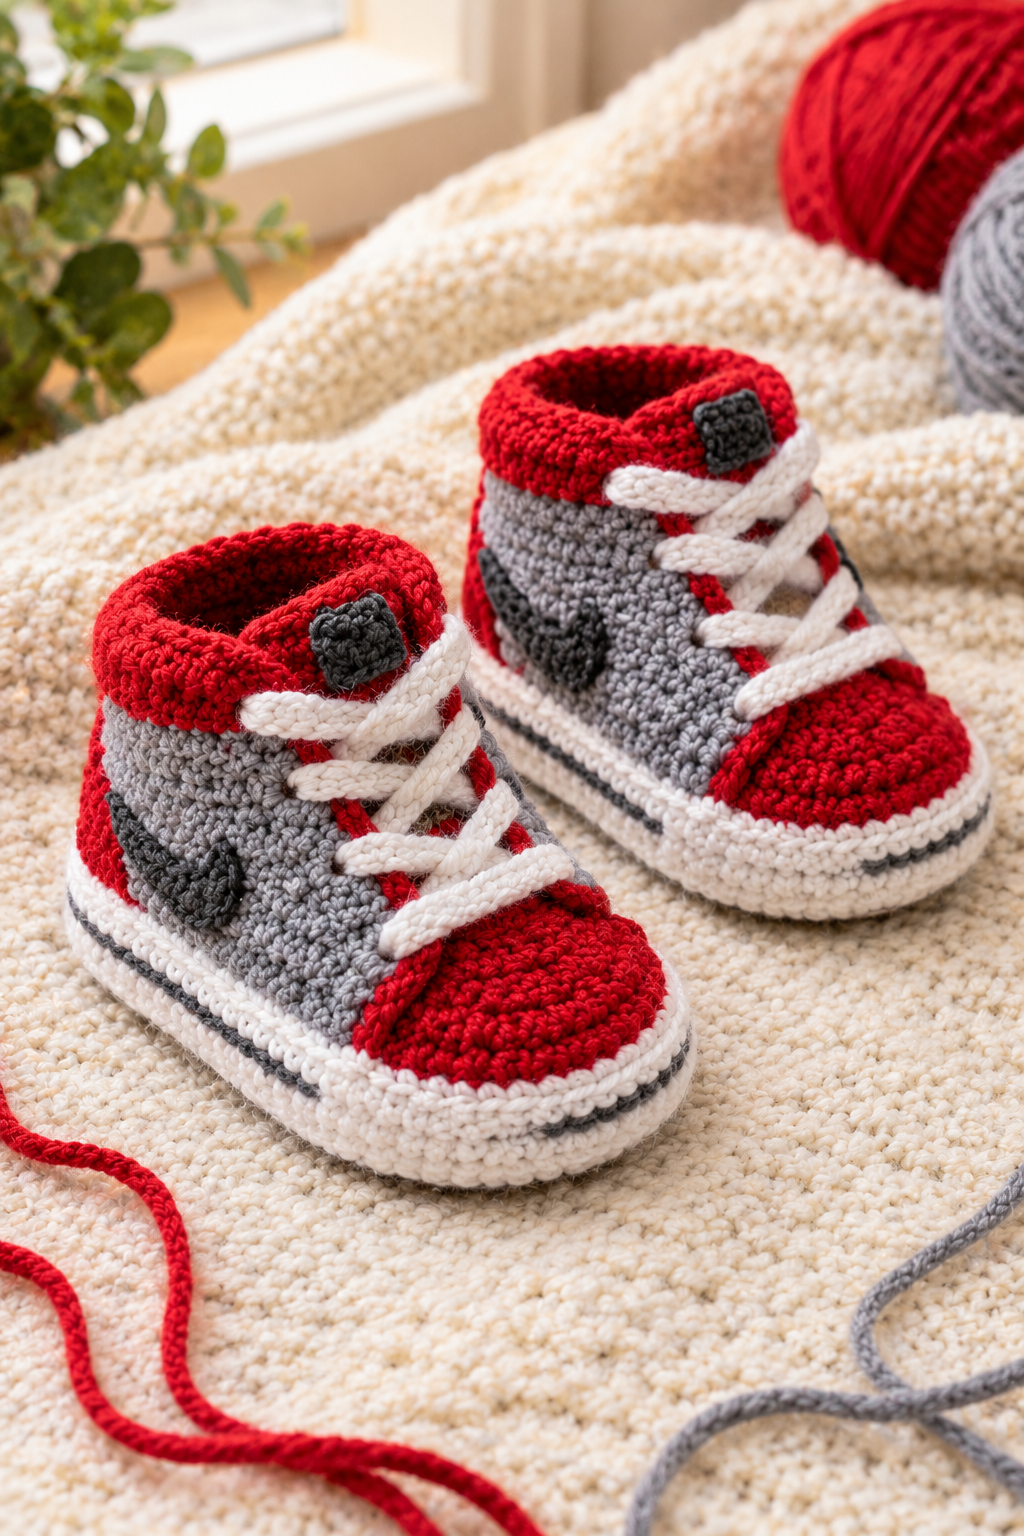
Some baby gifts get opened, admired for ten seconds, and then buried in a drawer. Tiny sneakers are not one of them. People pick them up, turn them over, and say “wait, you crocheted these?” before they’ve even said thank you.
That’s exactly what happened the first time I saw a pair of red and gray high-top booties with a little swoosh-style stripe on the side. They looked like they’d walked straight out of a sneaker store, only they were small enough to fit in your palm. And here’s the good news: they’re far less scary to make than they look.
In this guide, I’ll walk you through the whole thing, from picking yarn to stitching on the laces. I’ll also cover the stuff most patterns skip: why your sole curls up like a taco, why the left bootie ends up bigger than the right, and how to keep the red from bleeding into the white. If you’ve got basic crochet skills and a free weekend, you can make a pair of Nike-inspired crochet baby booties that look genuinely professional.
What You’re Making (and Who It’s For)
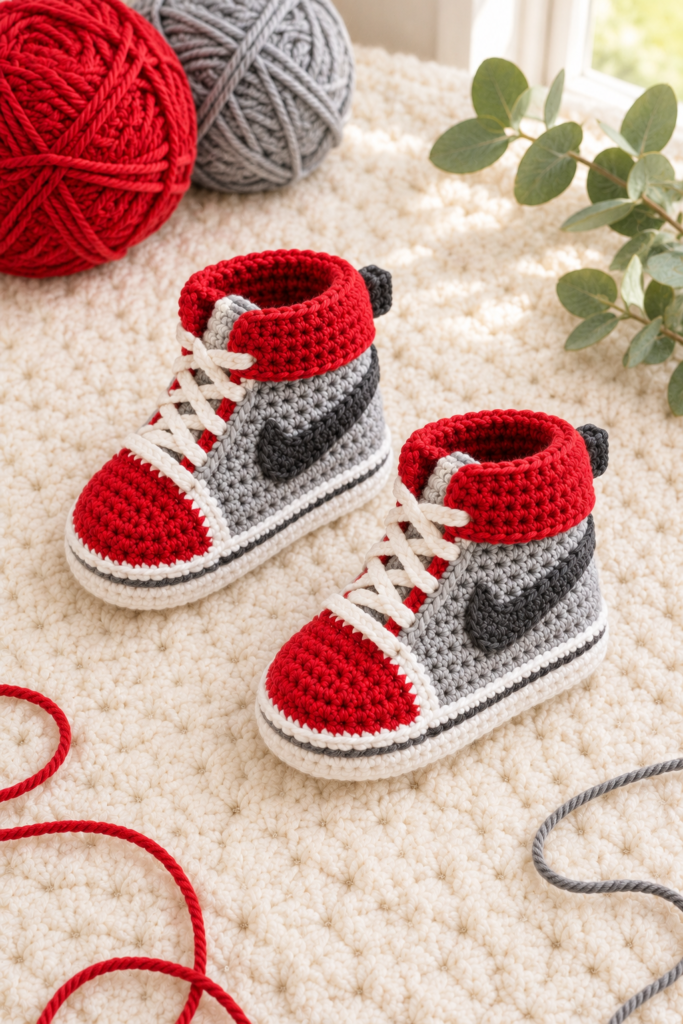
These booties are a high-top sneaker style with five color blocks: a white sole, a red toe cap, gray side panels, a folded red collar, and a charcoal swoosh-style detail with a matching heel tab. The white laces are purely decorative, which, as you’ll see later, is also the safest way to do it for a baby.
Skill level: Confident beginner to intermediate. You need to be comfortable with single crochet, slip stitch, increasing, decreasing, and changing colors. Nothing here is advanced, but it does take patience.
Sizes: The pattern notes below are written for 0 to 3 months, with a sole length of about 3.75 inches (9.5 cm). I’ll show you how to adjust for 3 to 6 and 6 to 12 months in the sizing section.
Time: Plan on about 3 to 4 hours per bootie if you’re a steady crocheter. Your first pair might take longer, and that’s completely normal.
Best for: Baby showers, newborn photo shoots, sports-fan families, and anyone who needs a gift that doesn’t look like every other gift on the table.
A Quick, Honest Note About the “Nike-Inspired” Part
The curved stripe on the side of these booties is a swoosh-style shape, and Nike is a registered trademark. Making a pair for your own baby, a friend, or a family member is completely fine. If you plan to sell finished booties, though, copying a famous brand logo can get you into trouble on marketplaces and craft sites. A simple fix is to design your own curved accent, like a lightning bolt, a wave, a star or a single stripe, and keep the same red, gray and white look. You’ll still get the sporty sneaker vibe without the legal headache.
Materials You’ll Need
Before you touch a hook, set everything out where you can see it. Nothing kills crochet momentum like hunting for a stitch marker with half a bootie hanging off your hook.
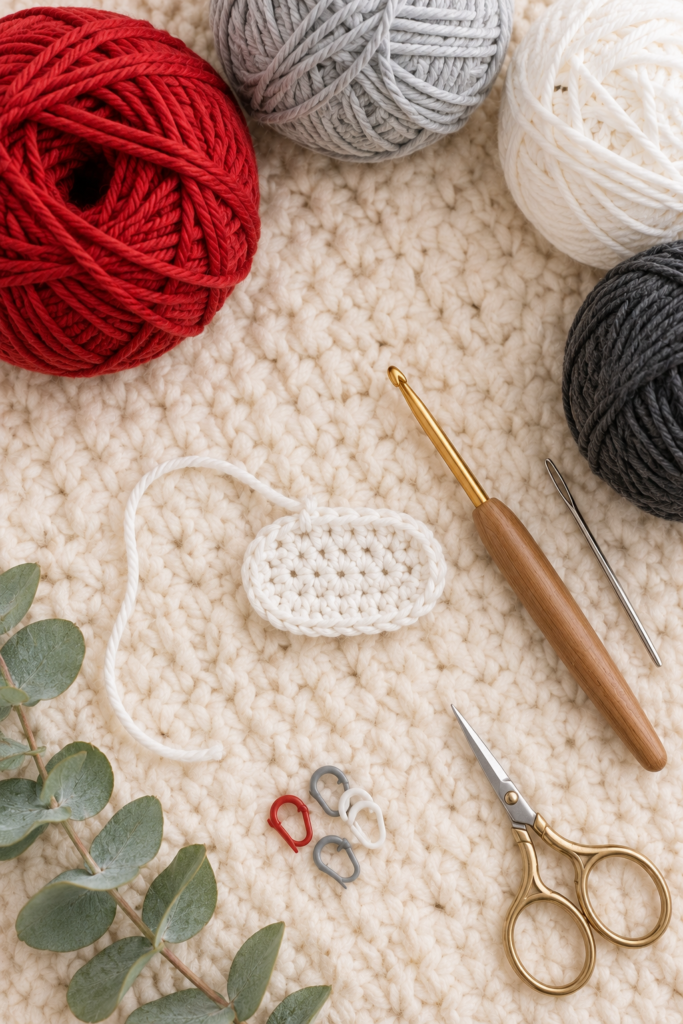
Yarn (DK or light worsted weight, cotton or cotton blend):
- Red: about 30 yards (27 m) per pair for the toe caps and collars, plus extra for the trim
- Gray (light): about 45 yards (41 m) per pair for the side panels
- White: about 60 yards (55 m) per pair for the soles and laces
- Charcoal or dark gray: a small amount, about 10 yards (9 m), for the swoosh, heel tabs and the sole accent line
Hook: 3.0 mm to 3.5 mm. Go down a size if your stitches look loose; baby booties should feel firm, not floppy.
Other tools:
- Tapestry needle (blunt tip)
- Sharp scissors
- Stitch markers in at least two colors (one for the start of the round, one for increases or the toe)
- A small ruler or tape measure
- Poly-fil is not needed, but a scrap of stiff interfacing or plastic canvas is useful if you want a firmer sole
A word on yarn choice. Cotton gives these booties the clean, sharp sneaker look. It holds its shape, shows stitch definition, and doesn’t pill much. Acrylic works too, and it’s easier to wash, but it can stretch. Avoid anything fuzzy, like mohair or brushed yarn, for baby items. Loose fibers can end up in little mouths, and they hide your stitches anyway.
If you’re buying yarn for a baby, check the label for machine-washable and, ideally, a fiber that’s soft against skin. Newborn feet are sensitive, and a scratchy collar is the quickest way to get a bootie kicked off.
Gauge and Sizing (Don’t Skip This, Seriously)
I know. Nobody wants to crochet a gauge swatch for a project the size of a lemon. But with booties, a loose or tight tension is the difference between a shoe that fits and a decoration.
Aim for about 5 single crochets per inch and 5.5 rows per inch in your main yarn and hook. If you’re getting fewer stitches per inch, your booties will come out bigger than the sizes below, so drop a hook size.
Approximate sole lengths:
- Newborn to 3 months: 3.5 to 3.75 inches (9 to 9.5 cm)
- 3 to 6 months: 4 to 4.25 inches (10 to 10.8 cm)
- 6 to 12 months: 4.5 to 4.75 inches (11.5 to 12 cm)
The easiest way to size up is to start with a longer foundation chain and add one or two extra rounds to the sole. Keep the same side height and collar, and the proportions stay cute.
A little tip that’s saved me more than once: measure the foot you’re making for, or ask the parent for the length of a pair of shoes or socks that fit. Babies’ feet vary a lot, and a pair that’s sized by guesswork often ends up in the “grow into it” pile.
Abbreviations (US Terms)
- ch = chain
- sl st = slip stitch
- sc = single crochet
- hdc = half double crochet
- inc = increase (2 sc in one stitch)
- dec = decrease (sc two stitches together)
- BLO = back loop only
- rnd = round
- st(s) = stitch(es)
A quick heads-up about stitch counts: bootie patterns are a little forgiving, and different yarns and hooks will land you at slightly different numbers. Treat the counts below as a reliable starting point and trust the fit over the math. If your sole is the right length and shape, you’re on track even if your total is off by a stitch or two.
Step 1: Crochet the White Sole
Everything in a bootie starts with the sole. If the sole is wrong, nothing above it will sit right, so give this part your full attention.
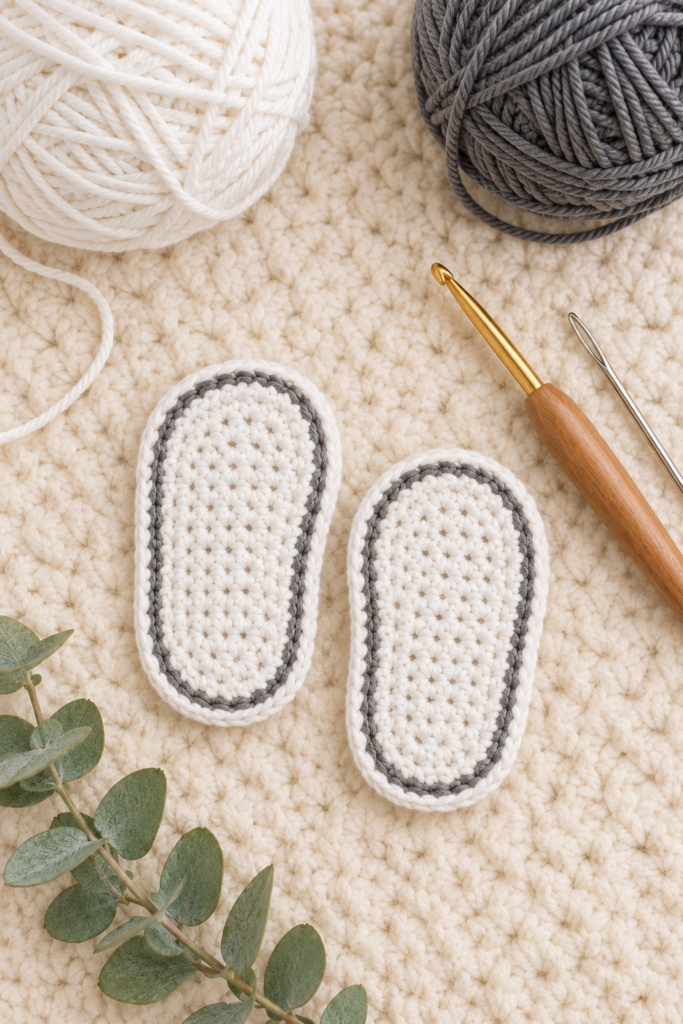
With white yarn, make a slip knot and ch 11.
Rnd 1: 2 sc in the 2nd ch from the hook, sc in the next 8 chs, 3 sc in the last ch. Rotate your work to the other side of the chain and sc in the next 8 loops, then 1 sc in the last loop. Don’t join; use a stitch marker and work in a continuous spiral. (22 sts)
Rnd 2: Work 2 sc in each stitch around the toe end and heel end curves, and sc in each stitch along the straight sides. You should land at about 34 sts. Move your marker up as you go.
Rnd 3: Increase gently around the toe and heel curves again, working one sc then an increase across the curves, and plain sc down the sides. You should land at about 44 sts.
Rnd 4 (gray accent line): Switch to charcoal or gray. Work 1 sc in each stitch around, with no increases. This is the thin line you see inside the sole in the photo above. Fasten off the gray, and carry on with white.
Rnd 5 (outer edge): With white, sc in each stitch around, adding a couple of increases at the toe and heel curves so the edge lies flat. Join with a sl st to the first stitch.
Now lay the sole on a table and check it. It should be flat, oval, and slightly narrower at the heel than at the toe. Measure it against your target length.
If your sole is curling up like a bowl: you’ve got too few increases. Pull out the last round and add one more increase on each curve.
If your sole ripples like a potato chip: you’ve got too many increases. Take one out on each curve.
If the sole is lopsided: check that your increases are mirrored on both curves. Placing a stitch marker at the center of the toe and the center of the heel helps a lot.
Make two soles before you move on. Seeing a matched pair also gives you a nice little motivation boost.
Step 2: Build the Walls and the Red Toe Cap
Now the sole turns into an actual shoe. You’ll work a round in the back loops only to form a ridge, then stitch up the walls.
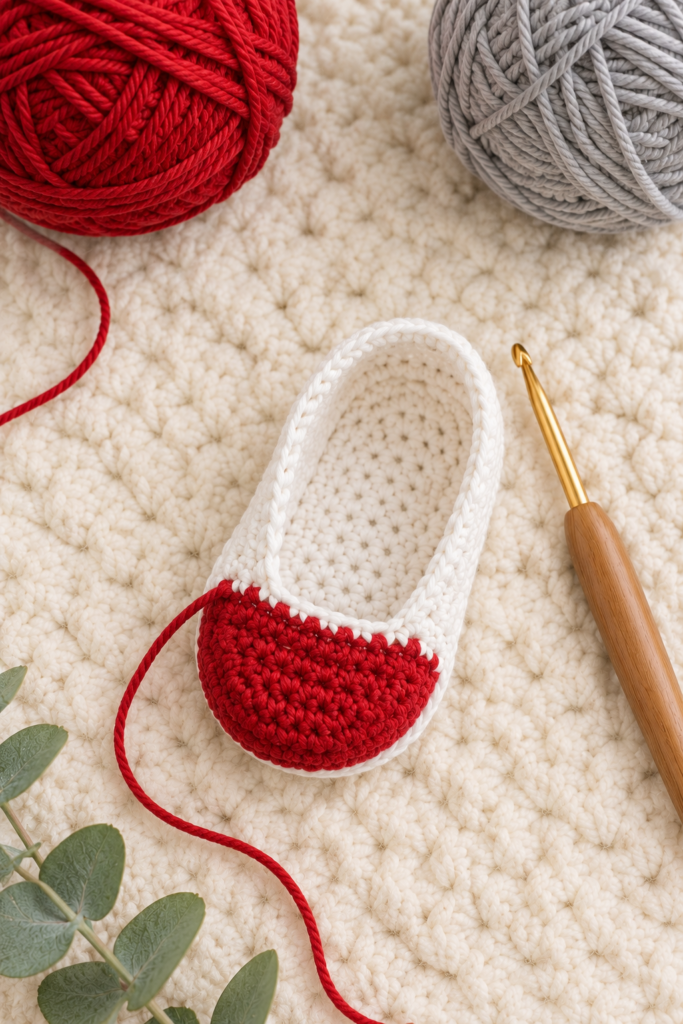
Rnd 1 (BLO): With white, work 1 sc in the back loop only of each stitch around. This creates a defined edge where the sole meets the wall and gives the bootie that classic sneaker shape.
Rnds 2 to 4: Sc in each stitch around, working in both loops. Stop when the wall is about 0.75 inch (2 cm) tall. Keep your tension even and your stitches snug; this is what gives the bootie structure.
You’ll notice the photo above shows the white wall wrapping around the heel and sides while the front is taken over by the red toe cap. That’s where we’re headed.
Making the red toe cap. Find the center of the toe and count out the 14 stitches that sit around the front curve. With red yarn, attach to the first of those 14 stitches and work back and forth in rows:
Row 1: Sc in each of the 14 sts. Turn. (14)
Row 2: Ch 1, dec, sc across until 2 sts remain, dec. Turn. (12)
Row 3: Ch 1, sc across. Turn. (12)
Row 4: Ch 1, dec, sc across until 2 sts remain, dec. Turn. (10)
Rows 5 and 6: Ch 1, sc across. Turn. (10)
Then, with the right side facing, sl st or sc along the sides of the cap and down into the wall so it’s joined smoothly. If you want the thin white line you see between the red and gray in the final bootie, work one round of white sl st or sc around the cap edge afterward.
The most common problem here: the red cap looks like a flat pancake sitting on top of the toe. That happens when the cap is too wide or too long for the front of the sole. Rip back and reduce the number of starting stitches to 12, or work one more decrease row. A good toe cap should follow the curve of the toe, like the front of a real sneaker.
Another common problem: the red yarn peeks through the white. When you carry red behind white, tiny red loops can show on the sole side. Keep your carried yarn loose and tuck it inside the wall, or just cut and weave in the end. It’s a little more work, but it keeps the white crisp.
Step 3: Add the Gray Side Panels
This is where the bootie starts to look like a sneaker. The gray panels wrap the sides and the heel and rise up toward the ankle, with a gap left open at the front for the laces.
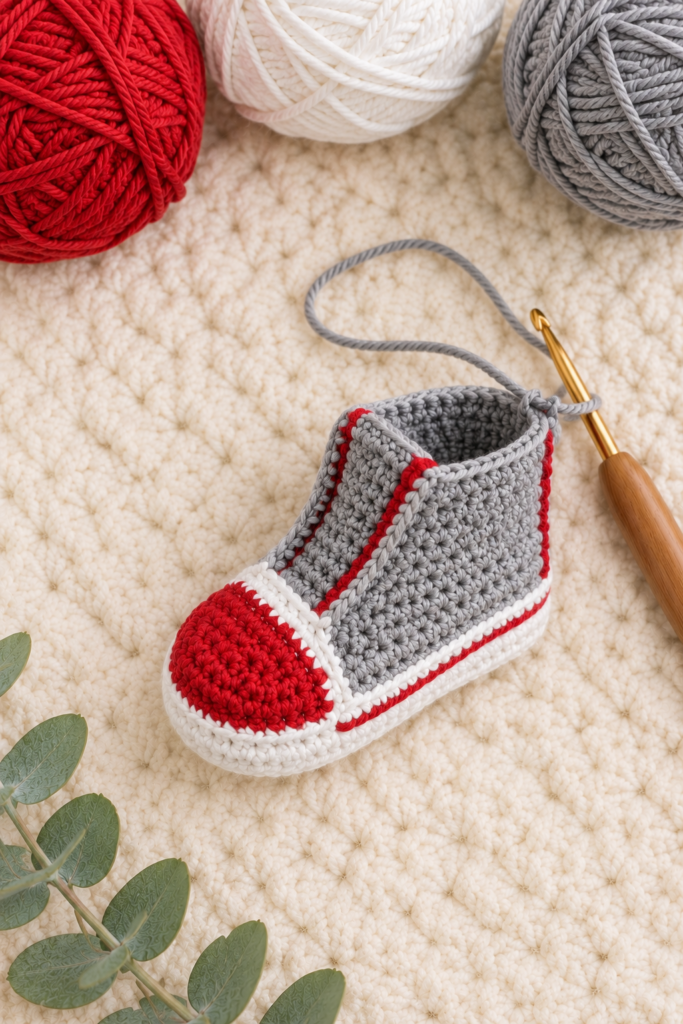
Join gray yarn to the wall at the point where the toe cap meets the side (on the outside, near the arch). Working around the heel and the other side, sc in each wall stitch until you reach the other edge of the toe cap.
At the front of the bootie, between the two edges of the toe cap, you’ll leave an opening. This opening is the instep, where the foot goes in and where your laces will sit later.
How to shape the upper:
- Work in the round across the sides and heel in gray for about 6 rounds, until the panels are about 1.25 inches (3 cm) above the sole.
- At the instep opening, chain 8 to 10 at the end of each round to bridge the gap, then continue in the round across the chain. This keeps the opening open while still letting you work a continuous spiral.
- On your next round, sc into each chain, so the opening has a bottom edge.
If you prefer, you can also work the panels in rows (turn at the end of each row) and sew up the heel seam later. Rounds give you a seamless look; rows give you more control over shaping. Use whichever you find easier.
Red trim beside the opening. Next, with red yarn, work one row of sl st or sc along each edge of the instep opening, the way you can see in the photo. This frames the laces and adds that sharp sneaker line. Add a row of ch-2 spaces on both edges if you want actual lace loops, which I’ll explain in the lacing section.
The problem I see most here: the opening gapes too wide. If the front of your bootie flares open like a clam, you’ve either chained too many stitches over the instep or your gray rows are too loose. Pull out and chain 2 fewer stitches. A narrower opening hugs the foot better and looks cleaner, too.
And the opposite problem: it’s too tight to get over the foot. That tells you your gauge is too tight or your chain is too short. Try a hook size up for the last 2 rounds of the panel and add 2 chains to the opening.
Step 4: The Folded Red Collar, Swoosh and Heel Tab
If the toe cap is the face of a sneaker, the collar is its personality. A chunky folded cuff in red turns a plain bootie into a proper high-top.
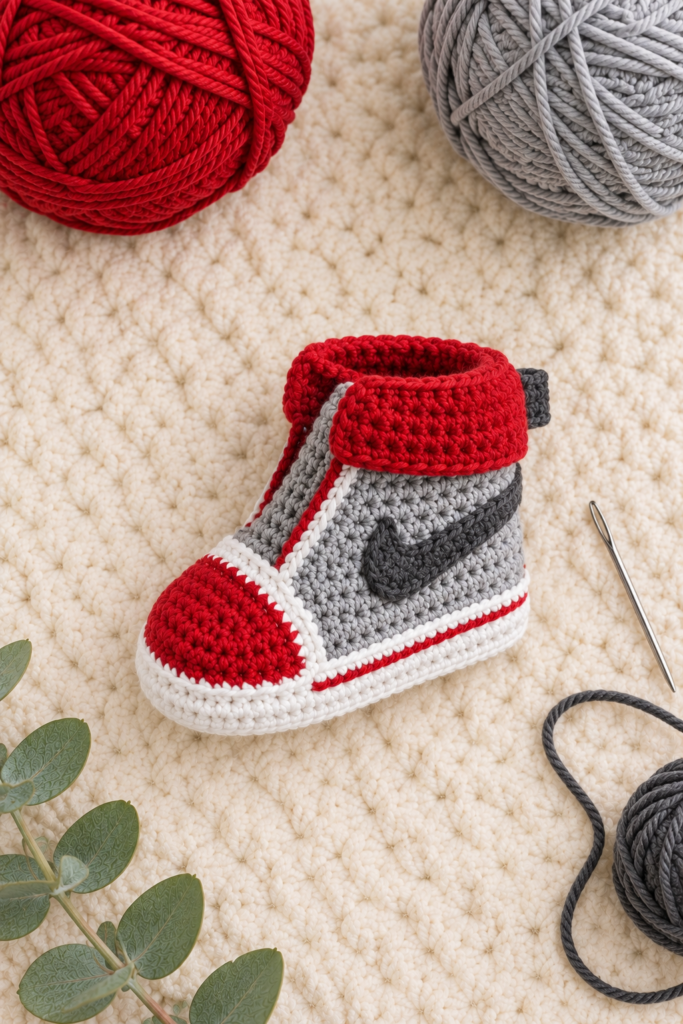
The collar. Attach red yarn at the top edge of the gray panel, at the back of the heel. Work in the round, 1 sc in each stitch around the top, including across the chain bridge at the front.
Keep working in sc rounds until the collar is about 1.5 inches (3.8 cm) tall, or about 8 rounds. Make it taller than you think you need, because you’re about to fold it down. Fasten off and weave in your end.
Fold the collar over to the outside, and tack it in place with a few small stitches at the heel and each side so it stays folded. This is the part that gives you the chunky, padded look you see in the photo.
The swoosh-style detail. With charcoal yarn, work the swoosh as a flat appliqué rather than crocheting it into the panel. It’s much easier to control the shape this way.
- Ch 16.
- Sl st in the 2nd ch from the hook, sc in the next 2, hdc in the next 4, sc in the next 4, sl st in the next 3, sl st in the last.
- Without turning, work back along the other side of the chain: sl st in the first 2, sc in the next 4, hdc in the next 3, sc in the next 3, sl st in the last 2.
- Fasten off, leaving a long tail for sewing.
You should end up with a tapered, curved piece that’s fat at one end and thin at the other. It won’t look perfect straight off the hook, but that’s fine. Pin it to the gray panel, shape the curve the way you want it, and then sew it down with small, even stitches along the edge.
A problem you may hit: the swoosh looks like a banana. If the curve is too deep or the shape is too rounded, make the starting chain 2 longer and keep the tapered end very thin. Once it’s pinned on the bootie, gently stretch the thin tip toward the heel so it points upward.
The heel tab. Using charcoal, ch 5. Sc in the 2nd ch from hook and across (4 sc). Work 4 more rows of 4 sc. Fasten off, leaving a tail, and sew the tab to the center back of the collar so it sticks out slightly. It’s a tiny detail, but it’s what makes people say, “Oh, that’s a real sneaker.”
Step 5: Laces, Finishing Touches and Safety
The lacing is the last big step, and this is where safety matters most.
Making the laces. With white yarn, make a chain of about 40 to 50 stitches, long enough to zigzag up the front opening. Fasten off, and weave the ends in.
Thread the chain through the ch-2 loops at the edges of the instep opening, crossing over the way you would on a regular shoe. Tie a small bow at the top if you like.
Now the important part. Long loose laces are not safe on baby shoes. They can come undone, and babies pull on everything. So, these laces are decorative only:
- Sew the crossed laces permanently to the panel with tiny stitches every few crossings.
- Keep the bow small, and sew it down.
- Trim any tails short and weave them in.
- Never use buttons, beads, safety eyes, or anything a baby can pull off.
That’s also why I recommend crocheting the swoosh and the heel tab rather than gluing on felt. Everything on this bootie should be stitched down tight.

Weaving in ends. Weave each tail through at least three or four stitches in one direction, then back through in the other. Cotton is slippery, and ends have a habit of working loose after a few washes. Snip close to the work once you’re sure it’s secure.
Blocking. Lightly mist the finished bootie with water, shape the collar and toe cap with your fingers, and let it dry flat. Stuff the bootie with a rolled-up washcloth while it dries so it holds its shape. Cotton responds really well to this, and it makes the stitches look even.
Troubleshooting: The Problems Nobody Warns You About
Here’s the rundown of the issues I run into most often, along with how to fix them.
My two booties don’t match.
Count your rounds and stitches on both, and write the numbers down as you go. Even a tiny difference in tension changes the size. If one is clearly bigger, make the second with a hook size down, or add an extra round to the smaller one. Also check that you used the same number of rows on the collars.
The red is bleeding onto the white.
Wash your finished work only in cold water, with a gentle detergent, and never soak it. Before you start, wash a small swatch of the red yarn in cold water on a white cloth; if the color runs, choose a different brand. Dark reds are the worst offenders. Once you’ve found a yarn that stays put, it’s worth buying extra of it.
The toe cap puckers.
Puckering usually means the cap rows are being joined to the wall too tightly. Work your joining stitches a little looser and make sure you’re picking up the right loops. If it’s still puckering, try working the cap in hdc rather than sc to give it more give.
The collar flops over instead of standing up.
This happens when the collar yarn is too soft or the rounds are too loose. Switch to a hook one size down for the collar, or work the last two rounds in BLO to give the fold a crisp edge. A little steam from an iron held above the work (never pressing on it) also sets cotton nicely.
The bootie falls off the baby’s foot.
Real talk: babies kick, and booties slide off. A snug ankle makes a huge difference. Weave a thin elastic cord or a chain of yarn through the top round of the gray panel and tie it loosely, or work a round of sc decreases at the ankle to bring it in slightly. Make sure the opening is snug but never tight enough to leave marks.
It looks too small (or too big) for the baby.
Babies change sizes fast. Making the next size up is the easiest fix, but you can also adjust the length by adding or removing a round on the sole. If you’re gifting, a good tip is to make the 3 to 6 month size. Newborn sizes are outgrown almost instantly, and a baby can wear a slightly bigger pair for a lot longer.
The swoosh keeps coming loose.
Sew it down with the same color yarn it’s made of, using small stitches close to the edge, and go around twice. Pulling the thread too tight will pucker the panel, so ease it a little as you go.
Color Swaps and Fun Variations
Once you’ve got the construction down, you can change the look in a lot of ways without altering the pattern:
- Team colors: Navy and gold, green and white, purple and yellow. Basically any combination that suits your favorite team.
- Soft pastels: Pink, cream and sage for a gentle, gender-neutral look.
- Low-top version: Skip the collar, stop the gray panel at about 1 inch, and finish with a single round of red sc around the opening. You can see this style in the work-in-progress photo above.
- Custom accent: Replace the swoosh with a star, a lightning bolt, or your baby’s initial.
- Matching set: Make a little crochet beanie in the same red and gray for a complete outfit.
Care Instructions to Share With Gift Recipients
If you’re giving these away, include a small care card. Parents appreciate it, and it helps the booties last.
- Hand wash in cool water with mild soap, or machine wash on a delicate cycle in a mesh bag.
- Don’t wring or twist.
- Reshape while damp and lay flat to dry.
- Keep out of direct heat and sunlight.
- Check the stitching regularly for loose threads or worn spots.
Frequently Asked Questions
Can a beginner make these crochet baby booties?
If you know single crochet, increasing and decreasing, you can. The color changes and the swoosh take some practice, so try a quick practice sole first.
What size hook should I use?
A 3.0 to 3.5 mm hook usually works for DK or light worsted cotton. Always check your gauge, because tight stitches are what give the bootie its shape.
Is cotton or acrylic better?
Cotton holds its shape and gives sharper stitch definition. Acrylic is easier to wash and often cheaper. Both work, as long as the yarn is soft and labeled baby-safe.
How much yarn do I need for one pair?
Roughly 145 yards (133 m) total across all four colors for the 0 to 3 month size. Buy a little extra of each color to be safe, especially the white.
Are the laces safe for babies?
Only if they’re sewn down and kept short. Never leave loose, long laces on baby shoes.
Can I sell these?
You can sell handmade crochet booties, but avoid using a brand logo like the Nike swoosh on items you sell. Create your own accent design to stay on the safe side.
How do I stop the booties from slipping off?
Make the ankle snug, sized to the baby’s leg, and use a soft elastic or chain through the top round if needed.
Final Thoughts
There’s something really satisfying about turning a few balls of yarn into a tiny sneaker. Yes, there are a few steps and a handful of small details, but each piece is simple on its own. Take it one section at a time, check your fit as you go, and don’t be afraid to rip back a round when something doesn’t look right. Every crocheter does it, and the booties come out better for it.
When you finish your first pair, set them on a cream blanket, take a photo in soft window light, and show them off. And if you have a baby shower coming up, you’ve just solved your gift problem.
If you try this pattern, I’d love to see how yours turn out. Share your photos, your color choices and any tweaks you made, and happy crocheting.
Pin it for later: Save this Nike-inspired crochet baby booties guide to your Pinterest boards so you can find it when the next baby shower sneaks up on you.