Tiny crochet projects have a way of becoming the pieces we reach for most often. They are quick to pick up, use small amounts of yarn, and can turn a simple idea into something genuinely personal. This Charming Crochet Fairy House Keychain – Free Amigurumi Pattern is a perfect example.
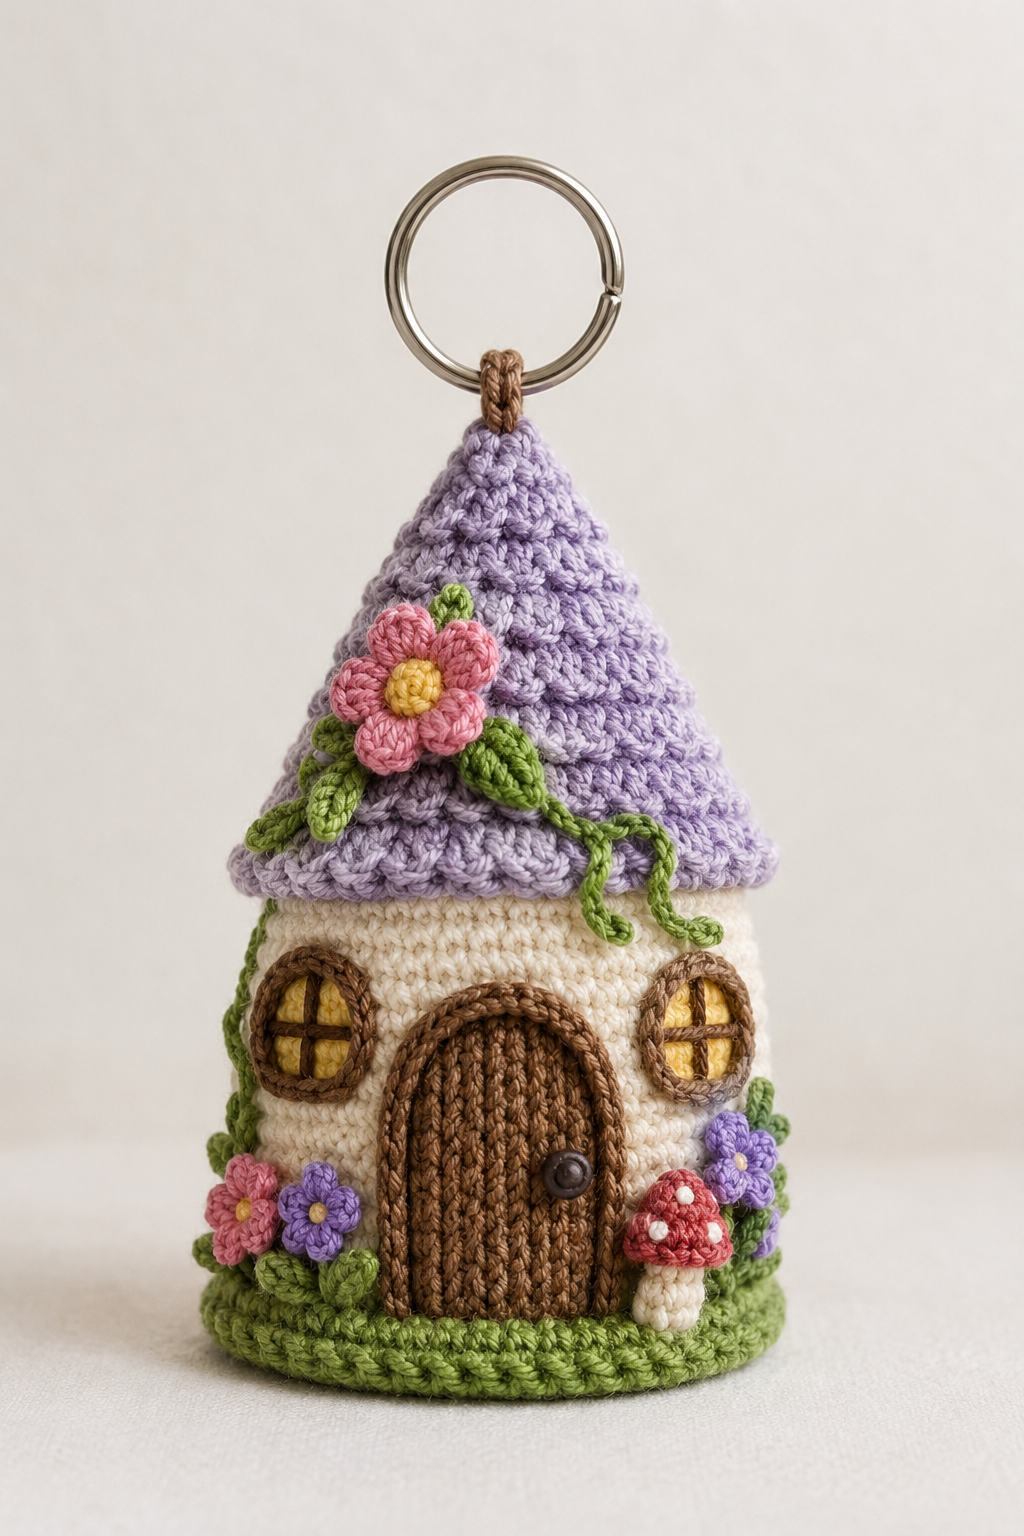
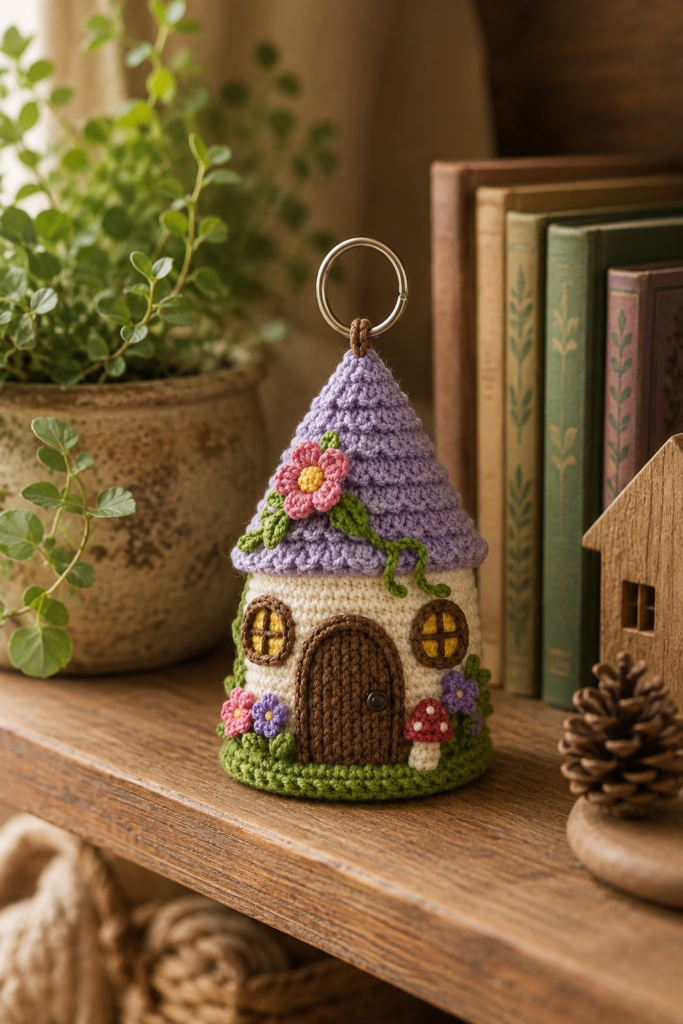
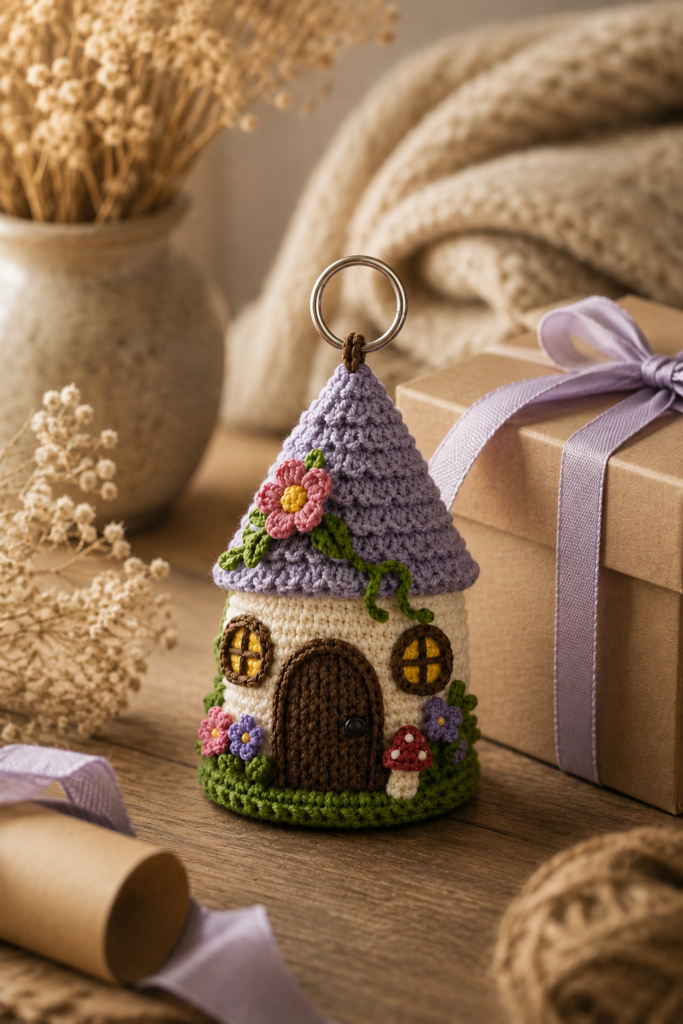
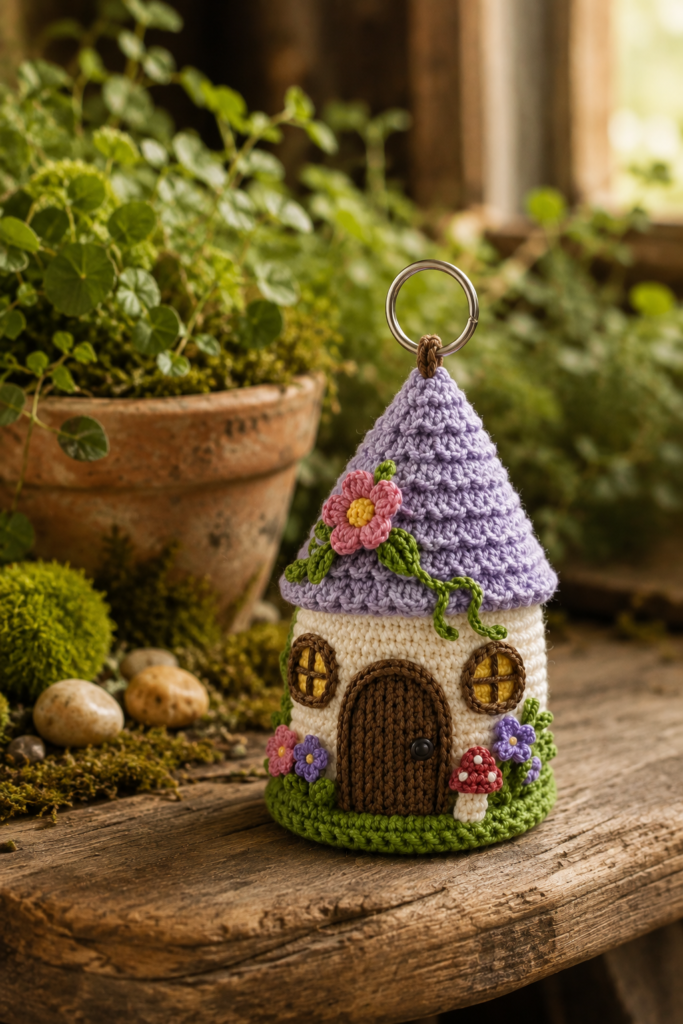
The design is a miniature fairy cottage worked in soft crochet textures, complete with a lavender pointed roof, cream-colored walls, a brown arched door, glowing yellow windows, colorful flowers, green vines, a tiny mushroom, and a green grassy-looking base. A metal keyring at the top turns the finished cottage into a practical little charm for keys, backpacks, purses, or craft bags.
What makes this project particularly appealing is the amount of character packed into such a small piece. The basic cottage shape is simple, but the flowers, leaves, windows, door, roof texture, and mushroom give it the feeling of a tiny storybook home.
This guide walks through the materials, construction approach, color choices, finishing techniques, and practical tips that can help you create a polished miniature fairy house.
Why You’ll Love This Crochet Fairy House
A fairy house is already a naturally charming crochet subject, but turning it into a keychain makes the project even more useful.
The finished piece can be:
- Attached to a backpack
- Used as a purse charm
- Added to a keyring
- Given as a handmade gift
- Displayed with other miniature crochet pieces
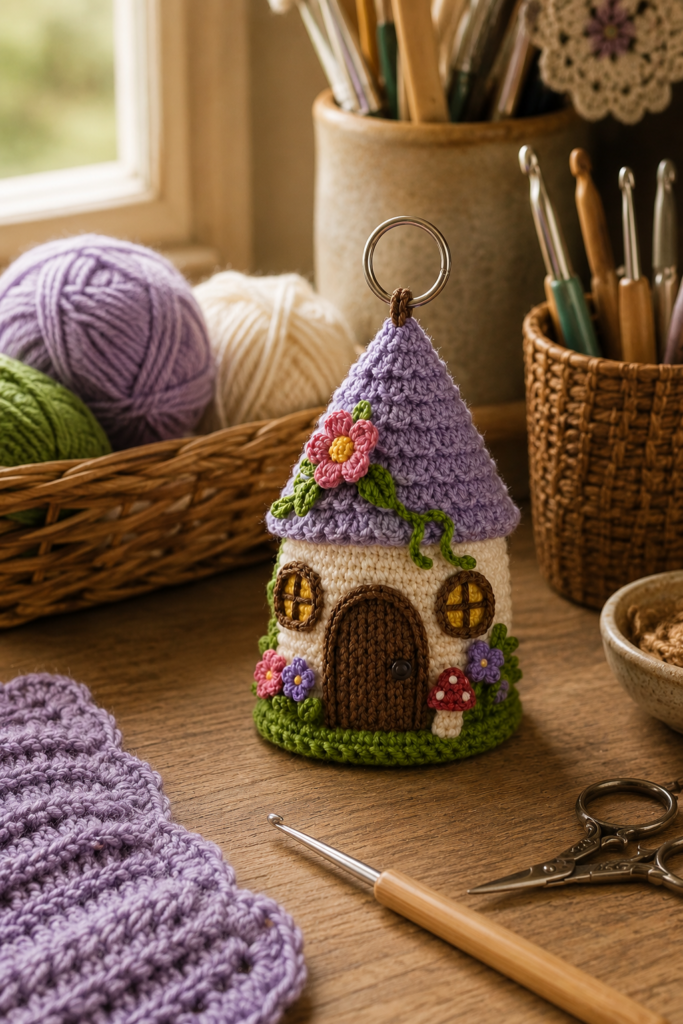
- Used as a decorative craft-room accent
- Included with a birthday or holiday gift
It is also a great project for using small amounts of leftover yarn.
You don’t need an entire skein of every color. The flowers, leaves, mushroom, door, windows, and roof details all use relatively small amounts of yarn, making this the kind of project where your scrap-yarn collection can actually become useful.
What Makes This Fairy House Keychain Unique?
The most noticeable feature is the lavender pointed roof.
Instead of using a plain rounded cottage top, the tall triangular roof gives the piece its fairy-tale appearance. The textured crochet surface also adds dimension without requiring complicated embellishments.
Below the roof is a cream-colored cottage body with two round windows. The windows use brown framing and yellow centers, creating the appearance of warm light inside the little house.
The brown arched door becomes the visual focal point of the lower section.
Around the bottom are colorful flowers, green leaves, curling vines, and a small red-and-white mushroom. Finally, the green base ties the entire cottage together.
The combination of colors is important:
- Lavender creates the magical roof
- Cream keeps the cottage soft and warm
- Brown gives the door and windows a natural wooden appearance
- Green creates the garden-like base
- Pink and purple add floral color
- Red and white make the mushroom stand out
Together, these details create a miniature cottage that feels like it belongs in a tiny enchanted garden.
Materials You’ll Need
You can keep the material list fairly simple.
Yarn
For a design inspired by the reference image, gather:
- Lavender yarn
- Cream or ivory yarn
- Brown yarn
- Green yarn
- Pink yarn
- Purple yarn
- Red yarn
- White yarn
- Small amount of yellow yarn
- Small amount of dark yarn if needed for tiny details
Smooth cotton or cotton-blend yarn is particularly suitable for this type of amigurumi.
The stitches remain easy to see, and the finished cottage keeps a neat shape.
Crochet Hook
Use a hook appropriate for your selected yarn.
For amigurumi-style crochet, a slightly smaller hook than you might normally use with the same yarn can help create tighter fabric.
The goal isn’t simply to use the smallest hook possible.
You want stitches that are firm and neat while still being comfortable to work.
Other Supplies
You’ll also need:
- Tapestry needle
- Stitch marker
- Small scissors
- Fiberfill, if your construction requires stuffing
- Keyring
- Strong sewing thread or matching yarn
- Optional fabric stiffener for specific decorative applications
If this is going to be a frequently handled keychain, choose sturdy metal hardware.
Choosing Yarn for a Miniature Fairy House
Yarn selection makes a surprisingly big difference in miniature crochet.
For this project, I would prioritize stitch definition over extreme softness.
Smooth cotton works particularly well because the roof texture, door, window frames, vines, and flowers remain visible.
Very fluffy yarn can hide the tiny details that make the cottage special.
What About Yarn Weight?
You can make the fairy house with different yarn weights.
A thinner yarn will create a smaller, more delicate keychain.
A thicker yarn will create a larger cottage with more visible stitches.
If you’re changing yarn weight, remember that the finished proportions may change too. Don’t simply increase the yarn size without checking how the roof, door, windows, and base relate to one another.
Crochet Skills You’ll Need
This project is best suited to a confident beginner or intermediate crocheter.
You should be comfortable with:
- Magic ring
- Single crochet
- Chain stitch
- Slip stitch
- Increasing
- Decreasing
- Working in rounds
- Changing colors
- Sewing crochet pieces together
- Weaving in yarn ends
The individual techniques aren’t necessarily difficult.
The challenge is working at a small scale and keeping the different components proportional.
If you’re newer to amigurumi, make the main cottage body slowly and don’t worry about speed.
How the Crochet Fairy House Is Constructed
One of the easiest ways to approach this project is to divide it into separate sections.
Instead of thinking, “I have to crochet an entire fairy house,” think of it as several small projects that eventually become one cottage.
The main components are:
- Green base
- Cream cottage body
- Lavender roof
- Brown door
- Two windows
- Flowers
- Green leaves and vines
- Small mushroom
- Keyring attachment
This makes the project easier to organize and gives you opportunities to check the proportions as you work.
Step 1: Crochet the Cottage Base
Begin with the bottom portion of the house.
The green base creates the garden-like foundation visible around the cottage.
Keep the base relatively firm and flat.
A clean foundation is important because every section above it depends on the base maintaining its shape.
If the bottom begins curling unexpectedly, check your stitch tension and increase placement before continuing.
Step 2: Build the Cream Cottage Body
The cream-colored body creates the main walls of the fairy house.
Work the body evenly so the sides remain relatively straight.
Avoid adding too much stuffing if your version uses stuffing. Overstuffing can make the walls bulge and can change the proportions of the roof.
The body should look compact and sturdy rather than overly round.
A Useful Beginner Tip
Place the project on a flat surface occasionally while you’re working.
If it rocks or leans, it’s easier to correct the shape before you’ve attached the roof and decorations.
Step 3: Create the Lavender Roof
The pointed roof is the feature that gives this project its fairy-house personality.
Work the roof separately or as your chosen construction method requires, gradually creating the pointed silhouette.
The reference design has a textured lavender roof rather than a smooth fabric-like surface.
Pay attention to your tension here.
If your stitches become too loose, the roof may lose its defined triangular shape.
Once finished, check that the roof sits evenly around the top of the cottage body.
Step 4: Crochet the Brown Door
The arched brown door is one of the most important decorative details.
Its darker color contrasts with the cream cottage walls and immediately draws attention to the front of the house.
Keep the door slightly rounded at the top to match the cottage style.
The vertical texture of the crochet also helps create the appearance of a tiny wooden door.
Once the door is complete, position it carefully before sewing it down.
A door that is even slightly off-center can make the entire cottage appear tilted.
Step 5: Add the Windows
The two round windows sit on either side of the door.
The reference design uses:
- Brown outer framing
- Yellow centers
- Dark dividing lines
These details give the impression that the cottage is glowing from inside.
Because the windows are small, don’t try to add more detail than the scale allows.
Simple, clean shapes will usually look better than overcrowded miniature decoration.
Step 6: Make the Flowers
The flowers are where you can have fun with color.
The reference design includes pink and purple flowers with contrasting centers.
Small flowers can be made separately and sewn onto the cottage.
Try to keep their sizes reasonably consistent.
If one flower is significantly larger than the others, it may overpower the miniature house.
Flower Placement
Don’t attach every flower immediately.
Arrange them around the lower section first.
Take a quick look from the front and sides.
Once you’re happy with the arrangement, sew them securely into place.
Step 7: Add the Green Leaves and Vines
The green leaves and curling vines give the house a garden-like appearance.
This detail is especially important because it connects the colorful flowers with the green base.
Thin crocheted chains or narrow crocheted strands can work well for vines.
Avoid making them too thick.
The vines should frame the cottage rather than cover the windows or door.
Step 8: Make the Tiny Mushroom
The red-and-white mushroom is a small detail, but it adds a lot of personality.
Use red for the cap and white for the stem and spots.
Because this is such a small component, keep your stitches firm and your shaping simple.
Attach the mushroom near the base where it complements the flowers without hiding the door.
Step 9: Assemble the Fairy House
Once all the individual pieces are ready, lay them out together.
Before sewing anything permanently, check:
- Is the roof centered?
- Is the door straight?
- Are the windows at similar heights?
- Are the flowers balanced?
- Does the mushroom sit naturally?
- Is the green base even?
- Is the keyring attachment centered?
This simple check can save a lot of time.
It is much easier to reposition an unattached flower than to remove one that has already been sewn securely.
Attaching the Keyring
The metal keyring turns your miniature cottage into a practical accessory.
The attachment point should be strong because a keychain is exposed to more movement than a decorative amigurumi.
The reference design uses a metal ring attached at the top of the lavender roof.
Reinforce this area several times with strong yarn or thread.
Then gently test the connection by pulling the ring.
If it moves independently of the cottage, strengthen it before using the finished piece.
Beginner Tips for Cleaner Results
Small crochet can be surprisingly unforgiving, but a few habits make the process much easier.
Keep Your Tension Consistent
Try not to crochet one section very tightly and another loosely.
Different tension can change the size of your pieces.
Count Your Stitches
A single missed increase can affect the shape of a miniature component.
Use a stitch marker and check your work regularly.
Weave Ends as You Go
Don’t leave every yarn tail until the final assembly.
Finishing a few ends after each component keeps the final stage much less overwhelming.
Take Your Time With the Roof
The roof is the most visually prominent part.
If it isn’t centered or the shape isn’t symmetrical, the whole cottage can look uneven.
Photograph Your Progress
Take quick front and side photographs during assembly.
A camera can reveal crooked doors, uneven windows, or an off-center roof that might not be obvious while you’re holding the piece.
Common Mistakes and How to Fix Them
The Cottage Looks Too Wide
This can happen when the body is overstuffed or your crochet tension is too loose.
Try using firmer stitches and less stuffing.
The Roof Doesn’t Sit Properly
Check the circumference of the roof opening against the top of the cottage.
If the roof is too small or too large, the proportions won’t look right.
The Windows Look Uneven
Position both windows before sewing.
Use the door as your center reference point.
The Flowers Hide the Cottage
Miniature decorations should enhance the house rather than cover its important features.
Move the flowers slightly outward or lower if necessary.
The Keyring Feels Loose
Reinforce the top attachment with several passes of strong thread or yarn.
This is particularly important if the keychain will be attached to a backpack.
How to Customize Your Crochet Fairy House
Once you understand the basic construction, there are plenty of ways to create your own version.
Change the Roof Color
Lavender gives the reference design a magical appearance, but you could experiment with:
- Dusty pink
- Sage green
- Soft blue
- Cream
- Deep purple
Change the Door
Brown creates a natural wooden effect, but darker chocolate, gray, or muted green could create a completely different mood.
Create Seasonal Versions
For spring, use pastel flowers.
For autumn, try rust, mustard, and brown.
For winter, replace some of the greenery with white or icy blue accents.
The important thing is to preserve the recognizable cottage structure while allowing the decorative colors to change.
Where to Use a Crochet Fairy House Keychain
There are plenty of ways to use the finished piece.
Backpack Charm
Attach it to a backpack zipper for a whimsical everyday accessory.
Purse Charm
The small size works nicely on a neutral tote or handbag.
Keyring
Of course, it can be used with your everyday keys.
Handmade Gift
It makes a thoughtful little extra for a friend who loves crochet, gardening, fairy gardens, or cottage-inspired décor.
Craft-Room Decoration
Even if you don’t want to use it as a keychain, the finished cottage can be displayed with other handmade miniatures.
Care and Storage
Crochet keychains are usually easy to maintain.
Keep the fairy house away from excessive moisture and direct sunlight for long periods.
For light dust, use a soft dry brush or cloth.
If deeper cleaning is necessary, check the care instructions for the specific yarn you used before applying water.
Avoid pulling the flowers, vines, mushroom, or keyring.
When storing the piece, place it somewhere dry where the roof and decorative pieces won’t be crushed.
Proper storage is especially important for miniature crochet because small decorative elements can lose their shape if they are compressed for a long time.
Frequently Asked Questions
Is this crochet fairy house suitable for beginners?
It can be a good project for a confident beginner who already understands basic crochet stitches. The individual components are manageable, but the small size and final assembly require patience.
What yarn is best for a crochet fairy house?
Smooth cotton or cotton-blend yarn is a strong choice because it provides clear stitch definition and helps small decorative elements keep their shape.
How much yarn does a crochet fairy house use?
A miniature keychain generally requires only small amounts of each color. The exact quantity depends on yarn weight, hook size, tension, and the final size of your house.
Can I make the fairy house without a keyring?
Yes. Simply leave out the keyring hardware and use the finished cottage as a small decorative amigurumi.
Can I change the colors?
Absolutely. Changing the roof, flowers, door, or greenery is an easy way to personalize the design.
Is this suitable as a children’s toy?
Because the design includes a metal keyring and very small decorative components, it should be treated as a decorative craft/accessory rather than automatically assuming it is suitable for babies or young children.
How do I keep the crochet house standing upright?
Keep the base firm and even, avoid excessive stuffing, and check the cottage on a flat surface before attaching the decorative pieces.
Final Thoughts
This Charming Crochet Fairy House Keychain – Free Amigurumi Pattern is a wonderful little project for anyone who enjoys miniature crochet and whimsical handmade décor.
The lavender pointed roof immediately gives the cottage its fairy-tale character, while the cream walls and brown door create a warm cottage feel. The flowers, vines, glowing-looking windows, green base, and tiny mushroom are the details that make the finished piece feel like a tiny enchanted home rather than an ordinary crochet charm.
The secret to getting a polished result is not speed. Work carefully, keep your tension consistent, check your proportions during assembly, and take your time positioning the small decorative pieces.
And don’t be afraid to personalize it.
Your first cottage can follow the classic lavender-and-cream palette, while the next one could become a spring cottage with pastel flowers, an autumn cottage with warm earthy colors, or a woodland-inspired version with deeper greens.
That’s one of the best things about crochet: once you understand the construction, the same basic idea can become many different creations.
Save this fairy house idea for your next miniature crochet project, and keep exploring StitchNestStudioShop for more creative handmade patterns and crochet inspiration.