Some projects begin with a pattern. This one began with a tiny patch of pale green growing on a mossy rock.
If you have ever walked through a damp forest and crouched down to look at the ground, you may have seen cup lichen. It is a small, soft, silvery-green organism with little cup-shaped tips that look like miniature goblets. It is easy to walk past, but once you notice it you cannot stop seeing it. That quiet sage color and that gentle scalloped shape are exactly what inspired this crochet ear cap.
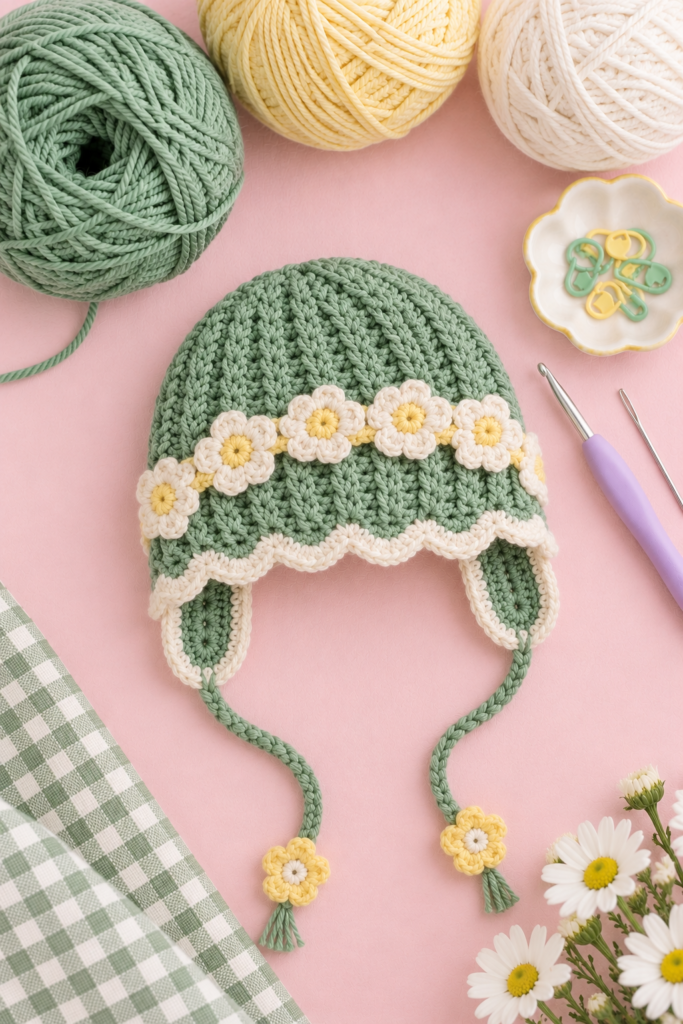
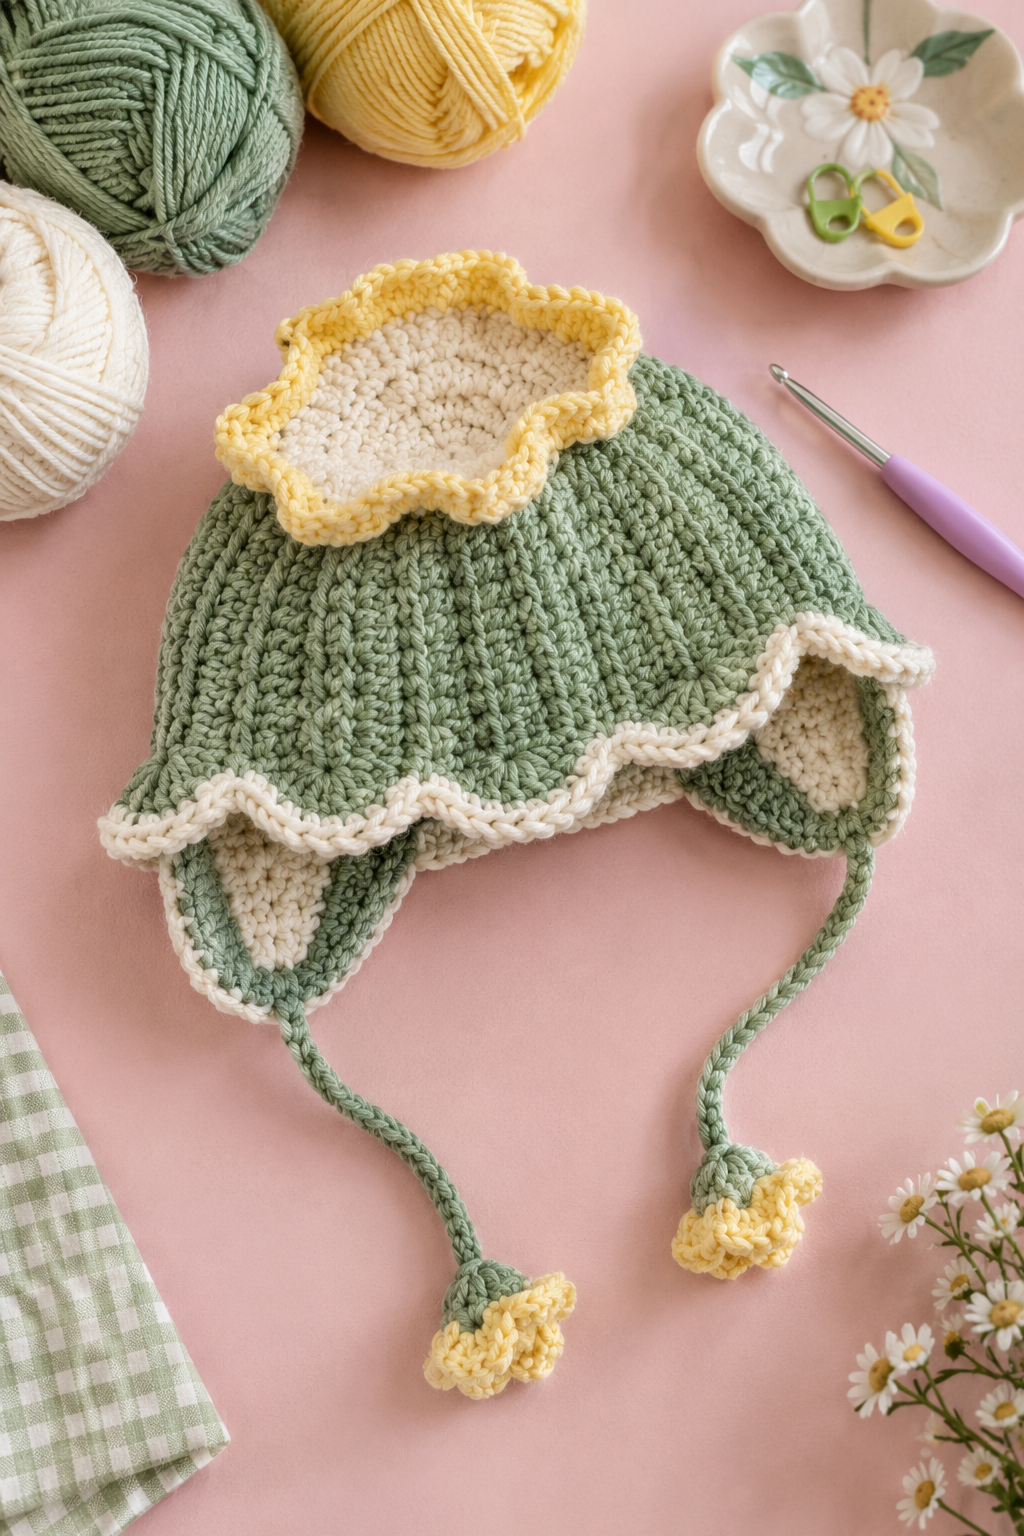
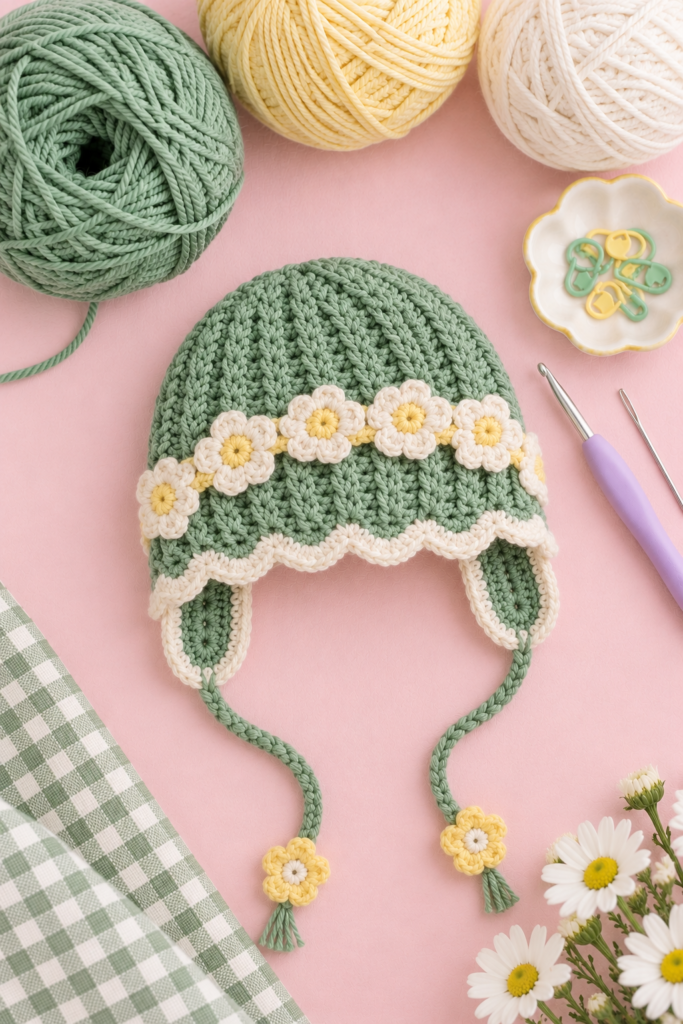
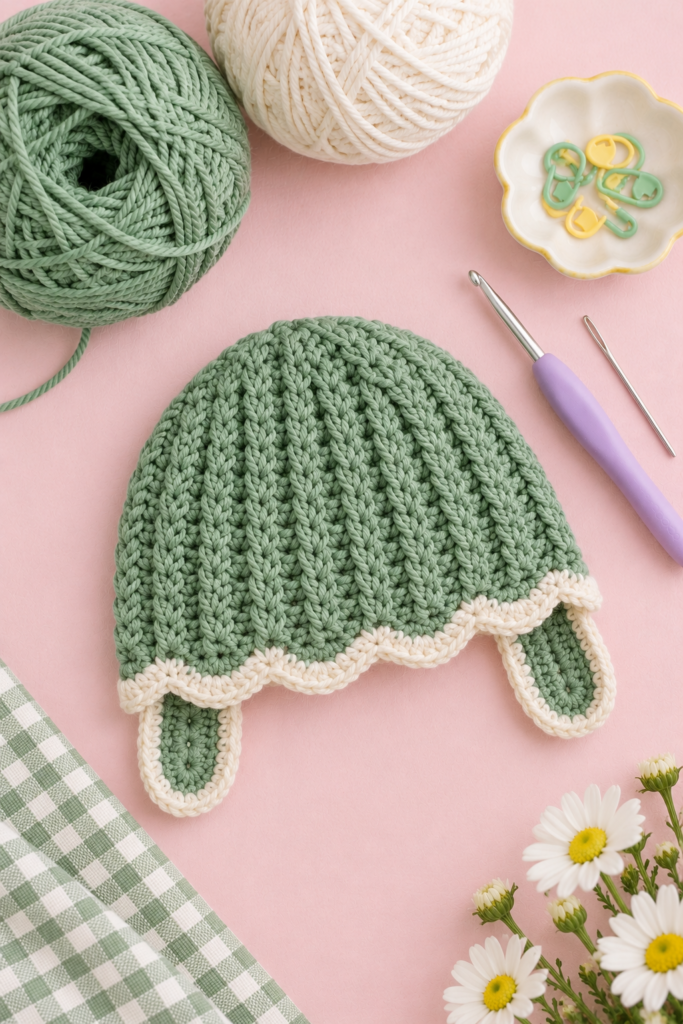
This cute cup lichen crochet ear cap is made in soft pastel colors: a calm sage green for the ribbed body, a creamy ivory for the wavy edge, and a buttery yellow for the little daisies. It has two rounded earflaps, long braided-look ties finished with tiny flowers, and a ribbed texture that looks far more complicated than it really is.
In this guide, I will walk you through everything. You will find the yarn and hook I recommend, the stitches you need, a full written pattern, sizing notes, and the small tricks that make the finished hat look neat. I have also added troubleshooting tips, because every maker hits a wobbly edge or a lopsided earflap at some point, and it helps to know the fix before it happens.
Whether you want a gift for a new baby, a photo prop, or a sweet little hat for a toddler, this pattern will work for you.
Why You Will Love This Crochet Ear Cap
Before we pick up our hooks, here is why this design is worth your time.
It uses one simple stitch. The whole body is worked in half double crochet, in the back loop only. There is no cabling, no post stitches and no complicated shaping. If you can make a half double crochet, you can make this hat.
The ribbed texture is built in. Working into the back loop creates those tall vertical ridges you see in the photos. They give the hat a knitted look and a lovely stretch, which matters a lot for a hat that has to fit a growing head.
The pastel palette feels fresh. Sage, cream and butter yellow sit well together. They photograph beautifully, they suit boys and girls equally, and they work in spring, autumn and everything between.
It is quick. The body takes one evening. The earflaps, flowers and ties are small, so you can finish them over a weekend, and they are a perfect way to use up scraps.
It makes a thoughtful handmade gift. A soft cotton hat with flowers and ties is the sort of thing parents keep in the memory box long after the baby has outgrown it.
The Story Behind the Cup Lichen Inspiration
Lichens are a strange and lovely group of living things. Each one is a partnership between a fungus and an alga, and together they grow slowly on soil, wood and stone. Cup lichens in particular are known for their little hollow cups, which rise from a crusty base like tiny trumpets.
When I looked at photographs of them, three things stood out: the muted green, the soft rounded edges, and the way the cups seem to overlap like layers of petals. I wanted a hat that felt like that. Calm, natural, a little whimsical.
That is why the edge of the hat is a scallop. Each scallop is a small curve, a little cup in cream against the sage body. The earflaps echo the same oval shape, outlined in cream. Then the daisies add a bit of meadow to the forest floor.
You do not need to know anything about lichens to enjoy the hat. But if you like nature-inspired crochet, this is a lovely way to bring a quiet woodland feeling into something you can wear.
Materials You Will Need
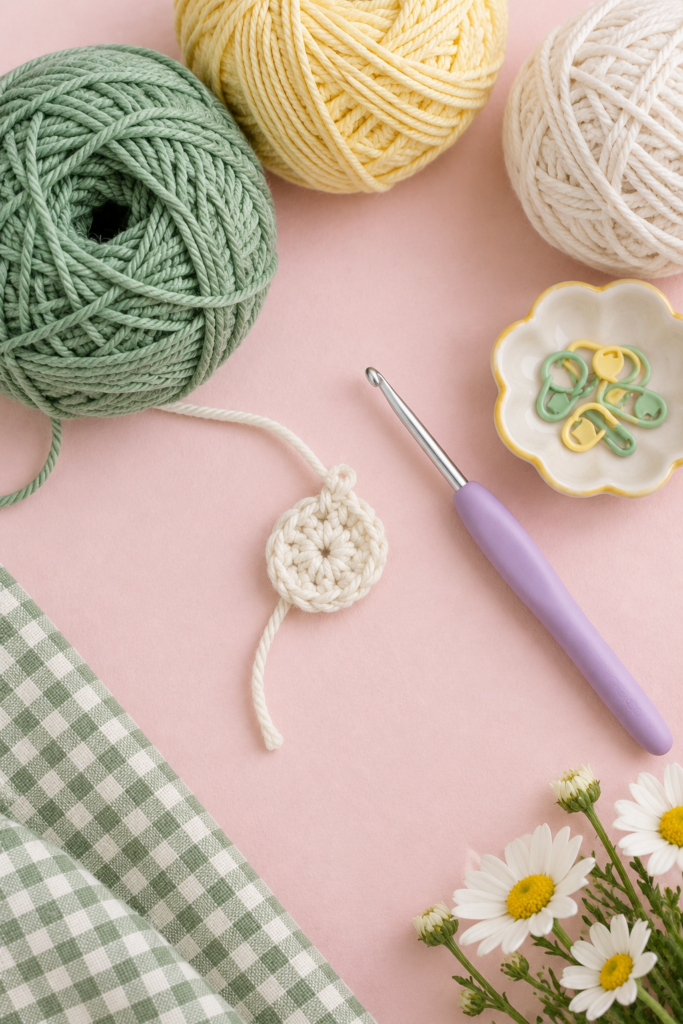
Here is everything I used. You can swap brands, but try to keep the yarn weight and fiber similar.
Yarn. A soft DK weight (light worsted) cotton or cotton blend. Cotton gives the ribs crisp definition and stays soft against delicate skin. You need three colors:
- Sage green (main color): about 100 g (roughly 200 to 250 yards) for the baby size
- Cream or ivory (edging and flower petals): about 40 g
- Butter yellow (flower centers and trim band): about 20 g
Hook. A 3.5 mm (E/4) hook is a good starting point. If your stitches look loose, go down to 3.25 mm. If the fabric feels stiff, go up to 3.75 mm. My hook has a lilac ergonomic handle, which is a real help on the rib rows because you work into the same loop for a long time.
Other tools.
- Stitch markers (I use the small safety-pin style markers)
- Yarn needle with a large eye
- Scissors
- Measuring tape
- Optional: a small dish to keep your markers and needle together, because they love to wander off
A note on yarn choice. For babies, choose a machine-washable cotton or a soft acrylic-cotton blend. Avoid anything scratchy or shedding. If you are making the hat for a toddler who will wear it in cold weather, a merino-blend DK is warmer, though it will not give quite the same crisp rib.
Sizing and Gauge
This pattern is written in a baby size, with notes for other sizes. Head circumference is the number that matters.
| Size | Head circumference | Foundation chain |
|---|---|---|
| Newborn | about 13 to 14 in | ch 19 |
| 3 to 6 months | about 15 to 16 in | ch 21 |
| 6 to 12 months | about 16 to 17 in | ch 22 |
| Toddler | about 18 to 19 in | ch 25 |
| Child | about 19 to 20 in | ch 28 |
These are approximate. Babies vary, so always measure the head you are making for if you can.
Gauge. Gauge is not strict for a hat like this, but it helps. With a 3.5 mm hook, 12 stitches of half double crochet in the back loop measure about 3 inches wide. The rows are very tight, so do not worry about counting rows per inch. Instead, I will show you how to measure the length as you go.
Quick tip: the foundation chain decides the height of the hat, because we are working sideways. The number of rows decides how wide it goes around the head.
Stitches and Abbreviations (US Terms)
- ch: chain
- sl st: slip stitch
- sc: single crochet
- hdc: half double crochet
- dc: double crochet
- blo: back loop only
- st(s): stitch(es)
- MR: magic ring
- RS / WS: right side / wrong side
How the Hat Is Built
Understanding the construction makes everything easier, so here is the plan in plain words.
- You crochet one long rectangle sideways in ribbed half double crochet.
- You seam the short ends together to make a tube.
- You gather one open edge closed to form the crown.
- You add a cream scalloped border to the bottom edge.
- You make two oval earflaps and sew them on.
- You make the ties, the flowers, and the yellow band, then attach everything.
Because the rows run sideways, the ribs end up running from the crown down to the brim. That is what gives the hat its tall, lichen-like ridges.
Step 1: Make the Ribbed Body
Use sage green and your 3.5 mm hook.
Foundation: Ch 22 (or the number for your size).
Row 1: Hdc in the 3rd chain from the hook (the skipped chains count as your first hdc), then hdc in each chain across. You should have 20 stitches. Turn.
Row 2: Ch 2 (does not count as a stitch here). Hdc in the blo of each stitch across. Turn.
Repeat Row 2 until your rectangle is long enough. Here is the rule I use: stretch the piece gently and measure it. When it measures about 1 inch less than the head circumference, stop. That small difference lets the hat hug the head without slipping.
For a 6 to 12 month size, this usually means a strip around 15.5 to 16 inches long once stretched a little.
Keeping your edges neat. The turning chain gives a slightly bumpy edge. If you prefer a smoother side, ch 1 and work a first stitch into the same stitch as the chain. Pick one method and stay with it all the way through.
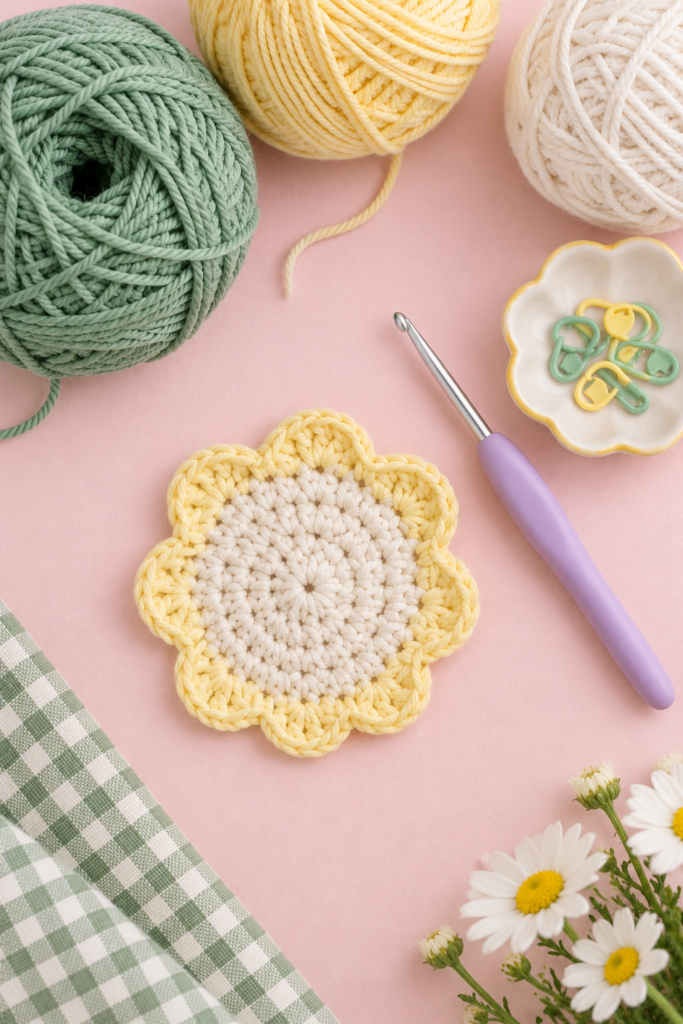
A Bonus Project: The Flower Coaster
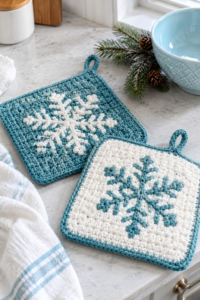
While making this hat, I used leftover cream and yellow to crochet a small flower coaster. It turned out so pretty that I kept it. It is also a handy way to test your color pairing and tension before starting the hat.
Here is the simple version:
- Round 1 (cream): MR, ch 1, 10 sc in the ring. Join with a sl st.
- Round 2: Ch 1, 2 sc in each stitch around. 20 sts. Join.
- Round 3: Ch 1, sc in the next stitch, 2 sc in the next; repeat around. 30 sts. Join.
- Round 4: Ch 1, sc in the next 2 stitches, 2 sc in the next; repeat around. 40 sts.
- Round 5 (yellow): Join yellow. Skip 1 stitch, 5 dc in the next stitch, skip 1 stitch, sl st in the next; repeat around to make the petals. Fasten off and weave in the ends.
Use it under a teacup, as a photo prop with the hat, or as a tiny gift tucked into the package.
Step 2: Seam the Tube
Fold the rectangle so the two short ends meet. Check that the right side (the side facing out) has the ribs you like. With the sage yarn and the yarn needle, whipstitch the ends together, or sl st them together with your hook for a firmer seam.
I prefer a mattress-style seam worked on the wrong side, because it is almost invisible. If the seam is a little thick, do not worry. The ribs hide it well, and it sits at the back of the head where it will not bother the baby.
You now have a short tube with one end that will become the crown and one end that will become the brim.
Step 3: Close the Crown
Decide which edge is the top. Thread your needle with a long tail of sage yarn (about 20 inches). Weave it in and out through the end of every row along the top edge, going all the way around.
Pull the yarn tight, like closing a drawstring bag. Pull firmly until the opening shuts. Wrap the yarn around the gathered center once or twice, then pass the needle through to the inside and knot it securely.
Flatten the hat and look at it. You should see ribs radiating from the top like the segments of a small umbrella. If the top looks a little pointy, press it gently with your fingers, or run a steam iron over it from a distance (do not touch the cotton directly, and do not press hard).
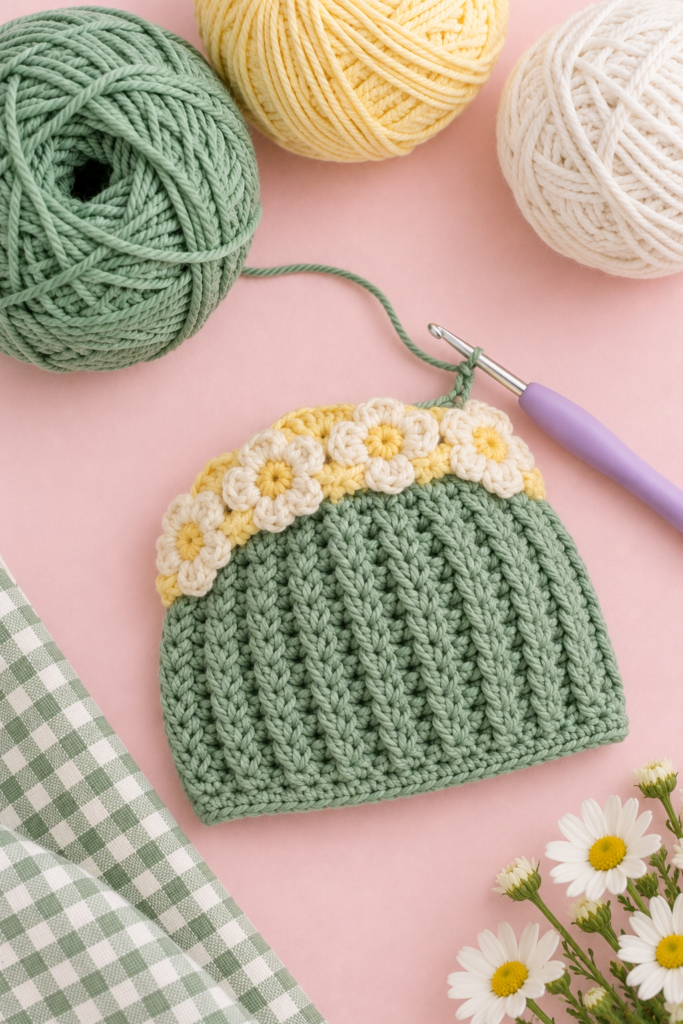
Step 4: The Cream Scalloped Edge
This is the part that gives the hat its cup lichen character.
Turn the hat so that the brim is facing you. Join cream yarn at the seam with a sl st.
Round 1 (base round): Ch 1, then sc evenly around the brim. Aim for about 3 stitches for every 2 rows, or just place one stitch at the end of each rib row. Count your stitches. You want a number divisible by 4. If you end up with an uneven number, add or skip a stitch somewhere hidden near the back. Join with a sl st.
Round 2 (scallops): Ch 1, sc in the same stitch. Skip 1 stitch, 5 dc in the next stitch, skip 1 stitch, sc in the next stitch. Repeat from * around. End with a sl st in the first sc. Fasten off.
Each group of 5 double crochets forms one little cup. Spread them slightly with your fingers while you work so they lie flat and open. If your scallops curl inward, your tension is too tight on the dc. Try making the dc stitches a bit looser, or go up a hook size for this round only.
Leave a gap for the earflaps. On each side of the hat, about a third of the way from the seam, you will attach an earflap. Mark those two places now with stitch markers so you know where to stop and start the flap seam later.
Step 5: Make the Earflaps (Make 2)
The earflaps are small ovals worked in the round. We start with sage in the middle and border with cream, which makes them look like little cups outlined in ivory.
Round 1 (sage): Ch 9. Sc in the 2nd chain from the hook and in the next 6 chains. Put 3 sc in the last chain. Working along the other side of the foundation chain, sc in the next 6 chains, then 2 sc in the final chain. Join with a sl st. You have 18 stitches.
Round 2: Ch 1. 2 sc in the first stitch, sc in the next 7 stitches, 2 sc in each of the next 2 stitches, sc in the next 7 stitches, 2 sc in the last stitch. Join. 22 stitches.
Round 3 (switch to cream): Join cream. Ch 1, sc in each stitch around, working 2 sc in each stitch at the two rounded ends so the oval lies flat. Join and fasten off, leaving a tail for sewing.
Thread the tail on the needle. Position the flap on the inside edge of the brim at one of your markers, then whipstitch it along the top straight edge. Repeat for the second flap on the opposite side.
Helpful check: lay the hat flat. The two flaps should sit directly across from each other. If one looks higher, unpick and move it before you weave in the ends. It is worth the extra two minutes.
Step 6: Make the Ties
You can make the ties in a few ways, and all of them look sweet.
Simple chain tie: With sage yarn, ch 45 to 50. Sl st back along the chain to strengthen it. This makes a neat, slightly rounded cord.
Single crochet cord: Ch 3, sc in the 2nd and 3rd chains, ch 1 and turn, sc in each stitch across. Repeat until the cord is about 10 inches long. It looks like a flat ribbon and has a lovely handmade feel.
Twisted tie: Cut three long strands of sage and twist them tightly, then fold in half and let them twist back on themselves. Knot the ends.
Attach one tie to the bottom point of each earflap with a secure knot, then weave in the ends. If this hat is for a very young baby, keep the ties shorter and consider sewing the ends down so nothing can pull loose. Safety always comes first with baby items.
Tiny tassel. Wrap sage yarn about 10 times around two fingers, tie the top with a short piece of yarn, and trim the bottom loops. This hangs below the flower at the end of each tie.
Step 7: Crochet the Little Daisies
The daisies are small, quick and satisfying. You will need about 6 to 8 cream daisies for the band, and 2 yellow daisies with cream centers for the tie ends.
Cream daisy (yellow center):
- Round 1 (yellow): MR, ch 1, 6 sc into the ring. Join with a sl st and pull the ring closed. Fasten off.
- Round 2 (cream): Join cream in any stitch. In each stitch work: sl st, ch 2, 2 dc, ch 2, sl st (this is one petal). Repeat in all 6 stitches. Fasten off and weave in the ends.
Yellow daisy (cream center): Reverse the colors. This pair looks lovely on the ends of the ties.
To make the petals look rounder, give each one a little tug with your fingertip after you finish. A tiny bit of steam from an iron held above the flower can help them lie flat.
The Yellow Band
Make a long chain in butter yellow, long enough to wrap around the hat just above the scalloped edge (about the length of the head circumference, minus 1 inch). Work sc in each chain across, then fasten off. This becomes the band the flowers sit on.
Step 8: Assemble Your Ear Cap
Now everything comes together.
- Place the yellow band around the hat, about one inch above the cream scalloped edge. Pin it in several places.
- Sew it down with small stitches, using matching yellow yarn.
- Arrange the cream daisies evenly along the band. Leave a gap at the back near the seam if you like, or place one directly on top of it to hide the join.
- Sew each daisy by stitching through the center and a few petals so they do not flop.
- Attach the two yellow daisies to the ends of the ties, with the tassels below.
- Weave in every loose end. Check each flower and each tie by tugging gently.
Lay the hat flat and admire it. You have just made the cutest cup lichen crochet ear cap, and it should look like a soft little woodland bonnet.
Variations to Try
Once you have made one, it is easy to change it.
Colorways. Soft pastel is the heart of this design, but other palettes work well. Try dusty rose with ivory, powder blue with butter yellow, or lilac with cream. For a deeper nature look, use moss green with oatmeal and a tiny touch of rust.
No flowers. If you want a simpler look, leave the band and daisies off. The plain sage hat with its cream scalloped edge and earflaps is still lovely, and it is a good option for a baby boy or for a gift where you want a clean, modern finish.
Pom-pom top. Instead of gathering to a point, add a small cream pom-pom to the crown for a playful touch.
Button chin strap. Replace the long ties with a short strap and a wooden button. It keeps the hat secure, and it is easier for tiny hands to manage.
Longer ties with beads. Thread a few small wooden beads onto each tie before adding the flowers.
Common Problems and Easy Fixes
My ribs look flat. You may be working into both loops by mistake. Check that your hook goes only under the back loop each time. It is the back loop, farthest from you on the right side row, but because we turn after every row, the loop you want changes sides. Always look for the loop that is farthest from you as you work.
The hat is too tight. Add more rows before seaming. Even 4 extra rows give you almost an extra inch of room. Cotton also stretches a little with wear and washing.
The hat is too big. Remove rows by frogging, or simply move the seam. Alternatively, use a hook one size smaller next time.
The scallops are crowded. Check that you have a stitch count divisible by 4 and that you skipped one stitch before and after each group of 5 dc.
The earflaps look uneven. Make sure both ovals have the same stitch count and the same number of rounds. Pin them in place before sewing, and measure from the seam on each side.
The flowers curl. Block them gently with a bit of steam, or sew them down at the center plus two petals.
Yarn Care and Washing
Cotton is easy to care for, which is part of why I love it for baby hats.
- Machine wash on a gentle cycle with cool water.
- Use a mild detergent.
- Lay flat to dry, shaped to size.
- Do not wring the hat. Press it gently in a towel.
- Avoid tumble drying, as it can shrink cotton and distort the scallops.
If you are gifting the hat, include a small card with these instructions. Parents appreciate it.
Photographing Your Finished Hat
If you share your work on a blog, Pinterest or Instagram, a few simple styling choices make a big difference.
Choose a soft background. A pale pink or cream surface makes sage green glow. Natural light from a window is best.
Add a few props. Skeins of yarn in the same colors, a gingham napkin, fresh daisies, your hook and some stitch markers. They tell a story without crowding the hat.
Shoot from above. A flat lay lets the viewer see the ribbing, the scallops and the earflaps clearly.
Take close-ups. One shot of the daisies and one of the scalloped edge will help people understand the texture.
Keep the colors true. Avoid heavy filters. Pastel yarn can look washed out if the image is over-edited.
Frequently Asked Questions
Is this ear cap good for beginners?
Yes. If you know the chain, slip stitch, single crochet, half double crochet and double crochet, you can complete it. The only slightly new skill is working in the back loop, and the pattern repeats the same row throughout.
What size should I make for a newborn?
Use the newborn size, which starts with a chain of 19 and a strip of around 12.5 to 13 inches. Use a softer yarn, a slightly smaller hook if you like a close fit, and keep the ties short.
Can I make it with acrylic yarn?
You can. Acrylic is lighter and more elastic, so the ribs may be a little softer, and the hat might need an extra row or two to fit. Choose a baby-soft acrylic for sensitive skin.
How much yarn do I need in total?
Plan on around 160 g for the baby size, split between the three colors. A toddler size needs a bit more green.
Can I make this hat for an adult?
Yes, with a longer foundation chain (about 30 to 34) and rows until the strip measures around 20 inches. Many adult makers skip the earflaps or use shorter ones. The scalloped edge and flowers look great on a cozy adult beanie as well.
Why is it called a cup lichen ear cap?
The name comes from the inspiration. The soft sage color and the cup-like scalloped edge echo the look of cup lichen, a small pale-green lichen with tiny cup-shaped tips.
How long does it take?
Most people finish the body in two to three hours, and the details in another three to four. That makes it a very manageable weekend project.
Can I sell items made from this pattern?
Many designers allow sales of finished items as long as you credit the pattern. If you are using this guide, please link back to the original post when you list your work.
Final Thoughts
This cute cup lichen crochet ear cap is the kind of project that feels soothing from start to finish. The ribbed rows are rhythmic, the colors are gentle, and each small part, the scallops, the earflaps, the daisies, adds a little more charm until the whole thing feels like a tiny piece of spring.
If you make one, I would love to see it. Share a photo, tell me which colors you chose, and let me know whether you gave it away or kept it for yourself. And if you enjoyed this pattern, you may like other pastel and nature-inspired makes on StitchNestStudio, from flower coasters to baby accessories.
Happy crocheting, and may your ribs always be even and your scallops always lie flat.