There is something special about a tiny sleeping dragon curled up on a crochet moon. It combines two things crocheters love: a cute amigurumi character and a cozy decorative piece that feels almost magical.
This sleeping dragon on the moon crochet project is a lovely choice if you want to make something for a nursery, child’s room, reading corner, handmade gift, or simply a cute piece of seasonal and fantasy-inspired decor.
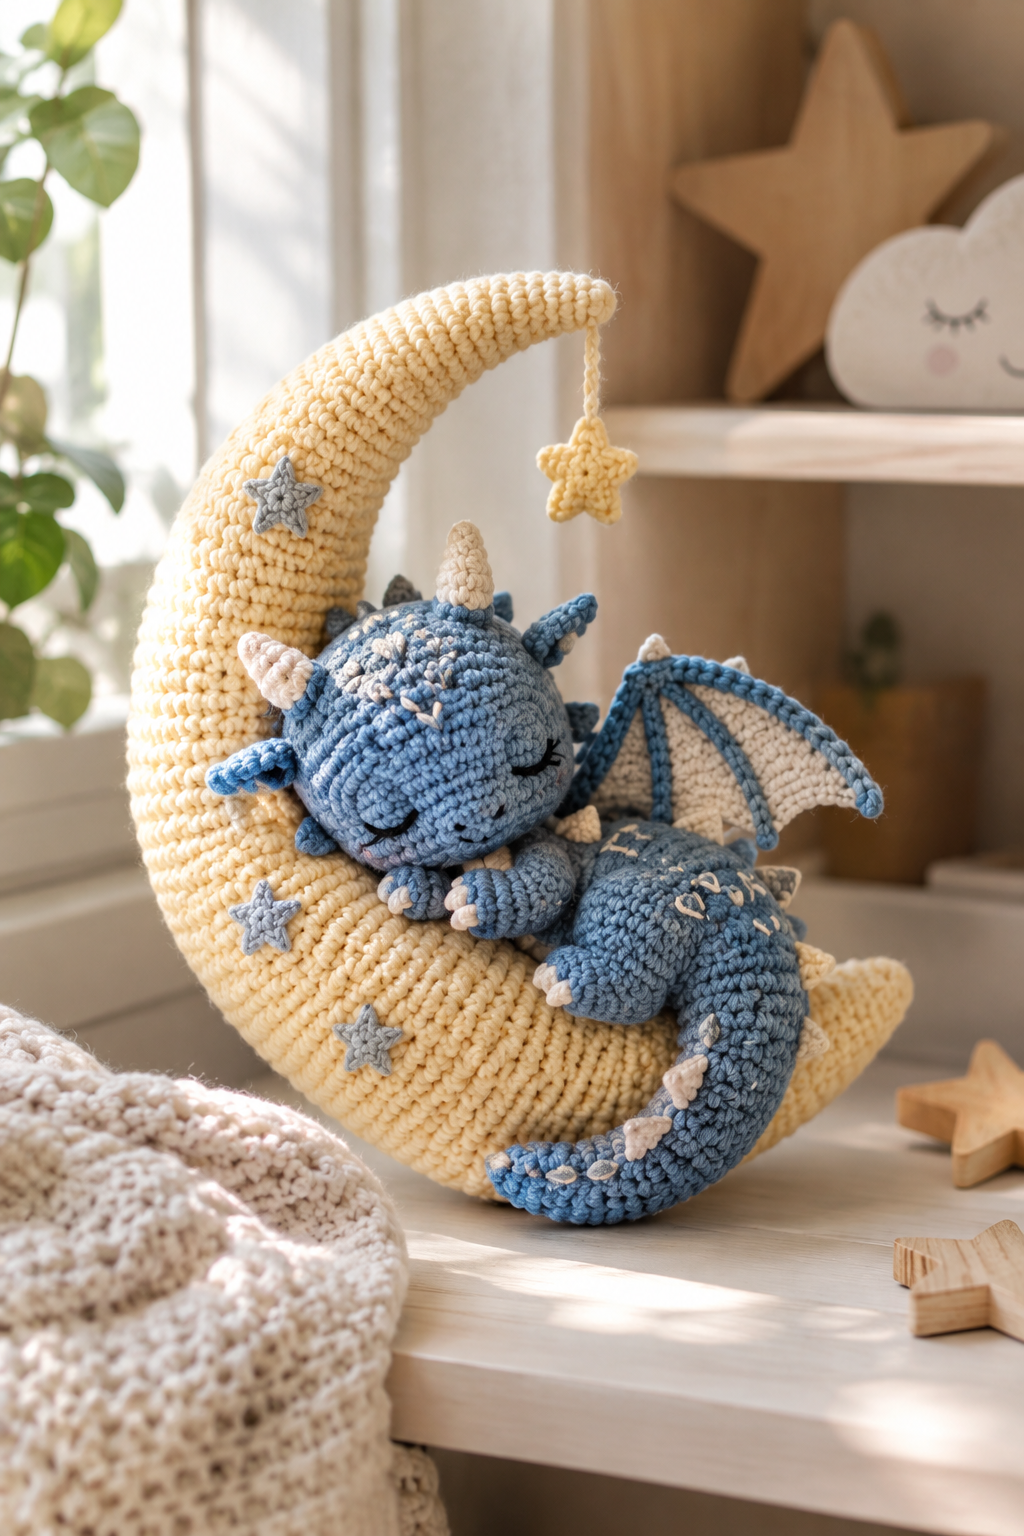
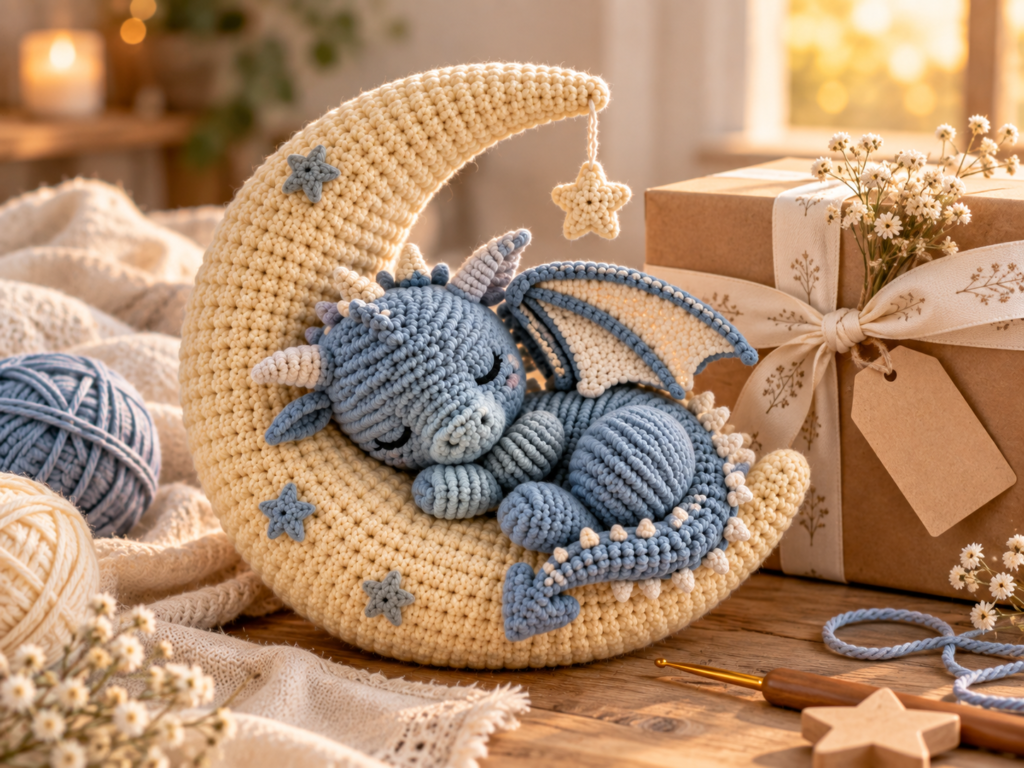
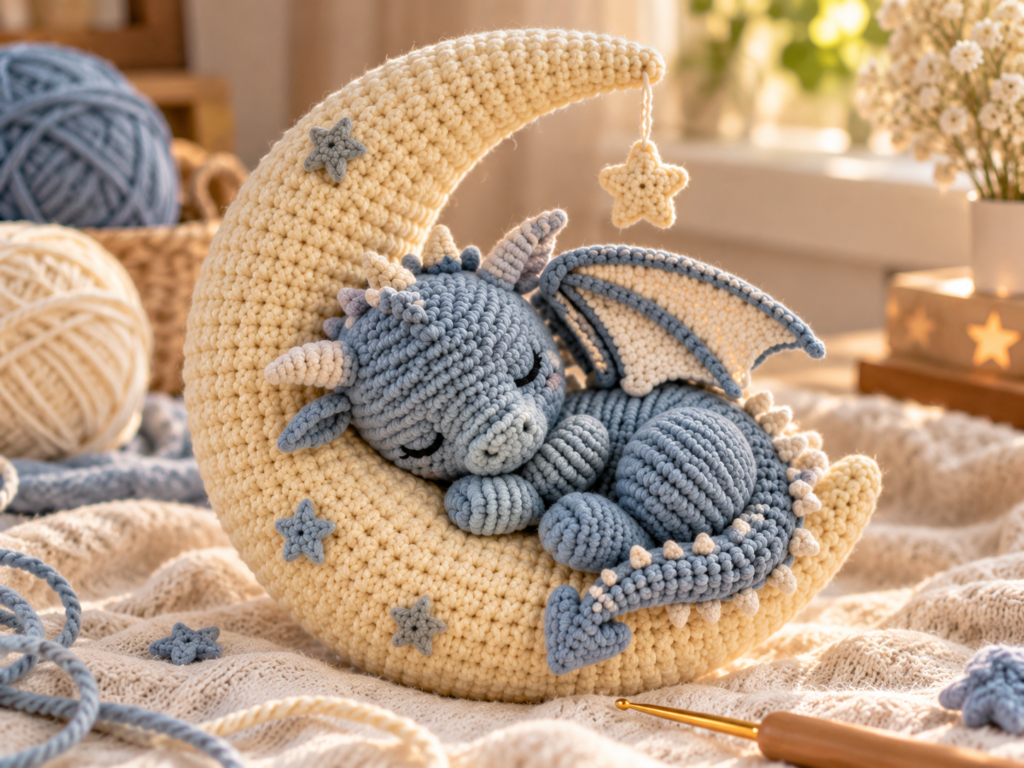
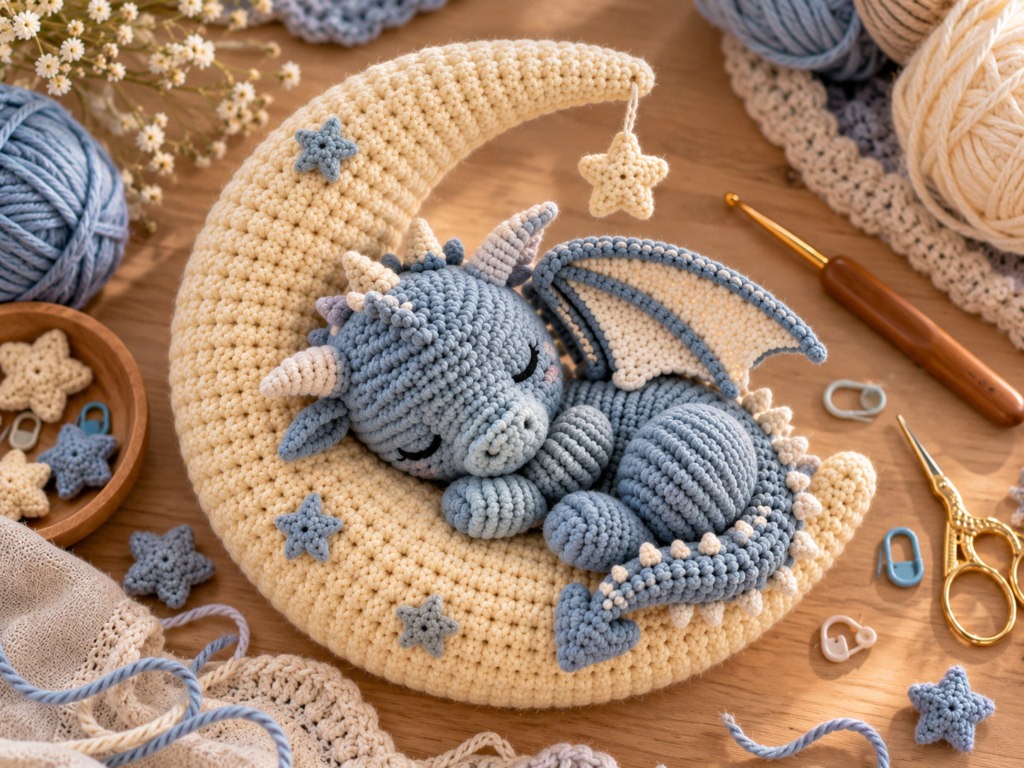
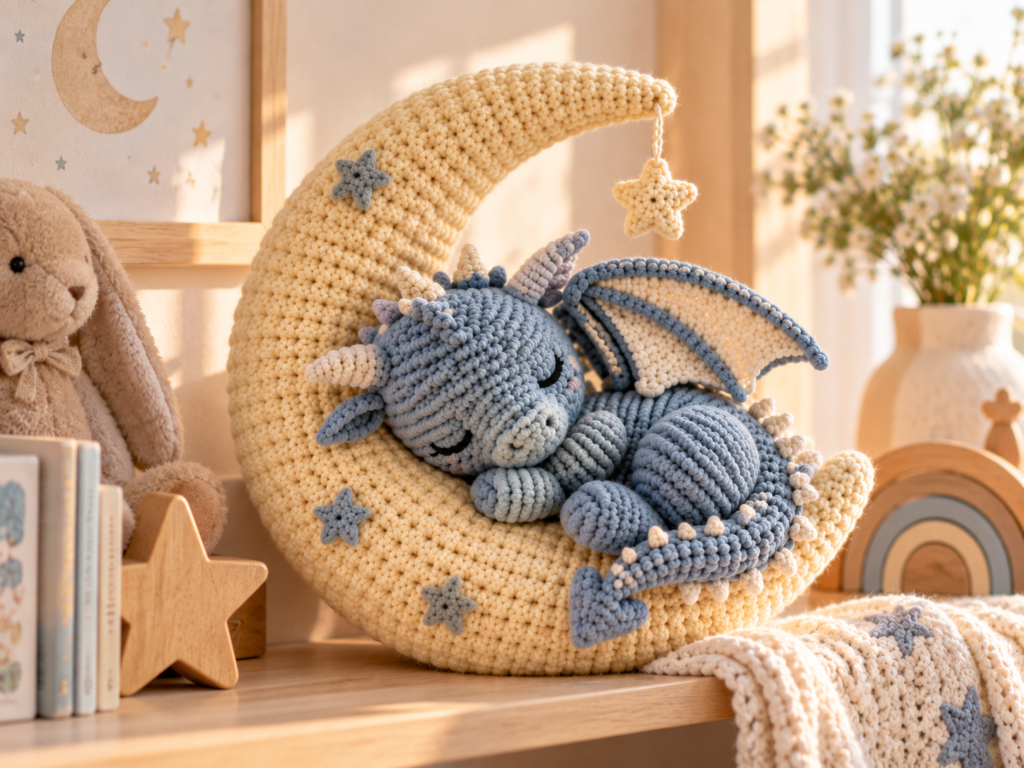
The finished design features a soft dusty-blue dragon resting on a chunky cream crescent moon. Small horns, spikes, wings, a curled tail, sleepy embroidered eyes, star details, and a dangling crochet star give the project its dreamy look.
But projects like this can become frustrating if you start without thinking about the construction first. The dragon has several small parts, the moon needs to hold its curved shape, and attaching the wings, horns, spikes, and tail neatly can make a big difference in the final result.
This guide walks through the important decisions, common problems, construction tips, and finishing techniques so you can approach a crochet sleeping dragon on the moon with much more confidence.
What Makes This Crochet Sleeping Dragon So Cute?
The charm of this project comes from the contrast between the two main elements.
The moon is large, soft, and neutral, while the dragon provides the color and personality. A dusty blue or gray-blue yarn works particularly well against a cream moon because the two colors are different enough to stand out without looking harsh.
The sleepy expression also changes the entire character of the dragon.
Instead of making the dragon look fierce or energetic, closed embroidered eyes make it feel calm and cuddly. That makes the finished piece especially suitable for cozy rooms, nurseries, shelves, and handmade gifts.
Some of the details that give this design its character include:
- A dusty-blue or soft gray-blue dragon
- A chunky cream crescent moon
- Small cream horns
- Tiny decorative spikes
- Rounded arms and feet
- A curled dragon tail
- Blue-and-cream wings
- Closed sleepy eyes
- Small star decorations on the moon
- A hanging crochet star
- Soft, neutral colors throughout the design
The important thing is not simply adding as many details as possible. The details need to work together.
If the dragon has too many colors or the moon is heavily decorated, the finished piece can lose the calm, dreamy appearance that makes this design appealing.
Materials You May Need
Your exact materials will depend on the pattern and the finished size you want, but a project like this generally uses a fairly simple collection of crochet supplies.
Yarn
For the main color palette, consider:
- Dusty blue or gray-blue yarn for the dragon
- Cream or ivory yarn for the moon
- Cream yarn for horns and spikes
- A matching blue for wing edging and tail details
- Small amounts of contrasting yarn for stars or decorations
A smooth yarn is usually easier to work with for amigurumi because individual stitches remain visible.
Cotton or cotton-blend yarn is a practical option because it tends to hold its shape well and gives small crochet details a clean appearance.
Crochet Hook
Choose a hook appropriate for your yarn weight and the type of fabric you want.
For amigurumi, crocheters commonly use a smaller hook than they would for an open, drapey crochet project. The goal is a firm fabric with minimal gaps.
This matters because loose stitches can allow stuffing to show through.
Other Supplies
You may also need:
- Polyester fiberfill
- Tapestry needle
- Stitch markers
- Embroidery needle
- Small scissors
- Safety eyes if your chosen design uses them
- Black or dark embroidery thread
- Pins for positioning pieces
- A crochet hook for weaving in ends
If the finished dragon is intended for a very young child, avoid assuming that small safety eyes or detachable decorations are automatically appropriate. Embroidered facial features are a better option when you want to reduce loose small components.
Choosing the Right Yarn Colors
Color selection is one of the easiest ways to make this project look polished.
The dusty-blue dragon and cream moon work because the colors are soft and slightly muted. You do not need a huge color palette.
A simple combination such as:
Cream + dusty blue + gray-blue + a small amount of darker thread
is enough to create the entire character.
If your blue is very bright, consider using a softer cream rather than pure white. A warm ivory can make the whole piece feel more handmade and cozy.
You can also create different versions without changing the basic design.
For example:
| Dragon | Moon | Overall Feel |
|---|---|---|
| Dusty blue | Cream | Soft and dreamy |
| Sage green | Ivory | Woodland-inspired |
| Lavender | Cream | Whimsical |
| Pale pink | Beige | Sweet and playful |
| Gray-blue | Warm white | Calm and neutral |
The most important thing is contrast.
The dragon should remain easy to see against the moon, but the colors should still look like they belong together.
Getting the Dragon’s Shape Right
One of the biggest challenges with crochet amigurumi is achieving the intended shape rather than ending up with a character that looks too long, too flat, or too round.
The dragon in this design has a compact sleeping posture.
The body should feel rounded rather than elongated. The head sits low against the moon, while the legs are tucked underneath the body.
That sleeping posture is important because it creates the impression that the dragon is actually resting.
Don’t Overstuff the Body
This is a common problem with stuffed crochet animals.
It can be tempting to keep adding stuffing because you want the piece to feel firm. But excessive stuffing can stretch the stitches and make the body look unusually large.
Instead, add stuffing gradually.
Fill the center first, then work toward the edges. Pause regularly and gently shape the piece with your fingers.
Ask yourself:
- Does the body still have a rounded shape?
- Are the stitches becoming stretched?
- Does the head sit naturally?
- Can the dragon rest against the moon?
If the answer to the last question is no, the body may be too firm or too large.
How to Build the Dragon in the Right Order
When a crochet project contains many separate pieces, assembly order can save a lot of frustration.
Rather than crocheting random pieces and attaching them whenever you finish them, organize the project into groups.
A practical order is:
- Crochet the main body.
- Crochet the head.
- Make the legs and arms.
- Create the tail.
- Make the horns and spikes.
- Crochet the wings.
- Make the facial details.
- Stuff and shape the major pieces.
- Attach the smaller pieces.
- Assemble the dragon.
- Position the dragon on the moon.
This approach makes it much easier to check symmetry.
Attaching the Head
The head should look naturally connected to the body.
Before sewing it permanently, use pins to test several positions.
A slightly lowered head usually works better for a sleeping character than a completely upright head.
Take a photograph of your pinned arrangement before sewing if you are unsure. Looking at the project through a phone camera can sometimes reveal proportions that are harder to notice when you are holding the piece directly in front of you.
Positioning the Wings
The wings are one of the most noticeable features of the finished dragon.
They should sit high enough to remain visible, but not so high that the dragon appears to be standing.
For a sleeping pose, slightly angled wings often look more natural than perfectly symmetrical upright wings.
Before sewing:
- Pin both wings.
- Step back and look at the entire dragon.
- Check that the wing heights are similar.
- Make sure both wings follow the body’s curve.
- Adjust the angle before making permanent stitches.
Small differences can actually make a handmade item look natural, but major differences in placement can make the character look unbalanced.
Creating the Crescent Moon
The moon is more than a background piece.
It provides the structure that makes the entire scene recognizable.
A crochet crescent needs enough stuffing and structure to maintain its curved shape without becoming overly stiff.
If the moon is too lightly stuffed, the crescent can flatten. If it is packed too tightly, the stitches may stretch and the curve can become less attractive.
Shape the Moon as You Stuff
Do not wait until the moon is completely closed to shape it.
Add stuffing gradually along the curve.
Pay attention to:
- The outer edge
- The inner crescent
- The bottom resting area
- The tip of each crescent
- The thickness of the moon
The two tips should remain clearly defined.
If you overstuff the tips, they can become bulky and lose the elegant crescent shape.
If they are underfilled, they may droop.
A good approach is to shape each section with your fingers while adding small amounts of stuffing.
How to Keep the Moon Looking Full
The moon should look soft and substantial enough to support the visual weight of the dragon.
If your crochet fabric is very loose, you may notice stuffing showing through. In that case, consider using a smaller crochet hook or adjusting your tension.
You do not want to crochet so tightly that the fabric becomes difficult to work with, but the finished moon should have a fairly solid surface.
Making the Dragon Look Peacefully Asleep
The face is one of the most important parts of this design.
A sleeping dragon does not need a complicated expression.
Simple closed eyes can be enough.
Embroider the Eyes After Shaping
It is usually easier to position embroidered eyes once the head has been stuffed and shaped.
Use pins or temporary markings to decide where the eyes should sit.
Then compare both sides.
The eyes do not necessarily need to be perfectly identical, but they should communicate the same relaxed expression.
A small curved line can create a much softer appearance than a large dramatic eye.
Don’t Place the Face Too Low
Another common problem is positioning the facial features too close to the bottom of the head.
That can make the dragon look surprised or uncomfortable rather than sleepy.
Before stitching, look at the head from several angles.
The nose, eyes, and horns should work together as one balanced face.
Adding the Horns, Spikes, and Tail
Small details can make a big difference in an amigurumi dragon.
The horns give the character its dragon identity, while the small spikes and curled tail add movement.
But these details need to be placed carefully.
Horn Placement
The horns should follow the natural direction of the head.
If they point in completely different directions, the character can look uneven.
Pin both horns before sewing.
Look at the dragon from the front, side, and slightly above.
This is especially useful because the final piece will often be photographed from a three-quarter angle.
Tail Position
The curled tail should support the sleeping pose.
Instead of extending straight backward, a gentle curve makes the dragon look more relaxed.
The tail can also help visually balance the wings.
If one side of the dragon feels visually heavier, a slightly different tail position can help.
Small Spikes
Small cream spikes provide contrast against the blue body.
Try to keep their placement consistent.
If the spikes are sewn too deeply into the body, they may disappear. If they are attached too loosely, they may flop around.
Use small, secure stitches and weave the ends inside the body where possible.
Decorating the Crochet Moon
The moon does not need heavy decoration.
A few small stars can be enough to reinforce the nighttime theme.
Blue-gray star motifs work especially well because they connect the moon visually to the dragon.
The dangling star adds another layer of movement.
Before permanently attaching decorations, lay everything on the moon and experiment with spacing.
Avoid putting every decoration in one area.
A more balanced arrangement usually looks better.
Think about the moon as a composition rather than simply a surface that needs to be filled.
Common Problems and How to Fix Them
A cute crochet project can still go wrong during assembly. Here are some of the most common problems and practical ways to deal with them.
Problem 1: The Dragon Looks Too Large for the Moon
Why it happens: The body or head may have been stuffed too heavily, or your yarn is significantly thicker than expected.
What to do: Check your yarn weight and gauge before making all the pieces. If you are already assembling the project, slightly reposition the dragon deeper into the crescent so more of the body follows the moon’s curve.
Problem 2: The Moon Looks Flat
Why it happens: Not enough stuffing or inconsistent filling.
What to do: Add stuffing gradually before completely closing the moon. Use your fingers to distribute the filling evenly through the curve.
Problem 3: The Dragon Doesn’t Look Asleep
Why it happens: The head may be positioned too upright, or the eyes may be too open-looking.
What to do: Lower the head slightly and use simple curved embroidered eyes. The body should also look tucked in rather than stretched out.
Problem 4: The Wings Look Uneven
Why it happens: They were sewn on without checking the placement from multiple angles.
What to do: Pin both wings first. Compare their height and angle from the front and back before sewing.
Problem 5: Stuffing Shows Through
Why it happens: Crochet stitches are too loose for the stuffing being used.
What to do: Use a smaller hook or tighter tension in future sections. For pieces already made, avoid aggressively stretching the fabric while stuffing.
Problem 6: Small Pieces Keep Moving
Why it happens: Decorative pieces were not secured firmly enough.
What to do: Use multiple small attachment stitches rather than relying on one large stitch. Hide the yarn ends inside the piece where practical.
Problem 7: The Finished Project Looks Messy
Why it happens: Loose ends, inconsistent attachment points, or details added without planning.
What to do: Before the final assembly, lay all parts together and photograph the arrangement. This gives you a simple visual reference while sewing.
How to Make It Look More Professional
You do not need expensive materials to make a handmade crochet project look polished.
Finishing is often more important than the price of the yarn.
Hide Your Ends Carefully
Loose yarn tails can immediately make a finished project look unfinished.
Weave the ends securely into the inside of the piece rather than simply cutting them close to the surface.
Check the Symmetry
Place the finished dragon in front of you and look at:
- Horn position
- Wing height
- Eye placement
- Leg position
- Tail direction
- Spike spacing
Small differences are part of handmade crochet, but obvious positioning problems are worth fixing before you call the project finished.
Give It a Gentle Final Shape
Once all the pieces are attached, gently manipulate the stuffing and limbs.
Do not pull aggressively.
The goal is simply to help the dragon settle naturally into its sleeping position.
Where Can You Use a Crochet Sleeping Dragon on the Moon?
This project is surprisingly versatile.
It can work as:
- Nursery decor
- Children’s room decor
- Fantasy-themed room decor
- Shelf decoration
- Reading-corner decor
- Handmade baby-shower gift
- Birthday gift
- Dragon-themed gift
- Crochet collector’s piece
- Whimsical seasonal decor
- Photography prop
It also makes a beautiful handmade gift because it feels more personal than a generic stuffed toy.
If you’re making one for someone else, consider choosing colors that match their room or favorite style.
A neutral cream-and-blue version works especially well when you do not know the recipient’s exact decor preferences.
How to Photograph Your Finished Crochet Dragon
If you plan to share your project on Pinterest, Etsy, Instagram, or your crochet blog, photography matters.
You don’t need a professional camera.
Natural window light is often enough.
Place the finished dragon near a window but avoid strong direct sunlight. Soft light reveals the texture of the crochet stitches without creating harsh shadows.
For a cozy photograph, try adding:
- A ball of yarn
- A crochet hook
- Neutral linen
- A small wooden object
- A simple plant
- Soft blankets
- A few handmade stars
Keep the dragon as the main subject.
Too many props can make the image look crowded.
A three-quarter angle is particularly useful because it shows the dragon’s face, wings, body, tail, and moon at the same time.
For Pinterest, landscape images can work well inside a blog post, while separate vertical graphics can be created later specifically for Pinterest sharing.
Is This a Good Crochet Project for Beginners?
It depends on the beginner.
The individual crochet techniques may not be especially complicated, but the project contains multiple pieces and requires careful assembly.
Someone who already understands basic amigurumi techniques will likely find it easier than someone making their first stuffed crochet project.
You should be comfortable with things such as:
- Working in the round
- Single crochet
- Increases
- Decreases
- Stuffing amigurumi
- Basic sewing
- Weaving in ends
- Attaching small pieces
- Reading crochet abbreviations
If you are completely new to crochet, consider practicing a small stuffed ball first.
Once you understand how increases, decreases, stuffing, and shaping work, a character like this becomes much less intimidating.
Frequently Asked Questions
What yarn is best for a crochet sleeping dragon?
A smooth cotton or cotton-blend yarn is a practical choice for amigurumi because it gives you clear stitch definition and a firm fabric. Choose a yarn weight that matches the pattern you are following rather than changing yarn thickness without adjusting the pattern.
How do I make my crochet dragon look softer?
Use soft yarn colors, moderate stuffing, and a relaxed sleeping pose. Embroidered closed eyes also create a softer expression than large open eyes.
Can I change the color of the dragon?
Yes. The basic design can be adapted to many color combinations. Dusty blue and cream create a calm look, while lavender, sage, pink, or gray can create completely different versions.
Why is my crochet moon losing its crescent shape?
Uneven stuffing is a common reason. Fill the moon gradually and shape the curve as you go. Avoid putting too much stuffing into the pointed ends.
How can I make the dragon sit naturally on the moon?
The body should remain rounded but not overly stiff. Position the head slightly downward and tuck the legs toward the body. Pin the dragon in place before permanently attaching anything.
Are safety eyes suitable for babies?
Small detachable components can present a safety risk for babies and very young children. If the finished item is intended for that age group, embroidered facial features are a safer design choice than relying on loose small components. Always consider the intended recipient and supervise use appropriately.
Can I sell finished crochet dragons made from a pattern?
That depends on the specific pattern designer’s terms. Some designers allow finished items to be sold while others place restrictions on commercial use. Always check the license or terms included with the pattern before selling finished pieces.
Final Thoughts
A sleeping dragon on the moon crochet project is the kind of handmade piece that can look complicated at first but becomes much easier when you break it into manageable sections.
Focus on the shape before the decoration.
Get the dragon’s body, head, moon, and overall proportions right first. Then work on the smaller details such as horns, spikes, wings, tail, stars, and facial features.
The biggest difference between a frustrating project and a polished one is often patience during assembly. Pin pieces before sewing them, check proportions from more than one angle, stuff gradually, and don’t be afraid to reposition a part if it doesn’t look right.
Most importantly, don’t worry if your finished dragon has tiny handmade differences. Those small details are part of what makes crochet special.
With a soft blue dragon, warm cream moon, sleepy expression, and a few carefully placed stars, you can create a peaceful little scene that feels right at home on a nursery shelf, reading nook, craft room, or gift table