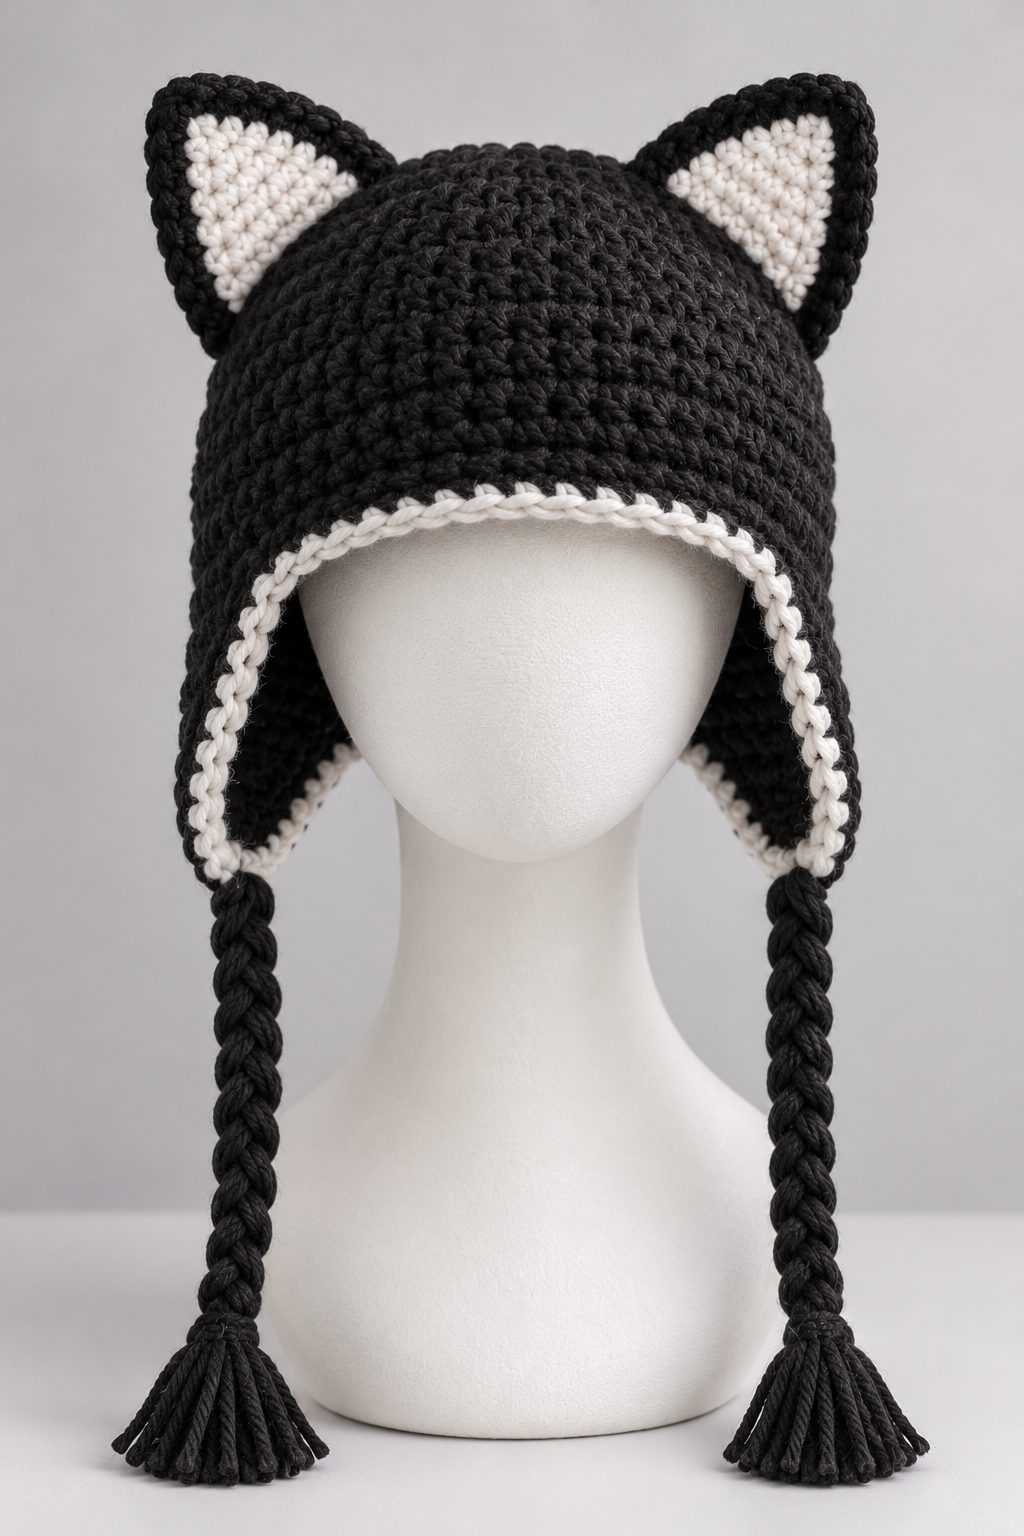
There is something about a cat ear hat that makes people smile the moment they see it. Maybe it is the tiny pointed ears, maybe it is the pop of cream inside each one, or maybe it is just the idea of walking around on a cold morning looking like a very stylish black cat. Whatever the reason, this adorable cat ear crochet hat has become one of my favorite projects to make, to gift, and to wear. And the best part is that it is easier than it looks.
This free crochet pattern is written for confident beginners and up. You will start with a simple magic ring, grow it into a flat circle for the crown, work the body of the hat in easy rounds, and finish with a cozy ribbed brim. Then you will make two little triangle ears with soft cream inner panels and sew them in place. If you want an even warmer version, I will also show you how to turn this same hat into an earflap style with cream trim, braided ties, and fluffy tassels. Everything is explained in plain language, so you can follow along with your cup of tea beside you and finish the whole hat in a weekend.
Why You Will Love This Cat Ear Hat
First, it is beginner friendly. The entire hat is worked in single crochet and a few simple stitches. There is no lace, no color changing in the main body, and nothing that requires special tools. If you can make a circle and keep a steady count, you can make this hat.
Second, it is wonderfully versatile. Make it in classic black with cream ears for a timeless look, or pick any color combination you love. A gray hat with pink ears is sweet, a white hat with gray ears looks like a snow kitten, and an orange hat with cream ears is perfect for a ginger cat lover. The same pattern works for every size, because the number of rounds is easy to adjust.
Third, it makes a fantastic gift. Cat lovers, children, teenagers, and grown ups all adore this style. It works for birthdays, holiday gifts, craft fair stalls, and even Halloween. I have made versions for nieces, friends, and one for myself that I wear far more often than I expected.
Finally, it works up quickly. With worsted weight yarn and a medium hook, you can finish the main hat in one or two sittings and the ears in another. That quick payoff is perfect for anyone who loves a satisfying project.
Materials You Will Need
For the yarn, choose a smooth worsted weight yarn, which is category 4. You will need about 150 to 180 yards of your main color, which is black in my sample, and about 30 yards of a contrast color for the inner ears, which is cream. A soft acrylic or an acrylic wool blend works beautifully, because it stays warm and washes easily. If you want a classic natural fiber, a cotton blend gives a sharper stitch definition, but it will feel less stretchy. Choose a yarn that feels gentle against the skin, since the hat sits close to your forehead and ears.
For the hook, a 5mm hook is a good match for most worsted weight yarns. If you crochet tightly, try 5.5mm. If you crochet loosely, try 4.5mm. A hook with a comfortable ergonomic handle is a real gift when you are working in continuous rounds, because you will be turning the hat constantly.
You will also need a yarn needle for sewing the ears and weaving in ends, a pair of sharp scissors, and a few stitch markers. A stitch marker is very important in this pattern, because the hat is worked in a spiral and you need to know where each round begins. A simple safety pin works just as well. If you plan to make the earflap version, you will also need a small piece of cardboard about 4 inches wide to wrap yarn around for the tassels.
Size, Gauge, and Abbreviations
This pattern is written for an adult medium, with a head circumference of about 21 to 22 inches. The finished hat measures about 20 inches around before stretching and about 8 inches tall, including the folded brim. Gauge is not critical, but aim for about 7 single crochet stitches and 8 rounds in 2 inches. To check, make a small circle and compare. If your circle is much larger than expected, go down a hook size. If it is smaller, go up.
To adjust the size, change the number of crown rounds. Each extra round adds 6 stitches, which adds about 1.7 inches to the circumference. For a child, stop the crown increases at round 9 for 54 stitches. For a larger adult, continue until round 12 for 72 stitches. Then keep working the body until the hat reaches the correct height.
This pattern uses standard US terms. Ch means chain. Sc means single crochet. Sc2tog means single crochet two stitches together, a simple decrease. Inc means 2 sc in the same stitch. Fpdc means front post double crochet. Bpdc means back post double crochet. Sl st means slip stitch. The hat is worked in a spiral, which means you do not join the rounds and do not chain at the start. Mark the first stitch of each round and move your marker up as you go.
Step One: Start With a Magic Ring
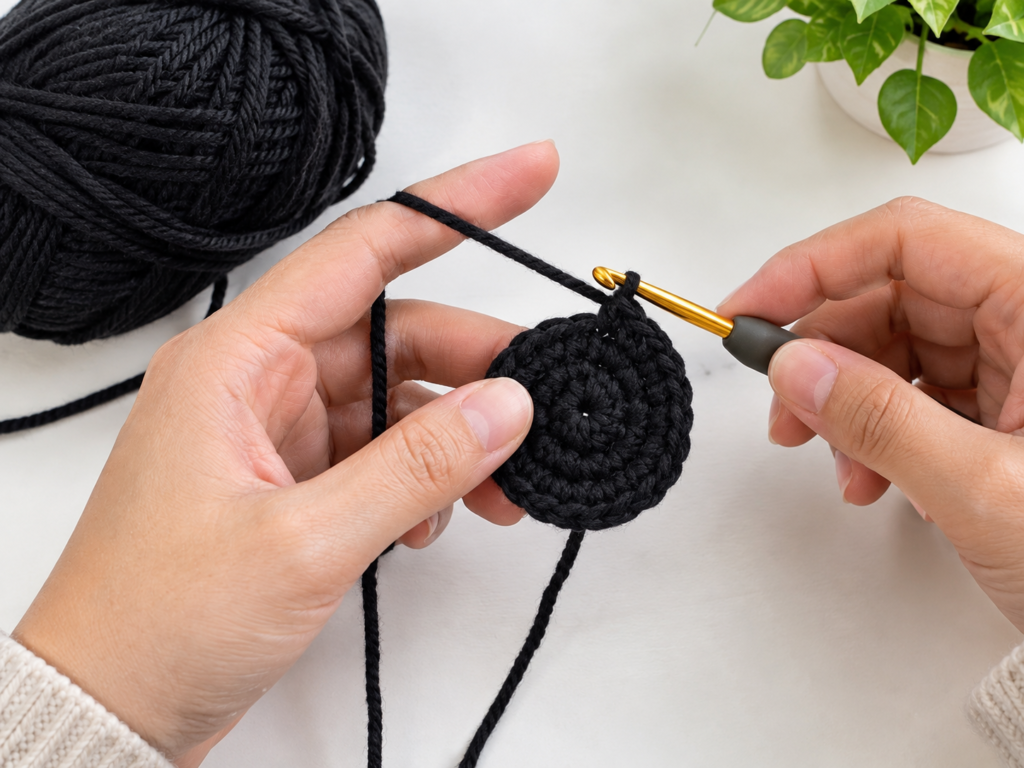
Every great hat begins with a good center, and a magic ring is the neatest way to begin. If you have never made one, do not be afraid. It is simply a loop that you pull tight after working your first stitches, which leaves no hole in the middle of your crown.
Make a loop with your yarn, and insert your hook into the loop. Pull up a strand and chain 1 to lock it. Work 6 sc into the ring, then gently pull the tail to close it. Place your marker in the first stitch. That is round one, and you have 6 stitches.
For round two, work 2 sc in each stitch around, which gives you 12 stitches. For round three, work sc in the first stitch and 2 sc in the next, repeating around, for 18 stitches. Round four is sc in the next 2 stitches, then 2 sc in the next, repeated around, for 24 stitches. Round five is sc in the next 3 and 2 sc in the next, for 30 stitches.
At this stage you have a small, firm circle that lies flat on your table. If it curls up like a cup, you have too few increases. If it ruffles, you have too many. Always count your stitches at the end of the round to be sure, because this is the easiest moment to fix a mistake.
Step Two: Grow the Crown Into a Flat Circle
Now we keep growing. The pattern for every round is the same idea: increase 6 stitches evenly around by adding one more plain stitch between increases each time.
Round six: sc in the next 4 stitches, then 2 sc in the next, repeat around. You now have 36 stitches. Round seven: sc in the next 5, inc in the next, repeat around, for 42 stitches. Round eight: sc in the next 6, inc in the next, repeat around, for 48 stitches. Round nine: sc in the next 7, inc in the next, repeat, for 54 stitches. Round ten: sc in the next 8, inc in the next, for 60 stitches. Round eleven: sc in the next 9, inc in the next, for 66 stitches.
Your crown is now a flat circle about 6 inches across. Lay it on a table and press gently with your hand. A good crown lies flat without ruffles, and its edge should look smooth and round. If you see a corner or a point, you may have placed your increases in the same spots each round. To avoid that, try to shift the increases slightly so they do not stack directly on top of each other. A little staggering keeps the circle truly round.
I find that this is the best point to try the hat on a mannequin, a bowl, or even a friend. If the circle already feels too small or too large for the head you are making it for, stop and adjust now by working fewer or more rounds. It is much easier than fixing the hat later.
Step Three: Work the Body of the Hat
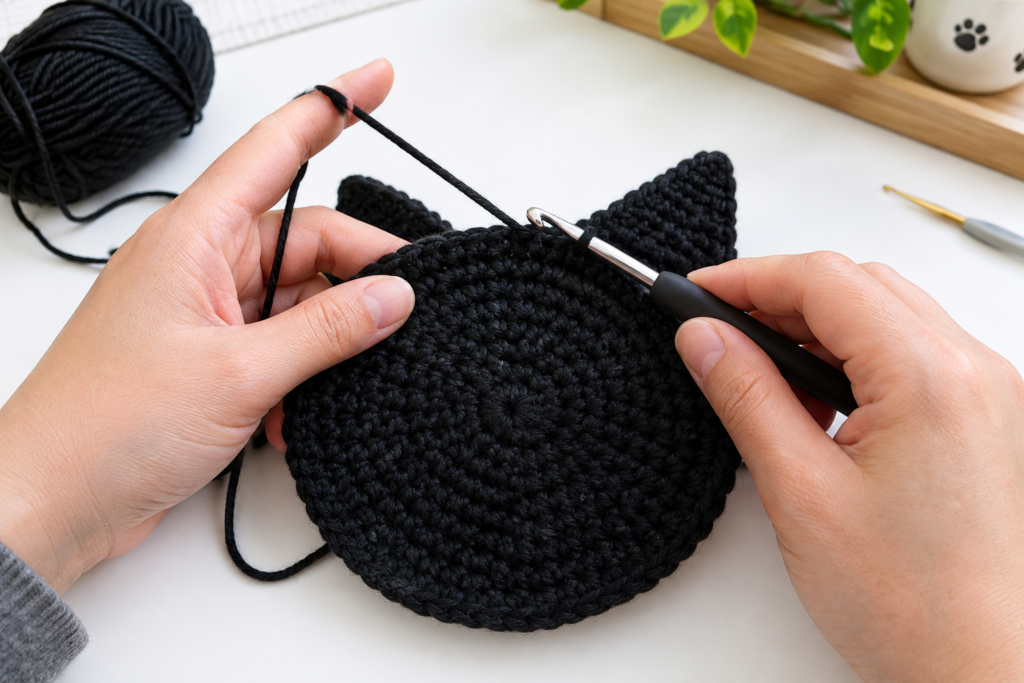
Once the crown is the right size, we stop increasing and let the hat grow taller. Work 1 sc in each of the 66 stitches around, round after round, without any increases or decreases. The sides will begin to curve down naturally, forming the soft dome of the hat.
Continue until the hat measures about 6 inches from the center of the crown straight down to the edge. To measure, lay the hat flat and measure from the center point to the edge, then hold the hat against a ruler for the height. This measurement leaves room for the ribbed brim, which adds about 2 inches. For a child, work about 4 inches before the brim. For a larger adult, work about 6 and a half inches.
A small tip from experience: single crochet in the round can twist the fabric slightly, because the stitches lean to one side. If the hat looks as though the stitches are tilting, do not worry. The ribbed brim and a gentle block will straighten it out. If you want a smoother texture, work in the back loop only on every third round for a subtle horizontal ridge that adds charm and hides the lean.
Keep your tension relaxed but even. If you find your stitches getting tighter as you work, take a break, shake out your hands, and loosen your grip. Even tension makes the fabric drape well and fit comfortably.
Step Four: Make the Ribbed Brim
The brim gives this hat structure, warmth, and a polished look. We make it in a ribbing that looks like columns around the edge.
Round one of the brim is worked as follows. Work fpdc around the next stitch, then bpdc around the next stitch, and repeat around. To work a fpdc, yarn over, insert your hook from the front, from right to left around the post of the stitch below, yarn over and pull up a loop, then finish like a regular double crochet. To work a bpdc, do the same but insert the hook from the back around the post. Because we have 66 stitches, you will have 33 pairs. Alternating these two stitches creates raised columns that pop forward and sink back, just like knitted ribbing.
Repeat that same round, fpdc over fpdc and bpdc over bpdc, so the columns line up. Work 8 rounds in total, which gives a brim about 2 inches deep. At the end, work a slip stitch into the next stitch, cut the yarn, leave a 6 inch tail, and weave it in firmly. If you like the look of a folded brim, as shown in the photos, the ribbing will naturally roll up and sit neatly against the hat.
Ribbing in the round can feel awkward at first, because your hook goes in different directions on every stitch. Slow down for the first round, and the rhythm will come. A rib that is worked too tightly will pull the hat in and feel uncomfortable, so use a hook one size larger for the brim if you need to. A snug brim keeps the hat in place on windy days, but it should never leave a mark on the forehead.

Step Five: Crochet the Cat Ears
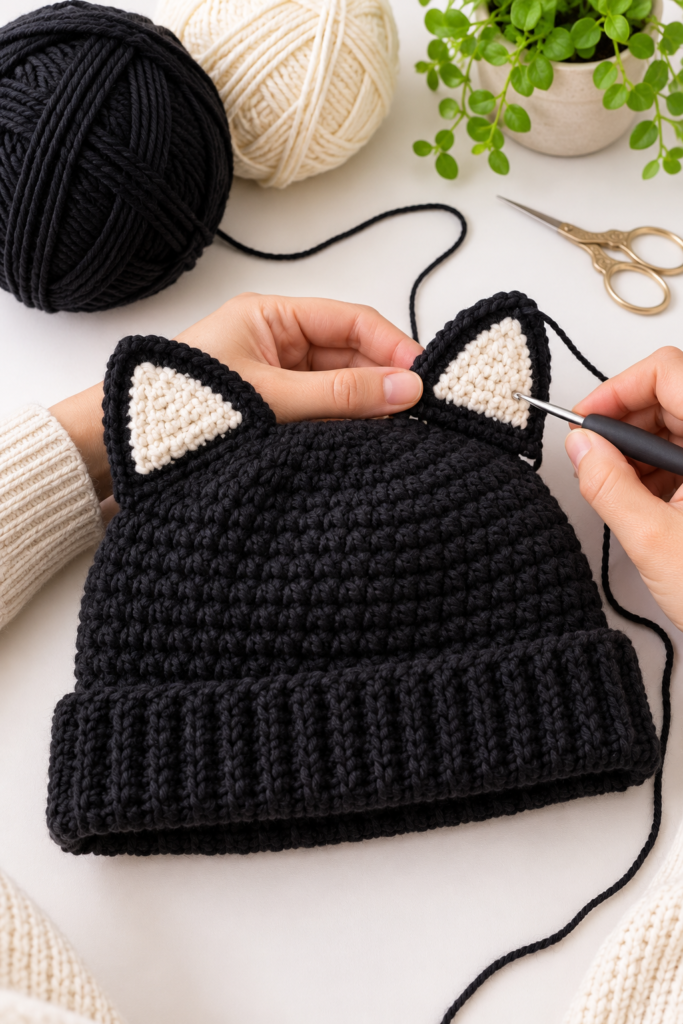
The ears are where this hat gets its personality. Each ear is made of two triangles, a larger black one and a smaller cream one that sits inside it like a tiny cat ear.
Begin with the black outer triangle. Chain 13. Work 1 sc in the second chain from the hook and in each chain across, which gives 12 stitches. Chain 1 and turn. For the next row, work sc2tog, then sc in the next 8 stitches, then sc2tog, giving 10 stitches. Chain 1 and turn. Work sc2tog, sc in the next 6 stitches, sc2tog, giving 8. Chain 1 and turn. Work sc2tog, sc in the next 4, sc2tog, giving 6. Chain 1 and turn. Work sc2tog, sc in the next 2, sc2tog, giving 4. Chain 1 and turn. Work sc2tog twice, giving 2. Finally, work sc2tog once to finish at the tip. Cut the yarn and leave a tail for sewing. Make a second black triangle the same way.
Now make the cream inner triangle. Chain 9. Work 1 sc in the second chain from the hook and each chain across, giving 8 stitches. Chain 1 and turn. Work sc2tog, sc in the next 4, sc2tog, giving 6. Chain 1 and turn. Work sc2tog, sc in the next 2, sc2tog, giving 4. Chain 1 and turn. Work sc2tog twice, giving 2. Work sc2tog once to finish. Make two of these as well.
Place a cream triangle in the center of a black triangle, so a small black border shows all around it. Pin it in place and sew it down with tiny whip stitches using the cream yarn, working under the edge stitches so the stitching stays hidden. Add a touch of structure by working a round of sc in black yarn around the outer edge of the black triangle, placing 3 sc in each corner point so the ear lies flat and keeps a crisp triangular shape. That extra round also strengthens the edge so the ear will stand upright.
A gentle tip: if your ears flop over, stiffen them by sewing a small triangle of plastic canvas or thin craft foam between the two layers. For a child who will wash the hat often, skip the stiffener and simply fold the base of each ear so that it keeps a natural bend.
Step Six: Attach the Ears to the Hat
Placing the ears correctly is the secret to an adorable finished hat. Try the hat on or place it on a mannequin. The ears should sit about 3 inches apart on top of the head and slightly toward the sides, tilting a little outward just like a real cat. A good starting point is to measure from the center front of the hat and place each ear about 3 stitches off the center line on each side of the crown, then check the angle.
Pin each ear in place, then step back and look at the hat from the front and from the side. Adjust until both ears look balanced. It helps to take a quick photo, because photos reveal uneven placement more clearly than your eyes do.
When you are happy, thread the black tail onto a yarn needle and sew the base of each ear to the hat with small, tight stitches. Go around the entire base of the ear and pass through the hat’s stitches rather than just the surface so the ear stays secure. For extra strength, go around twice. Weave in the ends on the inside of the hat.
Sewing ears on as the final step has a lovely benefit. You can tuck the folded base of each ear forward or backward to change the look. Tilted forward, the ears look alert and playful. Tilted back, they look calm and elegant. Choose whichever suits the person who will wear it.
Make It an Earflap Hat With Braids and Tassels
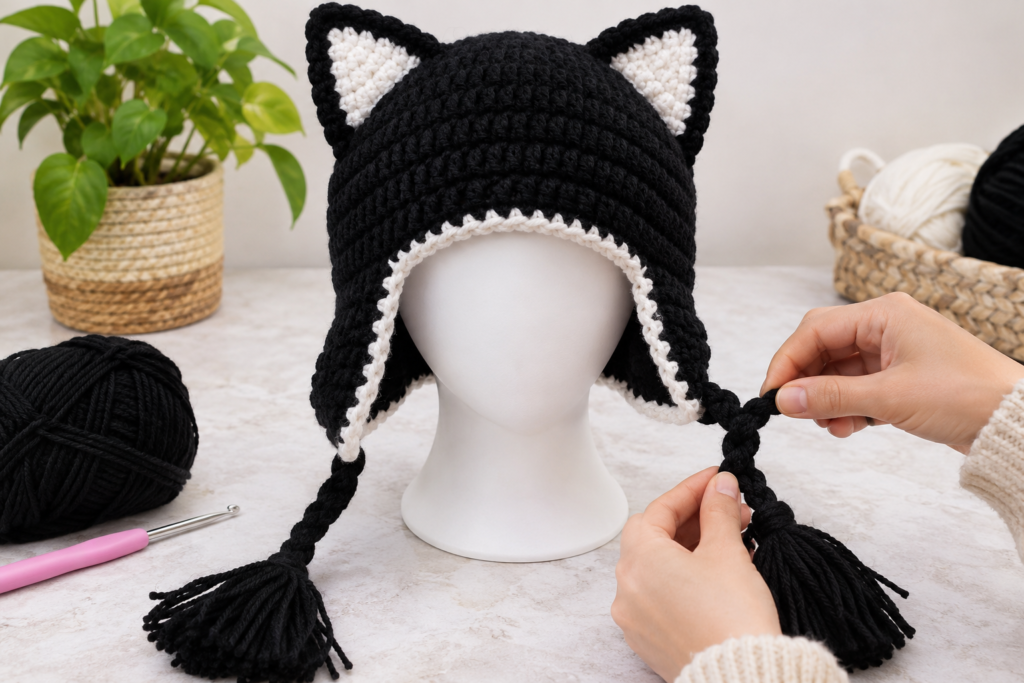
If you want a cozier version for deep winter, you can turn this same pattern into an earflap hat. The finished look has cream trimmed flaps, long braided ties, and fluffy tassels, and it is shown in the final photo of this tutorial.
To make it, work the body of the hat as in Step Three, but skip the ribbed brim. Work until the hat measures about 6 inches from the crown, then finish with a round of sc and a slip stitch to fasten off. Try the hat on and find the spot above each ear where the flap should start. On most adults, the flaps sit about 3 inches to either side of the center back.
To make the first earflap, attach black yarn to the edge of the hat at your marked spot. Work 13 sc across the edge, chain 1, and turn. Next row, work sc2tog, sc in the next 9 stitches, sc2tog, giving 11 stitches. Chain 1 and turn. Repeat the decrease row each time, working sc2tog at the start and end, until 5 stitches remain. The flap now forms a gentle rounded triangle that will hang over the ear. Make the second flap on the opposite side to match.
For the cream trim, attach cream yarn at the bottom of the hat at the back and work a round of sc all the way around the lower edge, including down one side of each earflap, across the flap tip, and back up the other side. Place 2 sc in each corner so the trim lies smoothly. The cream border gives the hat a cheerful, finished frame, and it echoes the cream inside the ears.
For the braids, cut 9 strands of black yarn, each about 24 inches long. Fold them in half, push the loop through the tip of an earflap with a hook, and pull the ends through the loop. Divide into 3 groups of 3 strands each and braid until about 3 inches remain at the end. Tie a tight knot below the braid. Make the second braid the same way.
For the tassels, wrap black yarn about 30 times around your piece of cardboard. Slide a short strand of yarn through the top, tie tightly, and slip the loops off the cardboard. Wrap another strand around the bundle about half an inch below the top and tie it tightly to form the tassel head. Cut the bottom loops, trim the ends even, and sew the tassel to the end of each braid. When the tassels swing as you walk, you will understand why this version is so popular.
Finishing Touches and Care
Weave in all remaining ends with care. With dark yarn like black, it is easy to miss a loose strand, so look at the hat in good light and thread each tail through several stitches in different directions before trimming. Turn the hat inside out and check that no knots are visible.
Blocking helps the hat sit beautifully. Dampen it lightly with a spray bottle, shape the crown over a bowl or a balloon, and let it dry fully. This smooths the stitches and gives the ears a clean, even shape. If you used acrylic yarn, you can steam it very lightly, holding the iron an inch above the fabric without pressing, but be careful not to touch the hot iron to the yarn, as acrylic can melt.
To wash the hat, use cool water and a mild soap, or follow the instructions on your yarn label. Press out the water gently, reshape the hat, and dry it flat. Avoid hanging it, because wet yarn is heavy and can stretch out of shape.
Troubleshooting Common Problems
If your crown looks like a bowl rather than a flat circle, you have too few increases, so go back to the round where it began to curl and check your count. If it looks wavy, you have too many, so rip back a round and recount.
If your hat is too tight, you may be crocheting too tightly. Go up half a hook size for the body and a full size for the brim. If it is too loose, go down half a size, or work fewer stitches in the crown.
If the ears lean in different directions, check your placement from the front before sewing. Pin them first, take a photo, and adjust. Once they are sewn in place, you can still tuck each base in or out to correct small differences.
If the ribbing looks messy, the cause is usually a missed post stitch. Count the stitches after each round and make sure you alternate front and back posts consistently. Mark your first stitch carefully, because the pattern will not line up if you lose your place.
If the inner ear panel puckers, it was probably stretched when sewn. Keep it flat and relaxed while stitching, and match the stitches evenly along each edge.
If your yarn splits, switch to a hook with a rounder head or use a smoother yarn. Black yarn can be hard to see, so work in good light, and avoid crocheting in dim rooms for long periods.
Fun Variations to Try
Once you have made the basic hat, you can customize it in countless ways. Try a different color combination for each cat personality, such as gray with white, brown with cream, or white with soft pink. Add a small pom pom to the top between the ears for extra fluff. Embroider little whiskers or a tiny paw print on the brim, or add a bow to one ear for a sweeter look. Use a textured yarn for the ears to make them feel like soft fur, or make the inner ears in a sparkly yarn for a festive touch.
You can also make a baby version by working fewer crown rounds and shortening the body. Cut the ears down by 2 rows, and shorten the braids. A toddler sized earflap hat with tiny tassels is one of the most adorable things I have ever made.
For selling at craft markets, a set of matching hats in several colors looks wonderful on a display. Cat themed hats are always popular in the colder months and around Halloween, and they photograph very well for online shops.
Frequently Asked Questions
Many readers ask whether this pattern is truly suitable for beginners. It is, provided you are comfortable with single crochet, increases, and decreases. The front and back post stitches in the brim are the only slightly unusual part, and a short video tutorial will show you how in a few minutes. If you want to avoid them completely, you can work the brim in simple sc in the back loop only, which gives a similar ridged look.
People also ask how much yarn they need. For an adult hat with ears, plan on about 180 yards of main color and 30 yards of contrast. The earflap version needs about 60 extra yards for flaps, braids, and tassels.
Another common question is how long it takes. Most crocheters finish the main hat in about 3 to 4 hours, the ears in an hour, and the earflaps, braids, and tassels in another 2 hours. Your speed will depend on your experience, so enjoy the process rather than racing.
Readers often wonder whether they can sell finished hats. You are welcome to sell items made from this pattern. I would love it if you credited this blog and linked back to the pattern when you share your work online.
Lastly, people ask what yarn works best for children. Choose a soft, machine washable acrylic or a cotton blend, because children’s hats get dirty quickly and need easy care. Avoid yarn that sheds fibers, and sew everything securely so there are no loose parts.
Final Thoughts
This adorable cat ear crochet hat is a project that rewards you at every stage. The magic ring gives you a tidy start, the crown grows smoothly, the ribbed brim feels professional, and the little ears bring everything to life. Add the earflaps, braids, and tassels, and you have a winter hat that feels cozy and full of character. Whether you make one for yourself, for a child, or for a friend who adores cats, you will end up with something handmade that people notice and love.
I would be so happy to see your version, so share your finished hat and tell me which colors you chose. Happy crocheting, and enjoy every stitch.