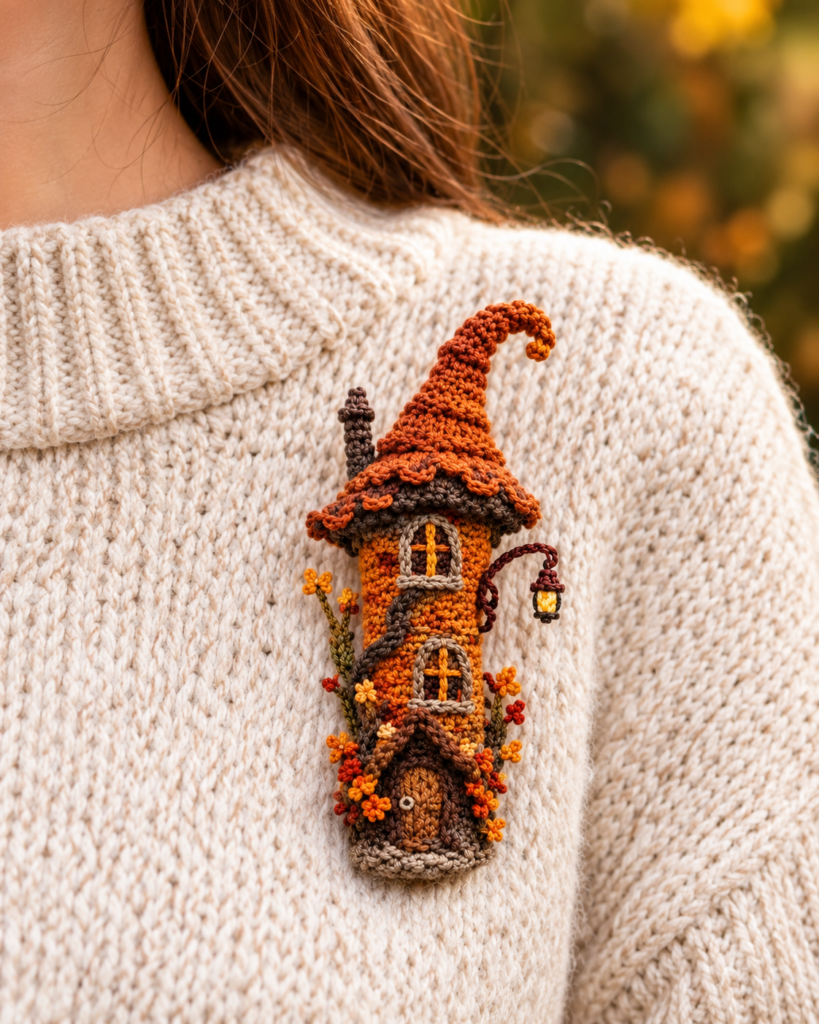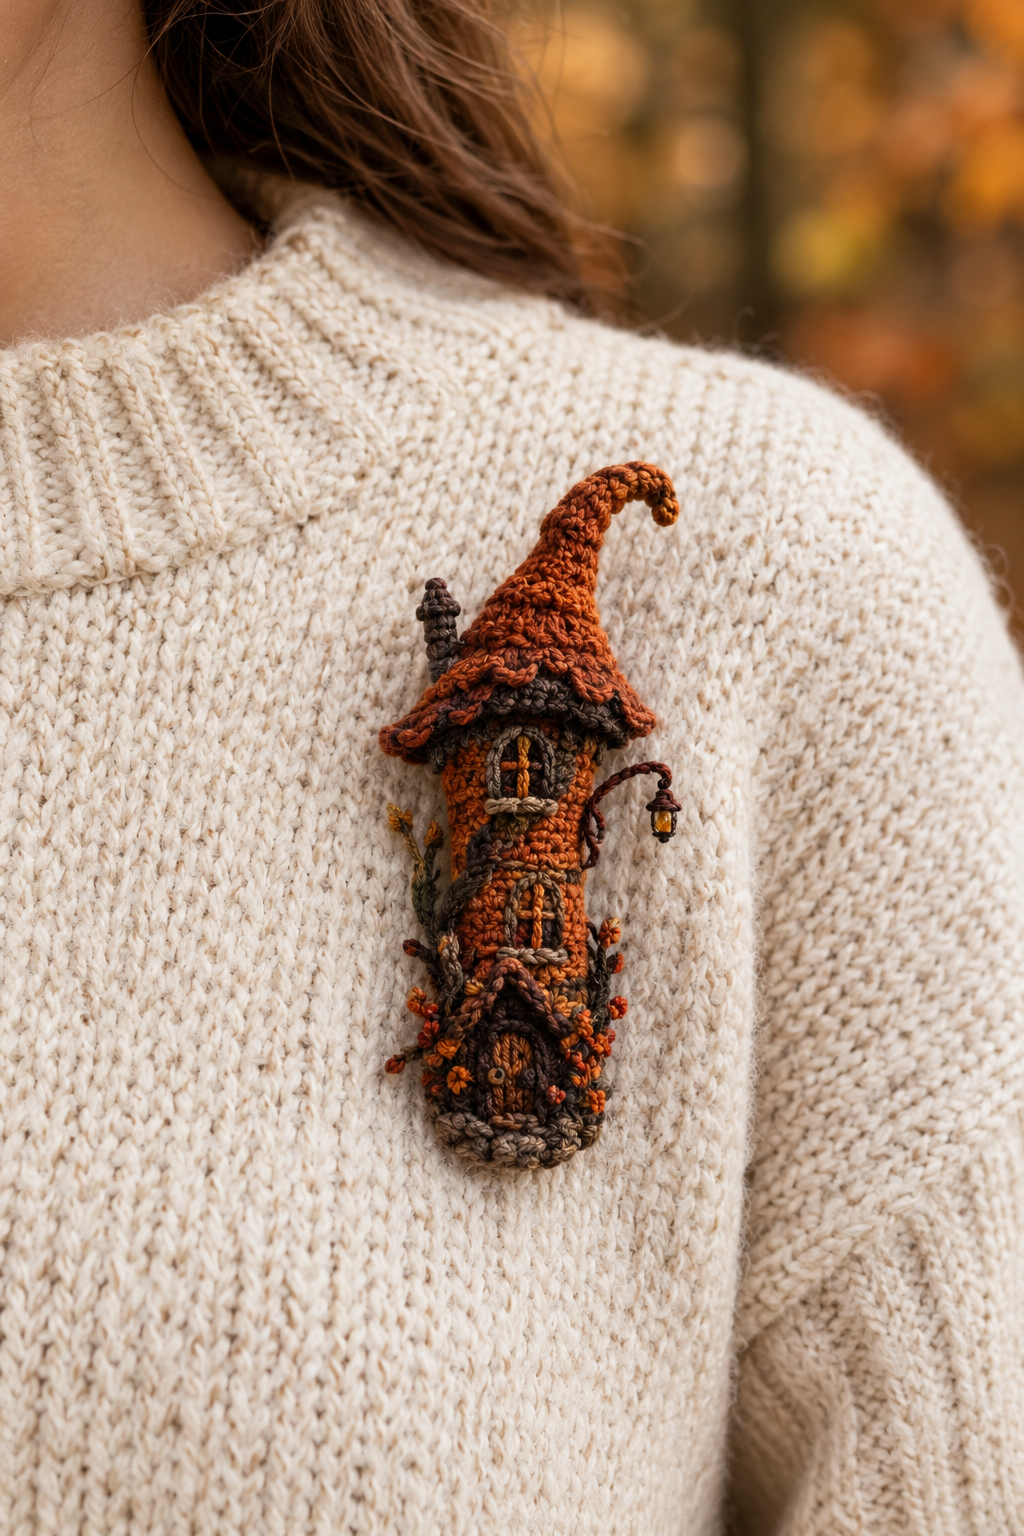
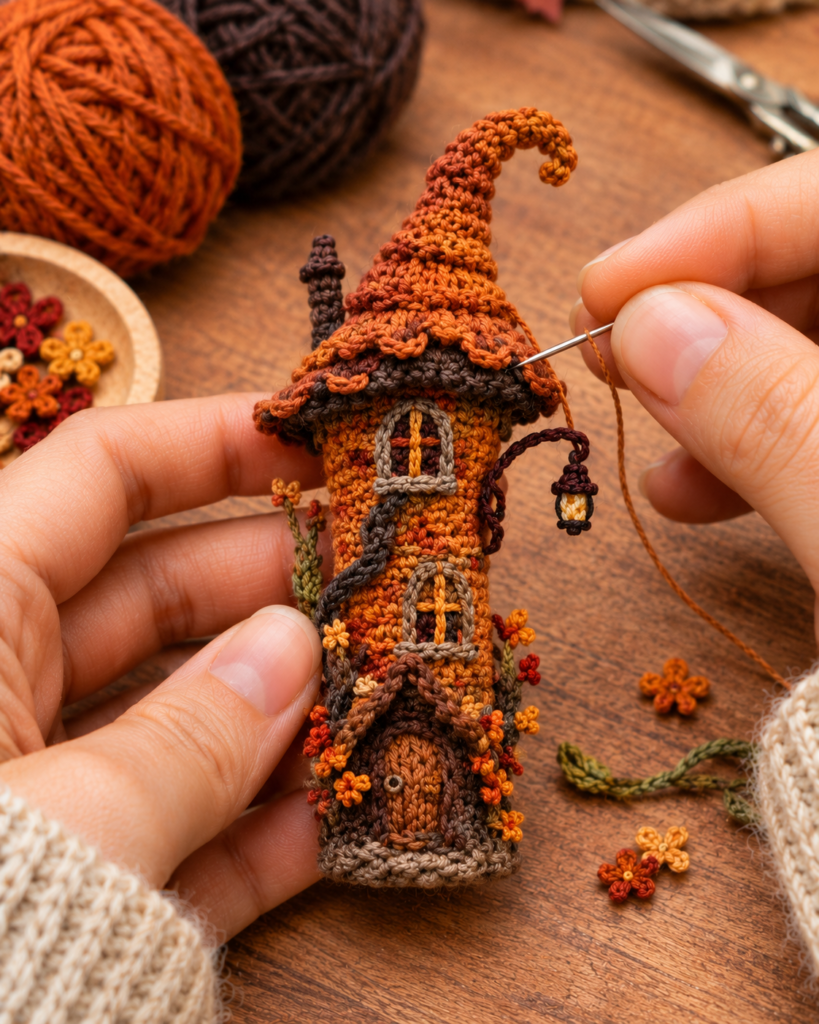
There is a particular kind of autumn mood that I adore. It is the one that arrives when the air turns crisp, the light goes golden and low, and everything starts to feel a little bit enchanted. Dry leaves, candlelight, woolly coats, and a crooked stone tower on a hill with one warm window glowing. This rust witch tower brooch is that feeling, made small enough to pin on your lapel.
It is a tiny crocheted tower in a deep rust color, topped with a pointed black witch hat and a golden band, with a little arched window that glows like someone is home. It is moody and sweet at the same time, which is exactly what “cute gothic” means to me. You can pin it on a denim jacket, a wool coat, a tote bag, a scarf, a beret, or the strap of your favorite backpack, and it instantly adds a bit of witchy fall magic to any outfit.
In this post I will walk you through the full project, from materials to the finishing details. You will get the complete pattern with stitch counts for every round, step-by-step assembly, a guide to attaching the pin back so it hangs properly, troubleshooting for the most common problems, color ideas, and answers to the questions I get asked the most. If you can crochet in the round with single crochet, increases, and decreases, you have all the skills you need.
Why You Will Love This Witch Tower Brooch
It is small and quick. A brooch is a perfect project when you want something finished without committing to a huge make. Most people can complete this one in an afternoon, which makes it ideal for a cozy weekend or a fall craft night.
It is a statement without being loud. Many Halloween accessories are bright orange and cartoonish. This one is quiet and moody, with warm rust, charcoal black, and a flicker of gold. It works from September through November, and it looks just as good on a regular Tuesday as it does on Halloween night.
It uses very little yarn. Scraps and leftovers are perfect here. If you have half-used skeins of rust, black, and mustard, you have everything you need.
It makes a thoughtful gift. A handmade brooch costs little, packs flat, and feels personal. It suits friends who love fall, bookish people, cottagecore fans, and anyone who keeps a black cat or a candle collection.
It is great for craft markets. Fall craft fairs are full of people hunting for small, giftable handmade pieces. A witch tower brooch has the right mix of cute and gothic to stand out on a table.
Project Details at a Glance
Skill level: Beginner to advanced beginner
Time to make: About 3 to 4 hours
Finished size: About 3.5 to 4 inches (9 to 10 cm) tall with DK weight yarn and a 2.5 mm hook. For a smaller brooch, use fingering weight yarn and a 1.75 mm hook, which gives roughly 2.5 to 3 inches.
Pieces: Tower, hat cone, hat brim, optional ivy vine, felt backing, and pin back
Techniques: Magic ring, single crochet, increase, invisible decrease, color changes, back loop only, basic embroidery, whip stitch assembly
Materials You Will Need
Yarn (DK weight, category 3): Cotton or a cotton blend is my favorite for small amigurumi pieces, because it holds its shape, gives clean stitch definition, and does not stretch much over time. Acrylic works as well. You will need small amounts of:
- Rust or terracotta for the tower (about 25 to 30 yards)
- Black or deep charcoal for the hat (about 15 to 20 yards)
- Mustard or antique gold for the hat band and window glow
- Dark brown or a deeper rust for brick lines and the window frame
- Dark green or olive for the optional ivy
Crochet hook: 2.5 mm. Use a hook one or two sizes smaller than your yarn label suggests, so the stitches are tight enough to hide the stuffing and hold the shape.
Polyester fiberfill: Just a small handful. The tower needs to feel firm, because a squishy brooch will droop on fabric.
Felt: A small piece of black or brown felt, about 2 by 2 inches (5 by 5 cm), for the backing.
Pin back: A 1 inch (25 mm) bar pin back, either sew-on style or one with holes you can stitch through. For a heavier brooch, use two pin backs.
Yarn needle, stitch markers, pins, and small scissors: Essential for assembly.
Embroidery thread (optional): Brown, black, and mustard for the window and brick details, if you prefer thread to yarn for fine lines.
Fabric stiffener or clear craft glue (optional): To help the hat tip keep a curve.
Sewing needle and matching thread: For attaching the felt and pin back securely.
Abbreviations (US Terms)
- MR: Magic ring
- sc: Single crochet
- inc: Increase (2 sc in the same stitch)
- dec: Decrease (invisible decrease over two stitches)
- BLO: Back loop only
- ch: Chain
- sl st: Slip stitch
- ( ) x3: Repeat what is inside the parentheses the number of times shown
- [ ]: Total stitches at the end of the round
Invisible decrease: Insert your hook through the front loops only of the next two stitches, yarn over, pull through both loops, yarn over again, and pull through the last two loops. It leaves a smooth surface and hides gaps, which matters on tiny pieces.
Work every piece in a continuous spiral without joining, unless the pattern says otherwise. Place a stitch marker in the first stitch of each round, and count your stitches often.
The Pattern
The Tower (Make 1, in rust)
The tower is worked from the base up. A back-loop-only round near the bottom creates a neat edge, and a small flare near the top gives it a classic corbel look, like the top room of a real stone tower.
Start with an MR.
Round 1: 6 sc in the MR [6]
Round 2: inc in each stitch around [12]
Round 3: (sc, inc) x6 [18]
Round 4: sc in the back loop of each stitch around [18]
Rounds 5 to 8: sc in each stitch around [18] (4 rounds)
Round 9: (4 sc, dec) x3 [15]
Rounds 10 to 13: sc in each stitch around [15] (4 rounds)
Begin stuffing now, and keep adding fiberfill as you go. Push it firmly into the base so the tower stands upright.
Round 14: (4 sc, inc) x3 [18]
Rounds 15 to 16: sc in each stitch around [18] (2 rounds)
Stuff the tower firmly. It should feel solid, with no soft spots, because a brooch needs to hold its shape. Fasten off, leaving a long tail for attaching the hat. Do not close the top. The open edge will be covered by the hat.
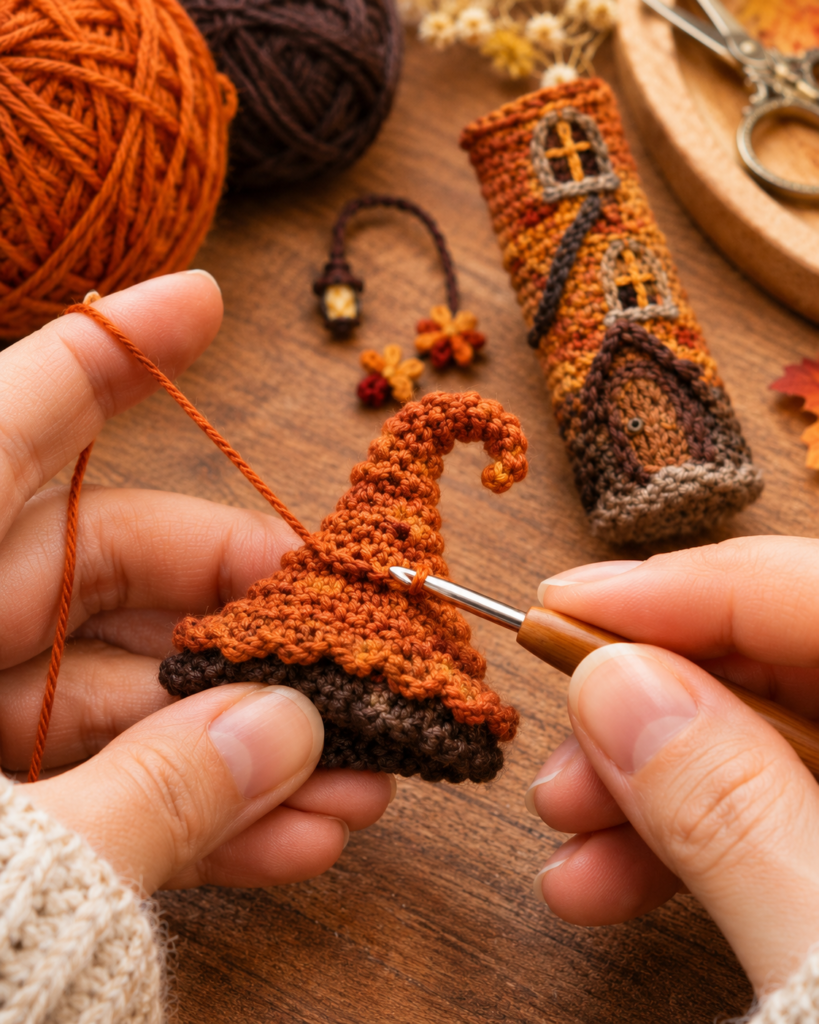
Hat Cone (Make 1, in black)
Start with an MR.
Round 1: 6 sc in the MR [6]
Rounds 2 to 3: sc in each stitch around [6] (2 rounds)
Round 4: (sc, inc) x3 [9]
Round 5: sc in each stitch around [9]
Round 6: (2 sc, inc) x3 [12]
Round 7: sc in each stitch around [12]
Round 8: (3 sc, inc) x3 [15]
Round 9: sc in each stitch around [15]
Round 10: (4 sc, inc) x3 [18]
Round 11: sc in each stitch around [18]
Change to mustard.
Round 12: sc in each stitch around [18]
Fasten off, leaving a long tail. Stuff the cone lightly, just enough to keep it from collapsing.
Hat Brim (Make 1, in black)
Start with an MR.
Round 1: 6 sc in the MR [6]
Round 2: inc in each stitch around [12]
Round 3: (sc, inc) x6 [18]
Round 4: (2 sc, inc) x6 [24]
Round 5: (3 sc, inc) x6 [30]
Round 6: sc in each stitch around [30]
Sl st into the next stitch and fasten off, leaving a long tail. This makes a flat disk, about 1.75 inches (4.5 cm) across.
Optional Ivy Vine (Make 1, in green)
Ch 20. Sl st in the second chain from the hook and in each chain across [19]. Fasten off.
Leaves (make 3 to 5): Ch 4. Sl st in the second chain from the hook, sc in the next chain, and sl st in the last chain. Fasten off and leave a tail. Sew the leaves along the vine at irregular intervals.
Embroidery Details: Where the Magic Happens
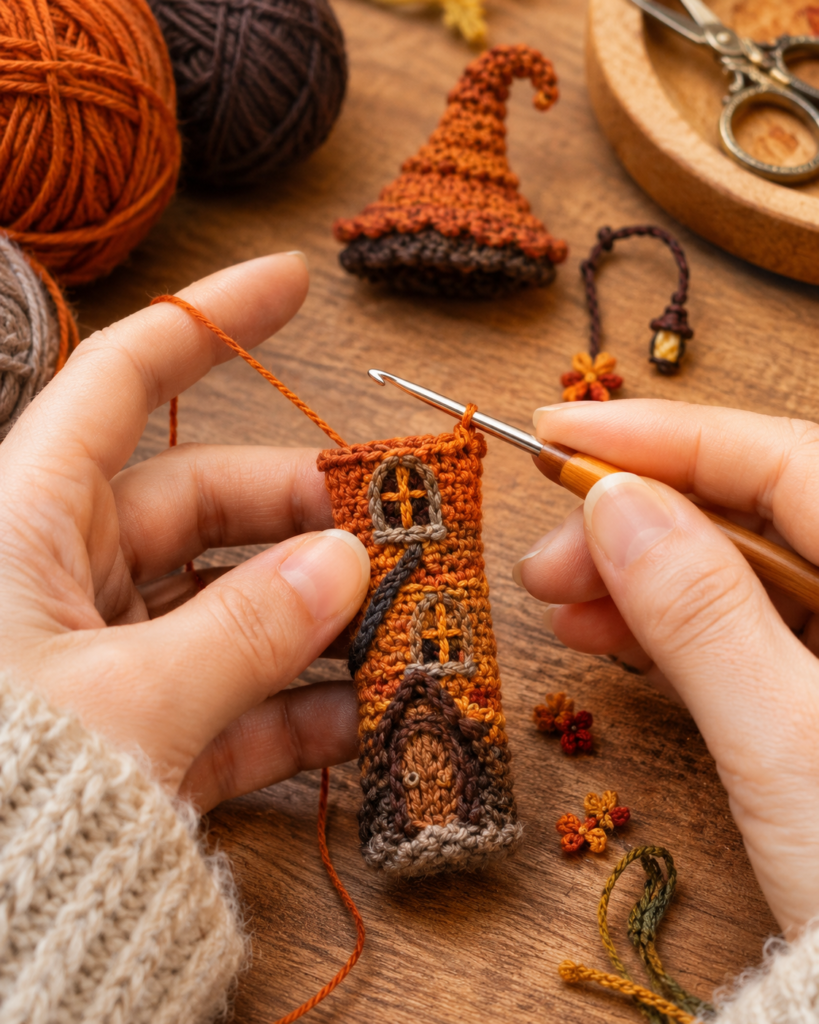
The little details are what turn a simple tube into a haunted tower. Use dark brown yarn or embroidery thread, and take your time. A few simple stitches make a big difference.
The glowing window. On the front of the tower, around rounds 9 to 12, embroider a small arched window. Start with a dark brown outline, using straight stitches to form a rectangle with a rounded top. Fill the inside with mustard, working small vertical stitches side by side, so it looks like warm light behind a pane. Add a tiny cross in brown thread over the glow to make a window frame.
The brick lines. Using a slightly darker rust or brown, add short horizontal stitches in a staggered pattern around the tower, like bricks. Keep the lines short and slightly uneven. Real old stones are never perfectly regular. Skip this step if you prefer a smooth look, and add it only near the base for a lighter texture.
The tiny door. Embroider a small arched door at the bottom, with a brown outline and a dot for the handle. This detail is optional, but it makes a surprising difference.
Aged shading. For a weathered look, add a few vertical brown stitches on one side of the tower, as if moss or rain stains have crept up the stone.
Assembly: Bringing Your Tower to Life
Step 1: Assemble the hat. Place the hat cone in the center of the brim disk, with the open end of the cone sitting on the third round of the brim. Sew the cone to the disk with small whip stitches, going all the way around. The mustard band should sit just above the brim.
Step 2: Curve the tip. Bend the point of the hat gently to one side, as if it has been leaning in the wind. For a permanent curve, add a couple of small stitches that pull the tip sideways, or brush on a thin coat of fabric stiffener and let it dry in position.
Step 3: Attach the hat to the tower. Place the hat on top of the tower, with the brim resting on the open top edge. Sew around the underside of the brim, joining it to the top of the tower with whip stitches. Tuck in any loose ends as you go.
Step 4: Add the ivy. Wind the ivy vine around the base or up one side of the tower, and stitch it down every few centimeters. Make sure the leaves point upward and outward for a natural look.
Step 5: Prepare the backing. Cut a small oval of felt, about 1.5 by 1 inches (4 by 2.5 cm). Sew the pin back to the felt first, using a needle and thread, with small, tight stitches through every hole.
Step 6: Attach the felt to the tower. Place the felt on the back of the tower, with the pin about a third of the way down from the top, so the brooch hangs upright and does not tip forward. Sew the felt to the crochet with small stitches around the entire edge. Make sure the pin opens at the top, so it clasps correctly.
Step 7: Test it. Pin the brooch on a piece of fabric and let it hang. If it tilts, move the pin back slightly higher or add a second pin back for balance.
Color Ideas and Variations
The rust version is my favorite, but this design is wonderfully flexible.
Classic Halloween. Use deep orange for the tower, black for the hat, and a purple band. It looks more playful and is perfect for October.
Moonlit gray tower. Pale gray and silver-blue yarn with a black hat gives a cool, misty look, and a cream window glow feels like moonlight.
Plum and berry. A dusty plum tower with a dark green hat and a pink glow is a softer, romantic take on gothic fall.
Mossy tower. Olive green with brown brick lines and a mustard window gives a forest-witch look, with ivy trailing over the stone.
Double tower set. Make two or three towers of different heights and sew them onto a single felt base for a witchy skyline brooch.
Add a bat or a moon. A small crescent moon cut from felt or crocheted from yellow yarn, stitched near the hat, adds extra story. A tiny black bat clipped to the side gives it extra gothic charm.
Turn it into something else. The same pattern becomes a bag charm if you add a keychain loop, a Christmas tree ornament if you swap the colors, or a magnet if you glue a magnet to the back.
Troubleshooting: Common Problems and Easy Fixes
The tower is leaning. Check that the base is flat and the stuffing is firm and even. If the base is round or soft, press it flat against a table while you add more fiberfill. A tighter tension also helps the tower hold its shape.
The brooch flips forward on fabric. This usually means the pin is too low or the brooch is too heavy at the top. Move the pin higher, add a second pin back, or make the piece smaller. Lighter yarn and less stuffing in the hat also reduce the weight.
The hat is floppy. Stuff the cone a little more firmly, and use a smaller hook for the hat. You can also stiffen it with a thin coat of fabric stiffener, which will keep the shape for years.
The hat does not sit straight. Pin it in place before sewing, and look at it from the side. If it tilts, sew a few extra stitches on the low side to lift it.
I can see stuffing between the stitches. Your tension is too loose. Go down a hook size, and consider using white fiberfill with light colors and dark fiberfill with dark colors.
The window looks messy. Mark the outline with a few pins first, or draw it lightly with a washable fabric pen. Stitch slowly, and pull the thread gently so the stitches lie flat rather than puckering the crochet.
The felt backing is visible. Cut the felt slightly smaller than you think you need, and choose a color that matches the tower. A rust-colored felt disappears against the rust crochet.
The ivy keeps slipping. Anchor it with tiny stitches at every leaf and at the base, and tie a knot on the inside.
Tips From My Own Making Experience
Choose your yarn carefully. A matte cotton gives a stony, aged look that suits a tower beautifully, while a shiny yarn looks more like candy.
Keep your tension consistent. On small pieces, even tiny changes in tension show up as bumps. Take a break if you feel your hands tightening up.
Embroider before you attach the pin. It is much easier to stitch the window and bricks while the tower is still loose in your hands.
Test on a swatch. Try your window embroidery on a scrap of crochet before you stitch the real thing.
Photograph on fabric. Brooches look best on wool, denim, or knit fabrics. If you plan to share your work online, pin it on a coat or a jacket and photograph it in natural light.
Make a small batch. Once you have the pattern, it is surprisingly fast to make three or four in different colors for gifts.
Safety, Care, and Wearing Tips
A brooch has a metal pin, so it is not a toy and is not suitable for babies or toddlers. Keep it out of reach of small children, and close the pin securely after pinning it on fabric.
To wear it, pin it through a thick fabric such as wool, denim, canvas, or a knit with a firm weave. Avoid very thin or delicate fabrics, because the weight of the brooch can pull or snag them. If you are pinning it on a bag, check the strap fabric first.
To clean the brooch, spot clean with a damp cloth and a little mild soap, then let it air dry completely. Do not machine wash it, and remove it from garments before washing. Store it in a small box or pouch so the pin does not catch on other items.
Can I Sell Finished Brooches?
Yes, you are welcome to sell finished brooches that you make from this pattern, whether at craft fairs, in an online shop, or to friends. Please credit StitchNestStudio as the designer, use your own photos, and do not copy, resell, or redistribute the written pattern itself. This is an original design and is not affiliated with any brand.
Frequently Asked Questions
Is this brooch pattern good for beginners?
Yes. It uses only basic amigurumi stitches, and each piece is small enough to finish quickly. The embroidery is simple, and mistakes are easy to fix.
What yarn is best for a crochet witch tower brooch?
DK weight cotton is my favorite, because it gives crisp stitches and holds its shape. Acrylic is fine too. Avoid fuzzy yarns, because they hide the stitch details and the embroidery.
How do I keep the brooch from drooping on my coat?
Stuff it firmly, place the pin about a third of the way down from the top, and use a felt backing to spread the weight. For heavier brooches, add a second pin back.
Can I make it without embroidery?
Yes. A plain rust tower with a black hat still looks charming. The embroidery just adds extra personality.
What size is the finished brooch?
About 3.5 to 4 inches (9 to 10 cm) tall with DK yarn and a 2.5 mm hook. Use thinner yarn and a smaller hook for a smaller brooch.
Can I turn it into a keychain or ornament?
Absolutely. Skip the pin back and sew a small loop of yarn to the top of the hat, or attach a keychain ring.
How long does it take to make?
About 3 to 4 hours for most crocheters, including the embroidery and the pin back.
What colors look best for a gothic fall palette?
Rust, black, mustard, plum, olive, and deep brown all work beautifully. A touch of gold or cream for the window glow adds contrast.
Final Thoughts
Small projects like this one are a quiet joy. In an afternoon, a handful of scraps becomes a tiny haunted tower with a warm window, ready to ride along on your coat all season. It is cute, a little spooky, and very easy to personalize, which makes it a lovely pattern to return to every fall.
If you make one, I would love to see it. Share your colors, your embroidery, and any changes you made to the design. And if you hit a snag along the way, leave a comment and I will help you work it out.
Happy hooking, and may your autumn be full of crisp air, warm light, and a little bit of witchy magic.
Written by the StitchNestStudio team, crochet designers who test every pattern before publishing.