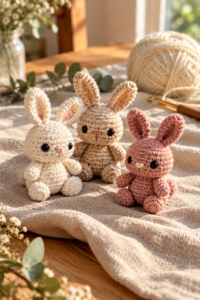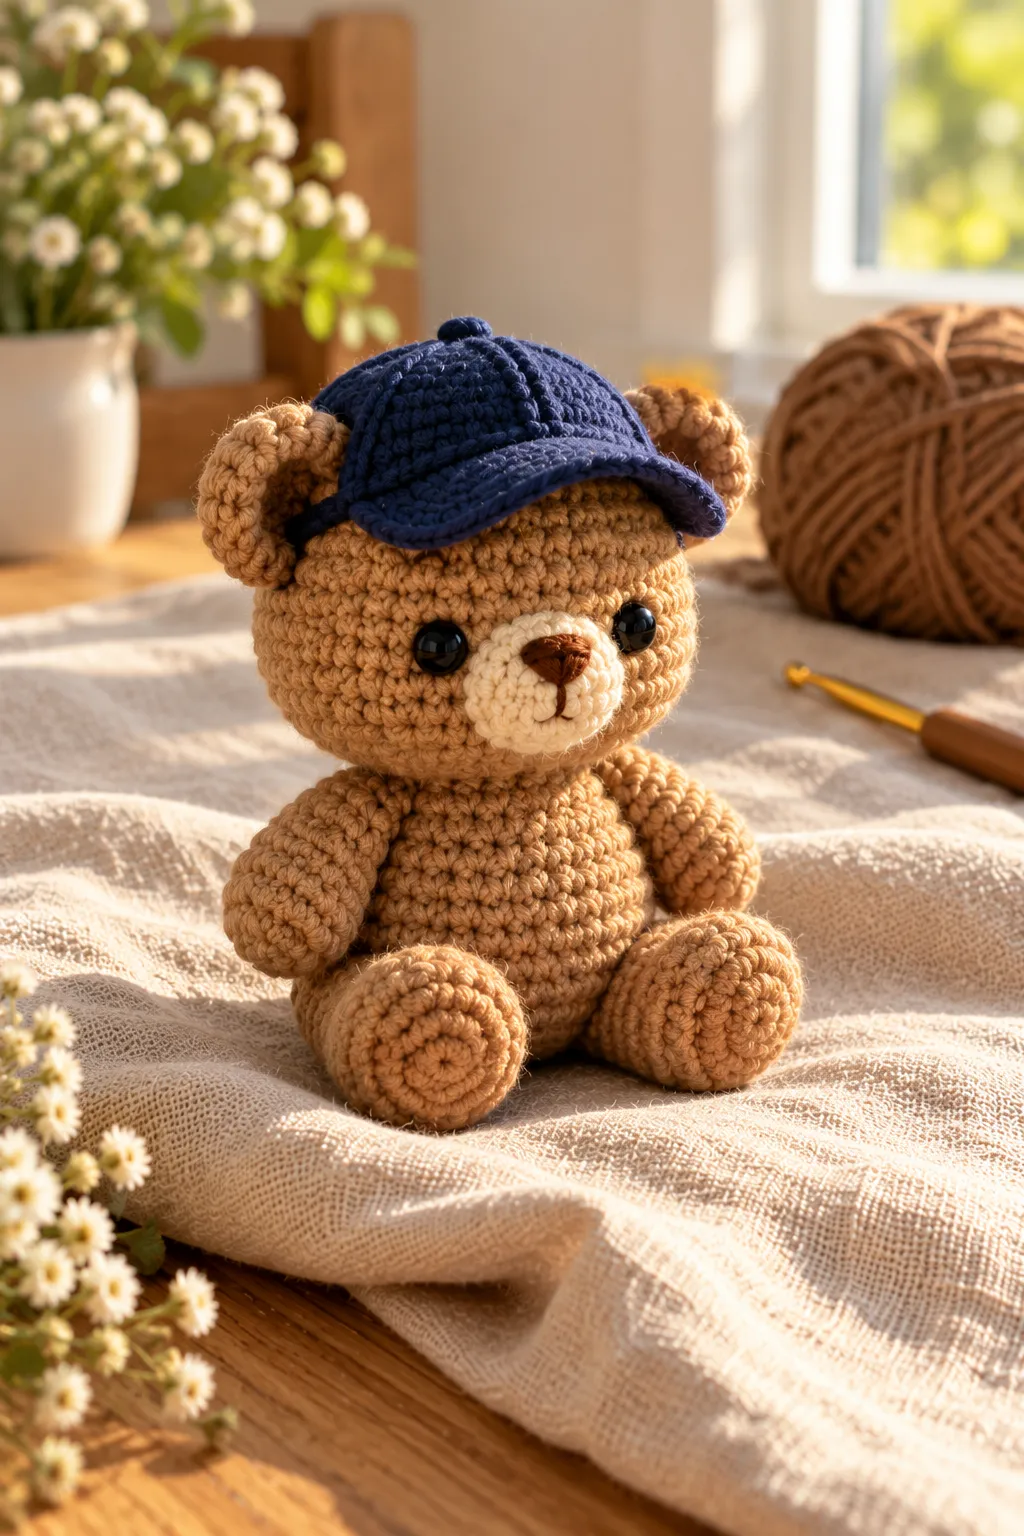
Introduction: A Tiny Bear with a Big Personality
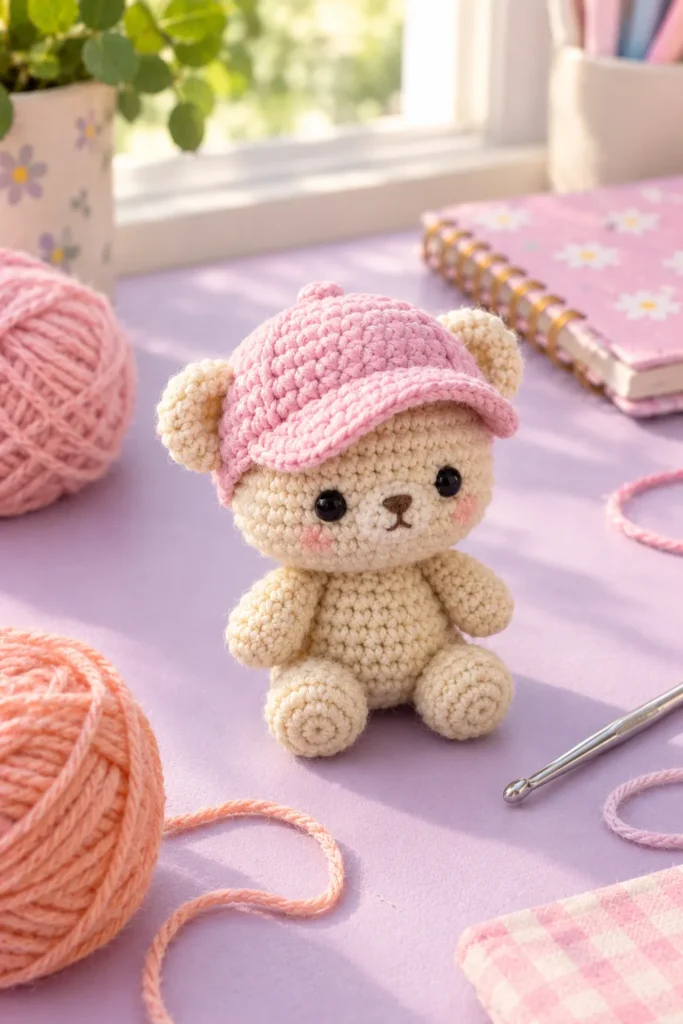
Some projects make you smile before you’ve even finished them. This little cream teddy bear in a pink baseball cap is one of those. He sits on his round little feet, his black safety eyes shine, and his soft pink cheeks give him the sweet, slightly shy expression that makes people say “aww” out loud.
If you’ve scrolled through crochet inspiration lately, you’ve probably noticed that small amigurumi animals with accessories are everywhere. Tiny hats, scarves, bows and backpacks turn a simple stuffed toy into a character with a story. This bear is a perfect example. The cream body is classic and gentle, and the pink cap adds a modern, playful twist.
The good news is that you don’t need to be an expert to make him. The whole bear is built from basic shapes: balls, ovals and small cups, joined together with a needle and thread. If you can make a magic ring, single crochet, increase and decrease, you can finish this project.
In this guide, I’ll walk you through everything:
- The materials and tools you need
- How to choose the right yarn and colors
- A full round-by-round pattern for the head, body, arms, legs, ears and muzzle
- How to embroider the nose and add rosy cheeks
- How to crochet the pink baseball cap with its little brim
- Assembly tips so your bear sits straight and looks balanced
- Troubleshooting, care instructions, and ideas for customizing your bear
- A short FAQ for the questions beginners ask most
Grab a cup of tea, find a comfy spot near a window, and let’s make a bear.
Why This Crochet Teddy Bear Pattern Is Perfect for Beginners
Many people avoid amigurumi because they think it’s complicated. In reality, the technique is simple. You crochet in a spiral, working in rounds, and the shape grows by increasing and shrinks by decreasing. That’s it. Everything else is assembly.
Here is why this particular design is friendly for newer crocheters:
1. Every piece is a simple shape. The head is a sphere, the body is a rounded pear shape, and the arms and legs are small ovals. There are no tricky color changes in the middle of a round and no complicated shaping.
2. The pieces are made separately. Because the bear is assembled from separate parts, you can take breaks between pieces. Finish an ear, put the project down, and pick it up tomorrow. It never feels overwhelming.
3. It uses very little yarn. A small bear like this takes only a small amount of cream yarn and even less pink. It’s a great stash-buster, and a failed attempt doesn’t cost much.
4. It makes a fantastic gift. Birthdays, baby showers, graduation days, Valentine’s Day or just a “thinking of you” gift: a handmade bear fits every occasion.
5. It can become a small business product. Handmade amigurumi sells well at craft fairs and in online shops. If you plan to sell, a bear with a removable cap gives customers something extra, because they can swap the hat for other accessories.
Finished Size and Skill Level
- Height: About 5 to 6 inches (12 to 15 cm) sitting, depending on your yarn and hook
- Skill level: Beginner to confident beginner
- Time to make: Around 5 to 8 hours total, split over a few sittings
- Construction: Worked in the round in a continuous spiral, then sewn together
If you want a bigger bear, simply use thicker yarn and a bigger hook. The same pattern will scale up. A chunky yarn with a 4 mm hook will give you a bear around 9 to 10 inches tall.
Materials You Will Need
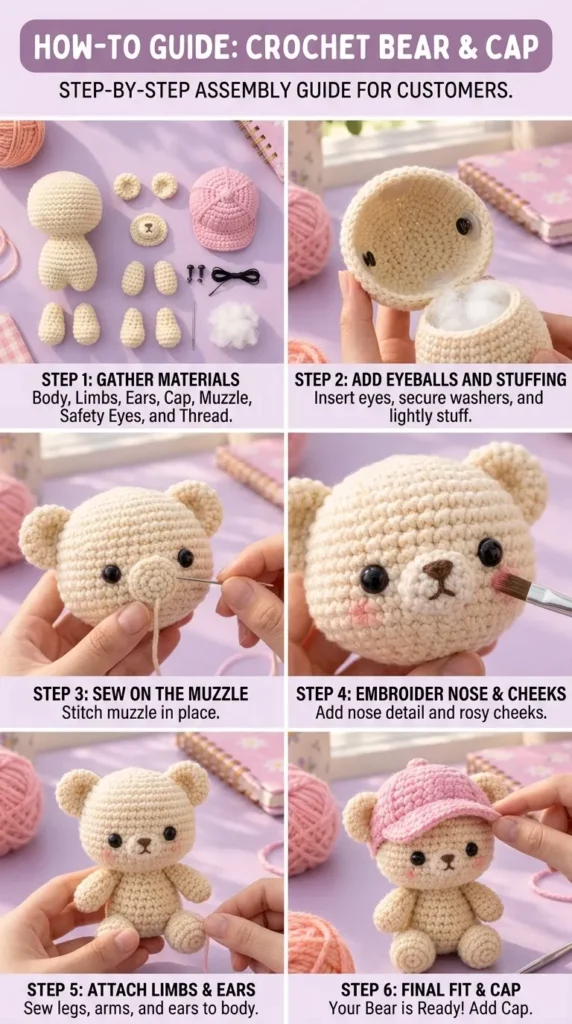
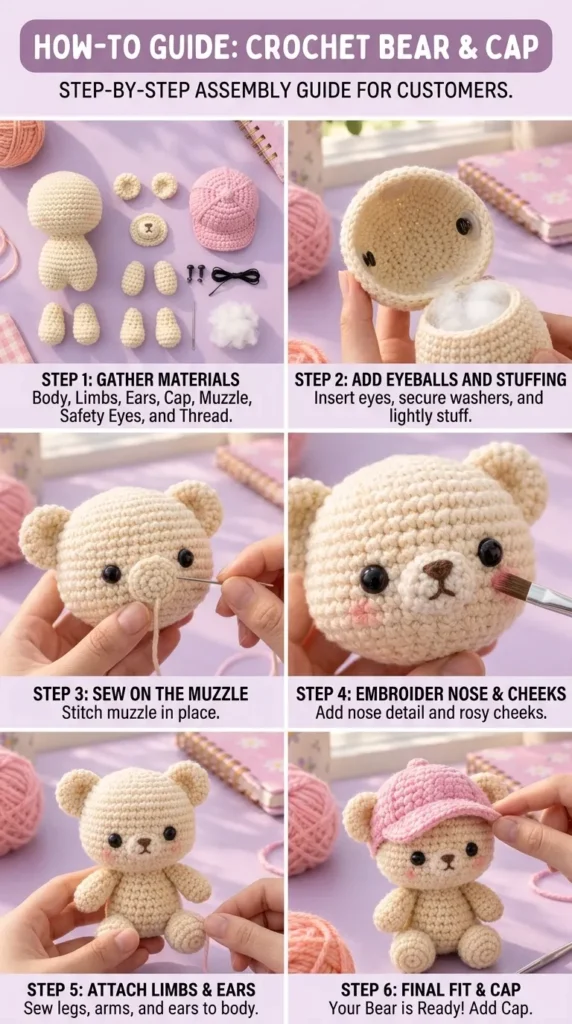
Gathering your supplies first makes the whole process smoother. The first step of the visual guide is exactly this: lay out your body parts, yarn, eyes and tools before you start stitching.
Yarn
- Cream or soft beige yarn for the head, body, arms, legs, ears and muzzle
- Pink yarn for the baseball cap
- Light brown or dark brown yarn or embroidery floss for the nose and mouth
- A small amount of pink embroidery thread or soft pink blush for the cheeks
For the bear in the photos, a soft DK weight (light worsted, category 3) cotton or acrylic works beautifully. Cotton gives crisp stitches that show off every little round. Acrylic is soft, affordable and easy to wash. A cotton-acrylic blend gives you the best of both.
Hook
- 2.5 mm crochet hook (for DK weight yarn)
Amigurumi needs tight stitches so the stuffing doesn’t peek through. If your fabric looks loose or gappy, go down a hook size. It’s normal to use a hook one or two sizes smaller than the yarn label suggests.
Other Supplies
- Black safety eyes, 6 to 8 mm, with washers
- Polyester fiberfill for stuffing
- Tapestry needle with a large eye for sewing and embroidery
- Stitch markers (or a scrap of contrasting yarn) to mark the beginning of each round
- Small scissors
- Pins to hold the limbs in place before sewing (optional but very helpful)
- Soft makeup blush and a small brush for the rosy cheeks (optional)
A quick safety note: if the bear is for a baby or small child, replace the plastic safety eyes with embroidered eyes. Safety eyes are secure when installed correctly, but embroidery is the safest option for little ones under three.
Choosing the Right Colors
The soft pastel look is a big part of this bear’s charm. Here are a few ideas to get the same effect:
- Cream: Look for names like “vanilla,” “ivory,” “buttercream” or “oatmeal.” Avoid stark white, which can look flat and cold.
- Pink: A soft bubblegum or rose pink works best. The cap should be noticeably pink against the cream body but not neon.
- Backdrop for photos: If you’re photographing your bear, lavender or lilac backgrounds make cream and pink look dreamy. Add a few skeins of peach or coral yarn, a flower-patterned notebook, and natural window light and you have a perfect product photo.
Abbreviations (US Terms)
- MR – magic ring
- sc – single crochet
- inc – increase (2 sc in the same stitch)
- dec – decrease (single crochet 2 stitches together; the invisible decrease is recommended)
- sl st – slip stitch
- ch – chain
- ( ) – repeat the instructions inside the brackets as many times as stated
- [ ] – total stitch count at the end of the round
Before You Start: Helpful Tips
Work in a continuous spiral. Don’t join at the end of each round. Place a stitch marker in the first stitch of every round and move it up as you go.
Use the invisible decrease. Instead of the standard sc2tog, insert your hook into the front loops only of the next two stitches, then yarn over and pull through both loops, then yarn over and pull through the remaining two. This hides the decrease and gives you a smooth surface.
Stuff firmly, but not too firmly. A well-stuffed bear holds its shape and doesn’t show the filling through the stitches. But overstuffing stretches the stitches. Add small pieces of fiberfill at a time and shape the piece as you go.
Leave long tails. Always leave a tail of at least 12 inches (30 cm) on pieces that you will sew onto the body. You’ll thank yourself later.
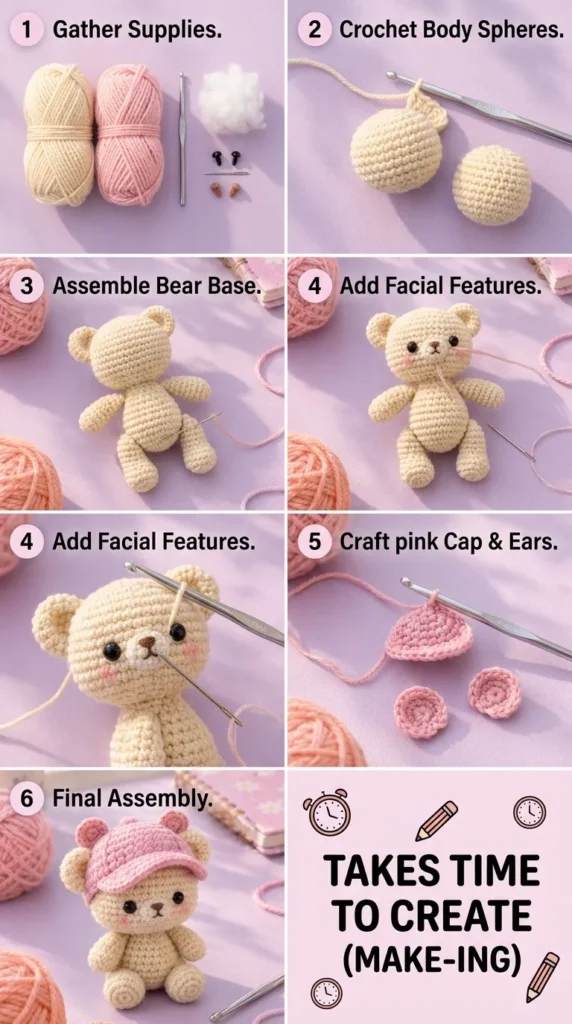
How the Bear Is Made: The Process
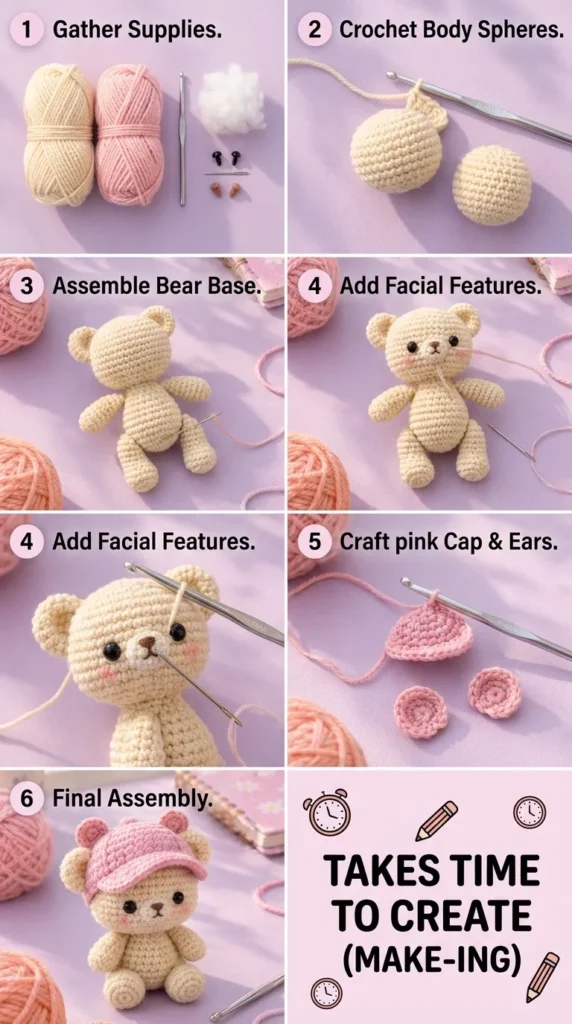
Before the full pattern, here is the big picture. You will crochet the body shapes, assemble the bear base, add the facial features, craft the pink cap and ears, and finish with the final assembly. Each stage builds on the last.
Crochet Teddy Bear Pattern: Step by Step
Step 1: The Head (Cream)
The head is the star of the show, so take your time. It’s worked from the top down, starting with a magic ring.
- Round 1: 6 sc in MR [6]
- Round 2: inc in each st around [12]
- Round 3: (sc, inc) x 6 [18]
- Round 4: (2 sc, inc) x 6 [24]
- Round 5: (3 sc, inc) x 6 [30]
- Round 6: (4 sc, inc) x 6 [36]
- Rounds 7 to 13: sc in each st around [36] (7 rounds)
Now it’s time for the eyes, as shown in step 2 of the guide.
Insert the safety eyes between rounds 9 and 10, about 6 stitches apart. Test the placement by pinning the eyes on before you lock the washers. Eyes placed a bit lower and wider apart give the bear a younger, cuter face. Eyes placed closer together give a more mature look. Secure each eye firmly with its washer.
Next, begin the decreases and lightly stuff as you go.
- Round 14: (4 sc, dec) x 6 [30]
- Round 15: (3 sc, dec) x 6 [24]
- Round 16: (2 sc, dec) x 6 [18]
Stuff the head firmly now. Because the head is round and chubby, it needs enough filling to look plump, but be careful not to distort the stitches.
- Round 17: (sc, dec) x 6 [12]
- Round 18: dec x 6 [6]
Fasten off, leaving a tail. Weave the tail through the front loops of the last 6 stitches, pull tight to close the hole, and hide the end inside the head.
Step 2: The Muzzle (Cream)
The muzzle is a small round disc sewn onto the lower middle of the face. For a subtle two-tone look, you can use a slightly lighter cream than the head.
- Round 1: 6 sc in MR [6]
- Round 2: inc in each st around [12]
- Round 3: sc in each st around [12]
Slip stitch into the next stitch and fasten off, leaving a long tail for sewing.
Don’t stuff the muzzle too much. A thin layer of fiberfill makes it slightly puffy, which looks adorable, but too much will make the nose look like a snout.
Step 3: Sewing on the Muzzle
This is step 3 in the visual guide, and it changes the bear’s whole personality, so go slowly.
- Pin the muzzle to the head, centered between the eyes and a little lower. The top edge of the muzzle should sit roughly 2 rows below the eye line.
- Step back and look at the face from a distance. Does it look balanced? Adjust as needed.
- Using the tail and your tapestry needle, sew around the edge of the muzzle with small, neat whipstitches. Add a pinch of stuffing before you close the last few stitches.
Step 4: Embroidering the Nose, Mouth and Cheeks
Now we’re at the detail work in step 4.
The nose: Using dark brown yarn or three strands of embroidery floss, stitch a small triangle at the top center of the muzzle. Make 3 or 4 horizontal stitches stacked on top of each other, getting slightly shorter toward the bottom to form an upside-down triangle or rounded nose shape.
The mouth: From the bottom tip of the nose, make one short vertical stitch down. Then make two tiny curved stitches that go left and right, forming a little “w” shape. Keep the mouth small. A tiny mouth reads as sweeter than a wide one.
The cheeks: You have two options.
- Embroidered cheeks: Use light pink thread and make 3 or 4 small straight stitches side by side in the same direction. This is machine-washable and permanent.
- Blushed cheeks: Use a soft cosmetic blush on a small, dry brush. Tap off the excess, then gently dab onto the cheek area in small circles. Build the color gradually. This is the technique shown in the guide image, and it creates that soft, natural glow. Keep in mind that blush isn’t washable, so I recommend it for decorative bears only.
.
Step 5: The Body (Cream)
The body is shaped like a small pear, wider at the bottom so the bear can sit upright.
- Round 1: 6 sc in MR [6]
- Round 2: inc in each st around [12]
- Round 3: (sc, inc) x 6 [18]
- Round 4: (2 sc, inc) x 6 [24]
- Rounds 5 to 8: sc in each st around [24] (4 rounds)
- Round 9: (2 sc, dec) x 6 [18]
- Rounds 10 to 12: sc in each st around [18] (3 rounds)
- Round 13: (sc, dec) x 6 [12]
Stuff the body firmly, especially the bottom, which has to support the weight of the head. Fasten off and leave a long tail for attaching the head.
Step 6: The Legs (Make 2, Cream)
The legs are short, round and chubby. When the bear sits, the soles face forward and show the spiral center, which is one of the cutest details on the whole toy.
- Round 1: 6 sc in MR [6]
- Round 2: inc in each st around [12]
- Round 3: (sc, inc) x 6 [18]
- Rounds 4 to 5: sc in each st around [18]
- Round 6: (sc, dec) x 6 [12]
- Rounds 7 to 8: sc in each st around [12]
Stuff the legs lightly. They should feel soft and squishy, not rock-hard. Fasten off, leaving a long tail for sewing.
Step 7: The Arms (Make 2, Cream)
- Round 1: 6 sc in MR [6]
- Round 2: (sc, inc) x 3 [9]
- Rounds 3 to 8: sc in each st around [9] (6 rounds)
Add just a little stuffing. Arms that are too firm look stiff, and slightly flexible arms give your bear a cuddly feel. Fasten off, leaving a long tail.
Step 8: The Ears (Make 2, Cream)
- Round 1: 6 sc in MR [6]
- Round 2: inc in each st around [12]
- Round 3: (sc, inc) x 6 [18]
- Round 4: sc in each st around [18]
Do not stuff the ears. Flatten them so the opening forms a curved cup, and sew them on directly through both layers. For smaller, daintier ears, stop after round 2 [12] and add one plain sc round.
Assembling Your Bear (Steps 5 and 6 of the Guide)
This is where your pile of little parts turns into a character. Take your time and use pins.
Attaching the Head to the Body
- Position the head on top of the body, centered.
- Use the long tail from the body (or a new length of cream yarn) and sew around the neck with a whipstitch or mattress stitch, going through the front loops of the body and the stitches of the head.
- Go around the neck twice. A double pass keeps the head from wobbling.
- Check from the side: the head should tilt very slightly forward. A tiny forward tilt makes the bear look friendlier.
Attaching the Legs
- Turn the bear so he sits on a flat surface. Place the legs on the lower front of the body, pointing forward, with the round soles facing out.
- Pin them in place and check that the bear sits upright without tipping.
- Sew each leg to the body with several secure stitches around the opening, then knot and bury the tail.
Attaching the Arms
- Place the arms on the sides of the body, just below the neck. Around round 9 or 10 of the body is a good guide.
- Pin them so the arms rest slightly forward, as if the bear is about to hug someone.
- Sew securely.
Attaching the Ears
- Pin the ears on top of the head, angled slightly outward. A good rule of thumb is to place them about 5 to 6 stitches from the center top, and about 3 rounds down from the crown.
- Sew them on with a strong whipstitch through both layers of the folded ear.
- Make sure both ears are symmetrical. Compare them from the front and from above.
The Pink Baseball Cap
The cap is what turns this from “a nice teddy bear” into “that adorable bear everyone wants.” It’s simple to crochet, and the little curved brim gives it genuine baseball cap character.
Cap Crown (Pink)
- Round 1: 6 sc in MR [6]
- Round 2: inc in each st around [12]
- Round 3: (sc, inc) x 6 [18]
- Round 4: (2 sc, inc) x 6 [24]
- Round 5: (3 sc, inc) x 6 [30]
- Round 6: (4 sc, inc) x 6 [36]
- Rounds 7 and 8: sc in each st around [36]
For a textured look like the cap in the photos, you can work the crown in the back loops only for a few rounds or alternate sc and a slightly raised stitch. This gives a subtle ridged, knitted-looking texture.
Cap Brim
Don’t fasten off after round 8. Continue as follows:
- Row 1: sc in the next 16 stitches. Chain 1 and turn. [16]
- Row 2: inc, sc in the next 14, inc. Chain 1 and turn. [18]
- Row 3: sc in each st across. Chain 1 and turn. [18]
- Row 4: sc in each st across. Do not turn; instead, continue to sc evenly around the edge of the brim, then slip stitch into the next stitch of the cap to finish.
Fasten off and weave in the ends. To get that curved shape, gently bend the brim over your finger or a small round object like a marker. If your yarn is acrylic, you can lightly steam the brim (without touching the iron to it) to set the curve.
Cap Button
- Round 1: 4 sc in MR [4]
- Round 2: sc in each st around [4]
Fasten off and sew it to the very top center of the cap.
Fitting the Cap
Place the cap on the bear’s head, tilting the brim slightly down at the front. The ears should stay outside the cap. If you want the cap to stay put, anchor it with two or three hidden stitches on each side. If you prefer a removable cap (a great option for gifting or selling), leave it loose and let the snug 36-stitch fit hold it in place.
Final Touches: Step 6 of the Guide
Now stand back and look at your bear.
- Does the head sit straight?
- Are the eyes level?
- Are the cheeks even?
- Do the ears match?
- Is any stuffing visible between the stitches?
Little adjustments make a big difference. A loose stitch can be pulled tighter with your needle. Stray fibers can be trimmed. If the face looks a little off, sometimes just moving the muzzle one stitch can change the expression.
Once you’re happy, sit your bear down on his round feet, place the cap on his head, and take a photo.
Troubleshooting Common Problems
My bear’s head is leaning to one side.
This usually happens when the head isn’t sewn on evenly. Remove a few stitches, re-center the head, and sew around twice for stability.
I can see stuffing through my stitches.
Use a smaller hook, pull your stitches tighter, or choose a yarn with a bit more body. Stuffing in small pieces rather than big clumps also helps.
My bear won’t sit up.
Check the weight distribution. The body should be firm at the bottom, and the legs should be attached at the front. Slightly less stuffing in the head can also help.
The cap is too loose or too tight.
Adjust the number of stitches in the last rounds of the crown. Subtract 6 for a tighter cap, add 6 for a looser one (adjusting the increase rounds accordingly).
The eyes look uneven.
Before locking the washers, always check your placement from a few angles. If you’ve already locked them, you can sometimes reposition the eyes by removing the washers using pliers, but it may damage the plastic. Prevention is much easier than correction.
The muzzle looks too big.
Make it a round smaller (stop after round 2 with 12 stitches), or sew it closer to the eyes so it fits the face better.
Ways to Customize Your Crochet Bear
Once you’ve made the basic bear, you can create a whole collection. Here are some ideas.
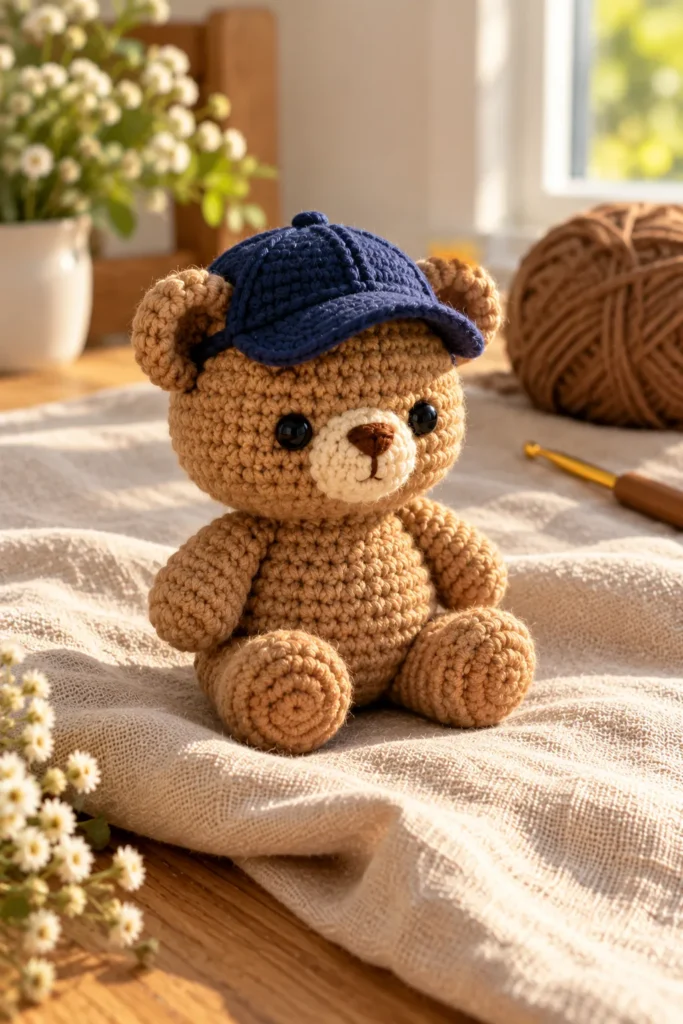
Change the colors. A caramel bear with a cream muzzle, a gray bear with a yellow cap, or a rainbow of pastel bears all look charming.
Swap the accessories. A bow, a scarf, a sweater, a bucket hat, a beanie, a tiny backpack, or a crown can all be made with small amounts of yarn.
Make it a keychain. Use a smaller yarn and hook, add a keyring loop at the top of the head or cap, and you have a cute bag charm.
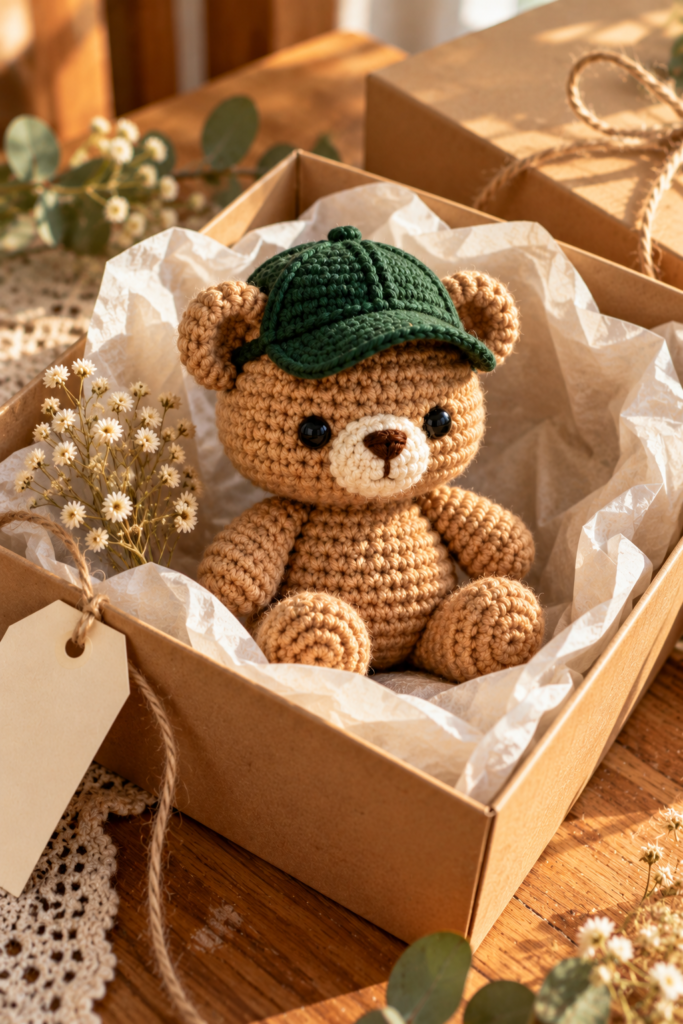
Make a gift set. A bear in a baseball cap paired with a handwritten card and a small bunch of flowers is a gift people remember.
Add a message. Embroider a tiny heart on the chest or sew on a small felt patch with initials.
Go bigger. Use chunky yarn and a larger hook for a huggable, bedroom-decor sized bear.
Caring for Your Crochet Teddy Bear
To keep your bear looking fresh for years:
- Spot clean with a damp cloth and a little mild soap.
- Avoid soaking bears with blush-painted cheeks.
- If the bear is made from washable yarn with embroidered details only, you can hand wash it in cool water and let it air dry completely before use.
- Reshape the bear while damp and let it dry away from direct sunlight, which can fade colors.
- Store it in a breathable cotton bag rather than a plastic one, to avoid trapping moisture.
Photographing Your Finished Bear
Part of the joy of making amigurumi is sharing it. A few tips will make your photos look as dreamy as the pictures in this guide:
- Use soft natural light. A window with morning or late afternoon light is ideal. Avoid harsh midday sun.
- Choose a simple, pastel background. Lilac, pale pink, or cream backgrounds make the bear stand out.
- Add props that tell a story. Balls of yarn, a crochet hook, a flower notebook, or a small plant create a cozy craft-desk scene.
- Get close. Macro details like the stitch texture, the shiny eyes and the embroidered nose are what make people fall in love.
- Show the process. Step-by-step collage images are perfect for Pinterest and Instagram. They get saved and shared, bringing traffic back to your blog.
Selling Handmade Crochet Bears: A Few Tips
If you’re thinking about turning this hobby into a small business, keep these points in mind:
- Price your time. A bear that takes 6 hours should not sell for the cost of the yarn. Include materials, labor, packaging and platform fees.
- Include care instructions. A small card with washing tips adds a professional touch.
- Package beautifully. A clear gift bag, a ribbon and a handwritten thank-you note leave a lasting impression.
- Follow safety rules. If selling toys intended for children, check your country’s regulations, and consider embroidered eyes for under-three buyers.
- Credit your pattern source. If you sell items made from a pattern, check the pattern’s terms of use first.
- Share the making process. Customers love seeing how handmade items come together. A short time-lapse or a photo series helps them understand the value of handmade work.
Frequently Asked Questions
Is this crochet teddy bear pattern suitable for beginners?
Yes. It uses only basic stitches (single crochet, increase, decrease and slip stitch) and simple shapes. Beginners who can make a magic ring will do well.
What yarn is best for amigurumi bears?
Soft cotton, acrylic and cotton-blend yarns in DK weight work very well. Choose a yarn that doesn’t split easily and has a smooth finish.
What size hook should I use?
A 2.5 mm hook works well for DK yarn. Always use a smaller hook than the yarn label suggests, since tight stitches give a better result.
How much yarn do I need?
A small bear like this needs only one small skein of cream yarn (about 50 g) and a little bit of pink for the cap. You will have leftovers.
Can I make this bear without safety eyes?
Absolutely. Embroider the eyes with black thread or yarn, using a small satin stitch or French knots. This is the best choice for toys given to babies and toddlers.
How do I make the bear bigger?
Use a thicker yarn and a larger hook. A worsted weight yarn with a 3.5 mm hook gives you a bear about 8 inches tall, and bulky yarn with a 5 mm hook gives a bigger one still.
Why is my bear’s head too small or too big for its body?
It usually comes down to tension and stuffing. Check your gauge, and adjust the number of increase rounds in the head if you want it larger or smaller.
Can I wash a crochet teddy bear?
Yes, if you’ve used washable yarn and embroidered details only. Place the bear in a mesh laundry bag and use a gentle, cold cycle, or wash by hand. Let it air dry fully.
How long does it take to make this bear?
Most crocheters need 5 to 8 hours in total, including assembly. Beginners may take a little longer, and that’s completely fine. Good things take time.
Final Thoughts
There’s something deeply satisfying about watching a handful of tiny crochet pieces transform into a character with a face, a posture and a little pink cap. Every stitch you make adds love to the finished toy, and that is exactly why handmade bears feel different from the ones in stores.
Whether you crochet this bear as a gift, as a keepsake for yourself, or as the first product of your handmade shop, I hope this pattern brings you joy from the first magic ring to the very last stitch. Don’t worry if your first bear isn’t perfect. Every maker’s first bear has a crooked ear or a funny smile, and those little imperfections are what give it personality.
Pick up your hook, choose your favorite colors, and start your bear today. Then share your finished creation with the crochet community, because someone out there is searching for exactly this kind of inspiration.
Happy crocheting!