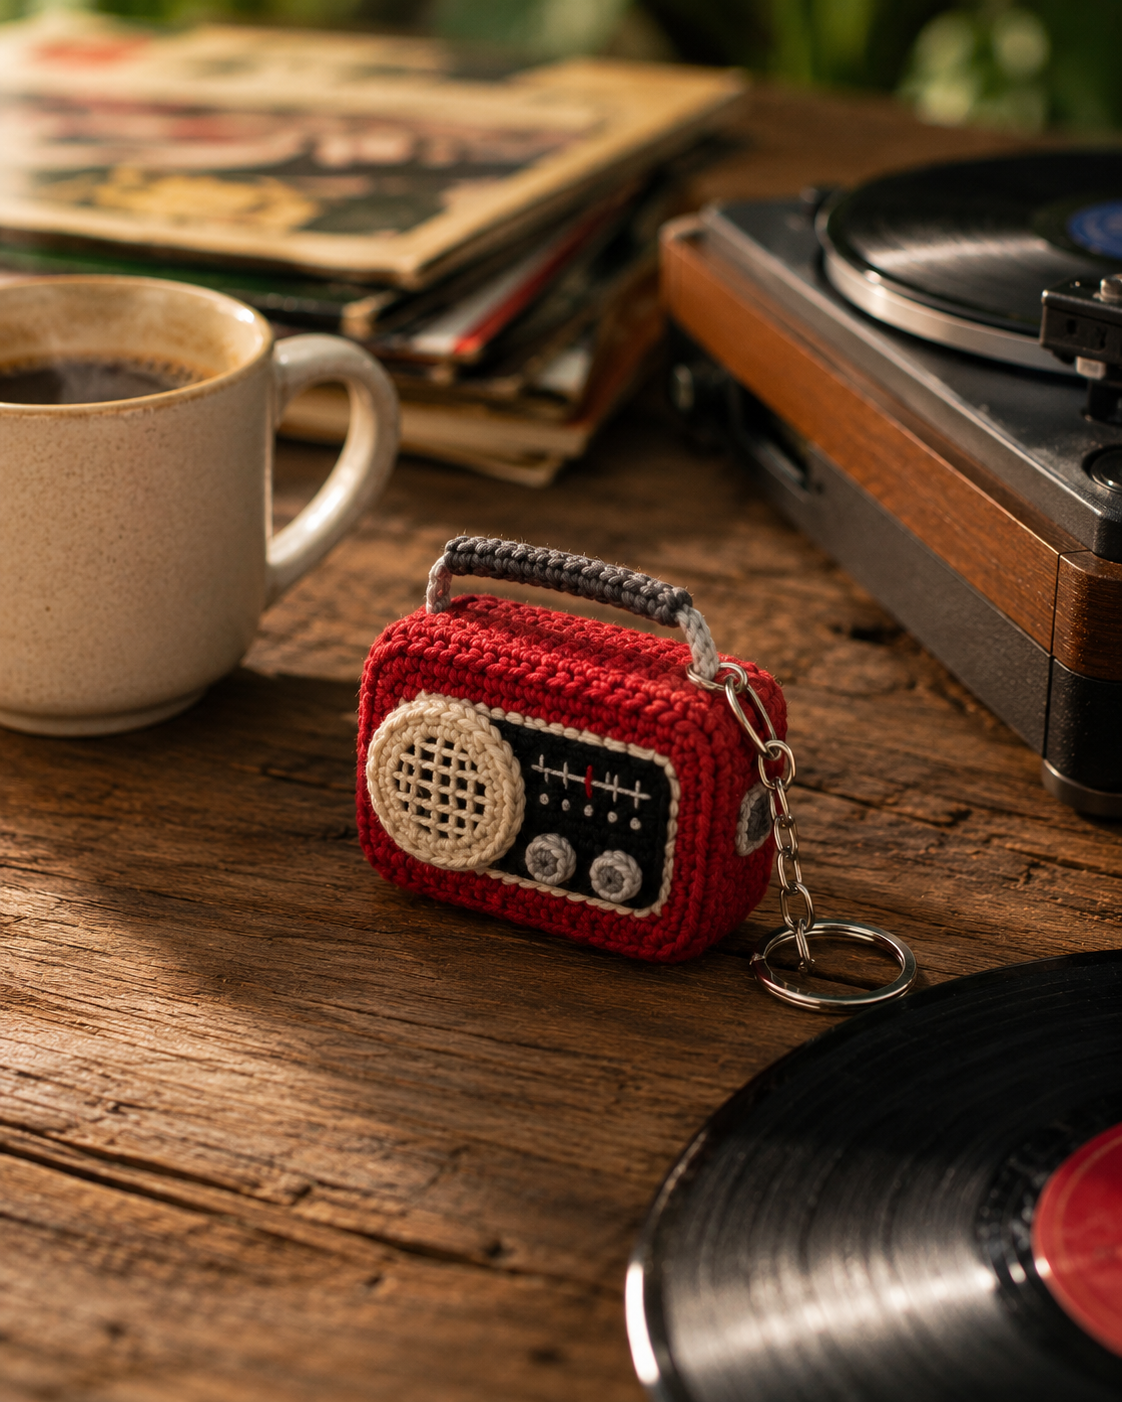
There is something especially charming about turning an everyday object into a tiny crochet creation. This free amigurumi retro radio keychain crochet pattern brings that idea to life with a miniature vintage radio made from yarn, complete with a cozy red body, cream speaker, little controls, a gray handle, and a silver keychain.
It is a fun project for crocheters who love nostalgic designs, miniature amigurumi, and practical handmade accessories. The finished radio is small enough to carry on your keys or bag, but detailed enough to make a cute little statement wherever you take it.
Whether you are making one for yourself, creating a handmade gift for a music lover, or looking for a small crochet project to use up leftover yarn, this retro radio is a wonderfully satisfying project.
Table of Contents
- Why You’ll Love This Retro Radio Keychain
- What Makes This Crochet Radio Special
- Materials You’ll Need
- Choosing the Right Yarn
- Recommended Crochet Skills
- Understanding the Radio’s Construction
- Tips for Getting Clean Amigurumi Results
- Common Mistakes to Avoid
- How to Attach the Keychain Hardware
- Making Your Radio Look More Professional
- Gift Ideas for a Crochet Radio Keychain
- Care and Storage
- Frequently Asked Questions
- Final Thoughts
Why You’ll Love This Retro Radio Keychain
Small crochet projects have a special advantage: they can be finished relatively quickly while still giving you plenty of opportunities to add personality.
This retro radio combines several details that make it especially fun:
- A bright red crocheted radio body
- A contrasting cream speaker
- A black front control panel
- Tiny crocheted knobs and tuning details
- A gray handle
- A functional metal keychain attachment
- A miniature vintage-inspired shape
The combination of colors makes the radio immediately recognizable, while the textured stitches give it the soft handmade appearance that makes amigurumi so appealing.
It is also a great project for practicing small crochet details. If you are comfortable with basic amigurumi techniques, you can use the project to improve your tension, shaping, color changes, surface details, and finishing.
What Makes This Crochet Radio Special?
The best part of this design is the combination of retro styling and miniature crochet.
A traditional radio is a fairly ordinary household object, but shrinking that shape down into a tiny handmade keychain completely changes its character.
The red body provides the main visual focus, while the cream speaker creates contrast. The black control section gives the front of the radio definition, and the gray handle and hardware add the finishing touches.
The result feels nostalgic without looking old-fashioned or overly complicated.
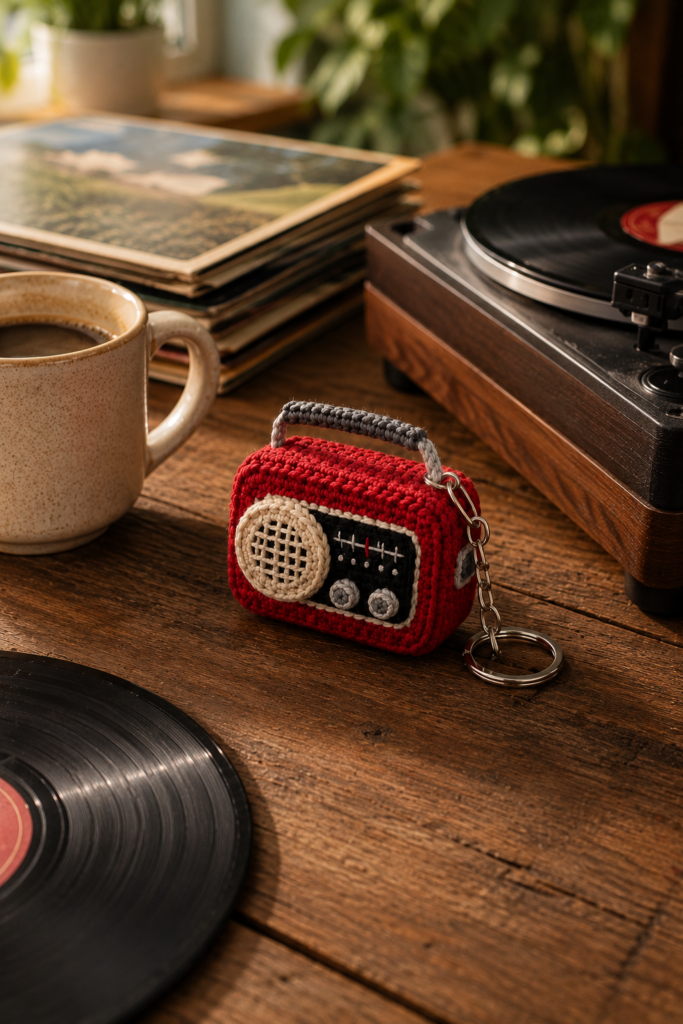
The record-player setting works especially well for the first supporting image because it immediately reinforces the radio’s vintage music theme while keeping the crochet piece as the main subject.
Materials You’ll Need
For a project like this, the exact yarn weight, hook size, stuffing amount, and stitch counts should always follow the specific pattern instructions. However, the following materials are typically useful for creating a miniature crochet radio:
Yarn
You will need yarn in colors that match the finished design, including:
- Red for the main radio body
- Cream or beige for the speaker
- Black for the front control panel
- Gray for the handle and small details
Because this is a miniature amigurumi project, relatively small amounts of each color are usually needed.
Crochet Hook
Choose the hook size recommended by the pattern. Amigurumi is normally worked with a smaller hook than you might use for a loose crochet fabric because you want firm stitches and minimal gaps.
Stuffing
Use a soft fiberfill suitable for amigurumi. The radio should be firmly stuffed enough to hold its shape without becoming hard or lumpy.
Keychain Hardware
You will also need:
- A metal key ring
- A small chain or keychain connector
- Optional small jump ring or suitable attachment hardware
Make sure the hardware is securely attached before using the finished piece on everyday keys or a bag.
Other Useful Supplies
Keep the following nearby:
- Tapestry needle
- Scissors
- Stitch marker
- Pins
- Small amount of additional yarn for sewing details
Choosing the Right Yarn
For a miniature radio, yarn with good stitch definition is particularly helpful.
A smooth cotton or cotton-blend yarn can be a great choice because it makes small stitches easy to see and gives the finished piece a neat appearance.
Avoid very fuzzy yarn for the main structure. Fuzzy fibers can hide the small details that make this design recognizable.
If you want a slightly softer-looking radio, you can experiment with different yarn fibers, but remember that changing yarn weight will also affect the finished size.
A Helpful Tip
If you substitute yarn, try to keep the replacement yarn close to the original weight. A significant change in yarn thickness can make the radio larger or smaller and may affect how the individual pieces fit together.
Recommended Crochet Skills
This project is best suited to crocheters who already understand basic amigurumi techniques.
You should be comfortable with skills such as:
- Working in the round
- Single crochet
- Increasing
- Decreasing
- Joining and finishing pieces
- Working with a tapestry needle
- Sewing small crocheted components together
- Changing yarn colors
- Attaching small decorative pieces
A confident beginner may be able to make the project with patience, particularly if they have already completed a few simple amigurumi projects.
The most challenging part is not necessarily the main body. It is the small decorative details that give the radio its personality.
Understanding the Radio’s Construction
One of the easiest ways to approach a miniature amigurumi project is to think about it as a collection of simple components rather than one complicated object.
The finished radio can be visualized as several main sections:
The Main Body
The red body creates the recognizable rounded rectangular shape of the radio.
The goal is to maintain even tension so the sides stay neat and the finished piece has a clean silhouette.
The Speaker
The cream speaker is an important focal point. Its contrasting color helps it stand out against the red body.
Small details such as the woven appearance of the speaker grille make a big difference at this scale.
The Control Panel
The black front section gives the radio its vintage appearance. The small stitched markings and knobs add visual interest without requiring a complicated structure.
The Handle
The gray handle sits above the radio and completes the classic portable-radio look.
Because the handle is relatively small, secure attachment is important.
The Keychain
Finally, the metal chain and ring turn the miniature radio into a practical accessory.
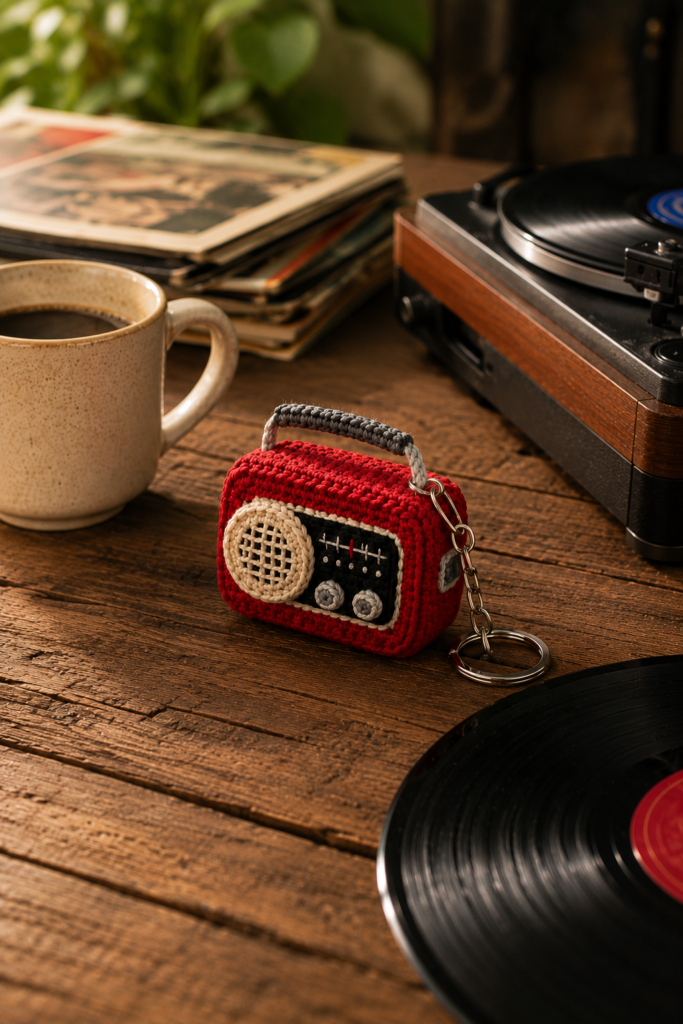
This image helps readers see the finished radio as a real lifestyle accessory rather than simply a crochet object.
Tips for Getting Clean Amigurumi Results
Small projects can actually make uneven tension more noticeable. A few simple habits can make a big difference.
1. Keep Your Stitches Consistent
Try to maintain steady tension throughout the body. Uneven tension can create bumps or distort the shape.
2. Use a Stitch Marker
When working in continuous rounds, a stitch marker makes it much easier to identify the beginning of each round.
3. Stuff Gradually
Do not wait until the very end to add all of your stuffing.
Add small amounts as the piece develops. This allows you to distribute the stuffing evenly and avoid obvious lumps.
4. Don’t Overstuff
The radio should hold its shape, but excessive stuffing can stretch the stitches and make gaps appear.
Firm but controlled stuffing usually gives the cleanest result.
5. Take Your Time With Small Details
The speaker, control panel, knobs, handle, and tuning details are what transform a simple crocheted shape into a recognizable retro radio.
If a tiny detail does not look right on the first attempt, it is often worth remaking it rather than trying to hide it.
Common Mistakes to Avoid
Making the Body Too Loose
Large gaps between stitches can allow stuffing to show through.
Solution: Use the recommended hook size and maintain firm amigurumi tension.
Overstuffing the Radio
Too much stuffing can distort the rectangular shape.
Solution: Add stuffing gradually and shape the piece with your fingers as you work.
Losing Track of Rounds
Small amigurumi pieces can become confusing when working continuously.
Solution: Use a stitch marker and count your stitches regularly.
Sewing Details Unevenly
The front panel and speaker need to be positioned carefully.
Solution: Pin each component in place before sewing it permanently.
Attaching the Keychain Too Loosely
The hardware needs to withstand repeated movement.
Solution: Reinforce the attachment point and make sure the yarn connection is secure before using the keychain.
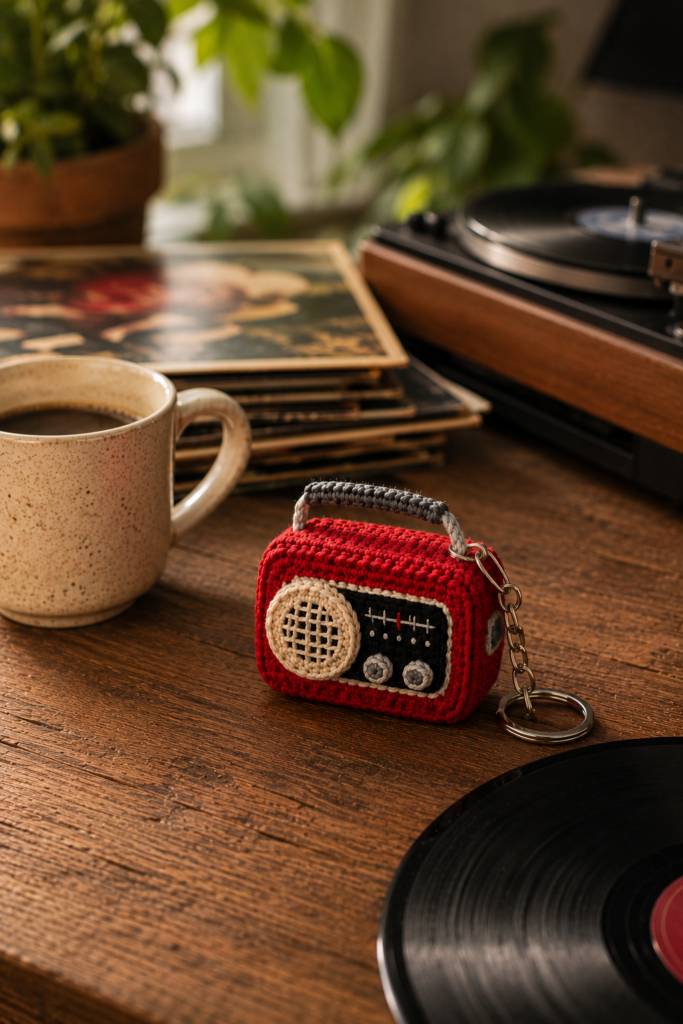
This is a strong visual break after the technical advice and keeps the article visually engaging while continuing the vintage music theme.
How to Attach the Keychain Hardware
The metal keychain is what turns this adorable miniature radio into something practical.
Before attaching the hardware, make sure the crocheted handle or attachment point is firmly secured.
If the design uses a small chain, connect it carefully to the crocheted attachment area using suitable metal hardware. Check that the connection does not pull directly against a single loose stitch.
Give the finished attachment a gentle test before putting your keys on it.
If you are making the radio as a gift for a child, remember that small metal hardware can present a safety concern. A keychain containing small components is better treated as an accessory rather than a toy for very young children.
Making Your Radio Look More Professional
The difference between a cute handmade project and a polished handmade project often comes down to finishing.
Keep the Front Symmetrical
Before sewing on the speaker and control panel, check their position from several angles.
Hide Yarn Ends Carefully
Secure and weave in ends neatly so they do not appear around the edges.
Shape Before Finishing
Use your fingers to gently shape the stuffed body before permanently attaching decorative pieces.
Match the Color Changes
Clean color transitions make the radio look much more intentional.
Don’t Rush the Sewing
Small components should be attached with enough stitches to remain secure while keeping the stitches as discreet as possible.
Gift Ideas for a Crochet Radio Keychain
This miniature radio makes a particularly fun handmade gift because it works for several occasions.
Consider making one for:
- Music lovers
- Vinyl collectors
- Retro décor fans
- Crochet enthusiasts
- Handmade gift exchanges
- Birthday gifts
- Stocking stuffers
- Teacher or coworker gifts
- Small thank-you gifts
You can also make several radios in different color combinations while keeping the same basic design.
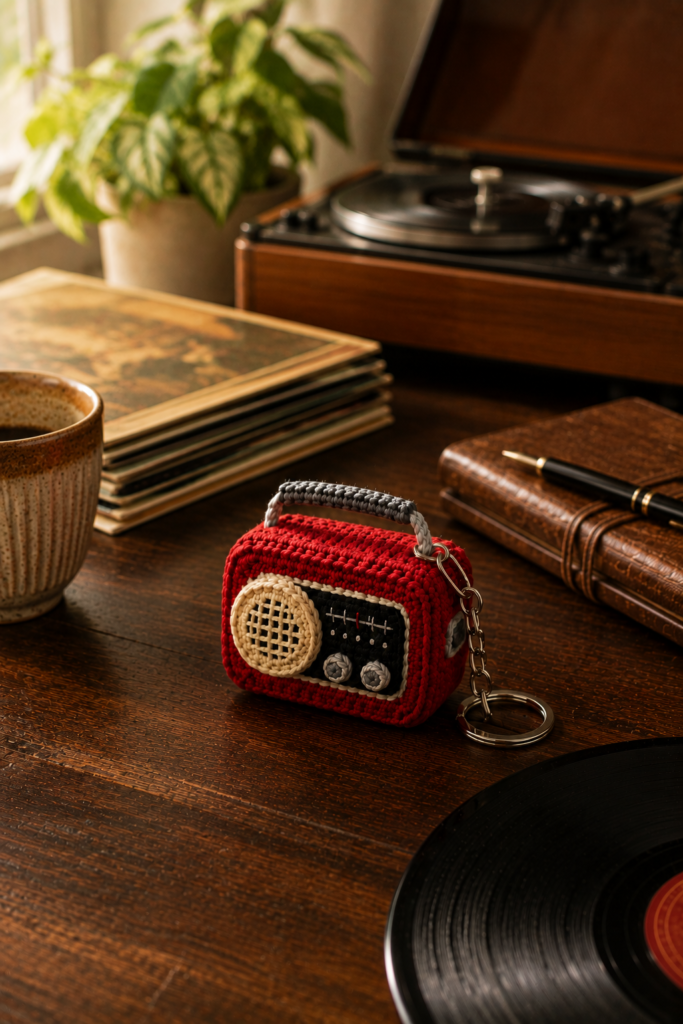
For a music-themed gift basket, pair the crochet keychain with a coffee mug, a vinyl-inspired notebook, or another small handmade accessory.
Care and Storage
Crochet accessories can last for a long time with gentle handling.
Keep your finished radio away from excessive moisture, rough surfaces, and prolonged direct sunlight, which can gradually affect yarn colors.
For small spots, gently clean the affected area according to the care instructions appropriate for your yarn.
Avoid pulling on the handle or metal chain unnecessarily. Although the keychain is designed to be functional, repeated heavy pulling can eventually stress the crocheted attachment point.
When storing it, keep it somewhere dry and avoid placing heavy objects on top of it.
Frequently Asked Questions
Is this retro radio crochet pattern suitable for beginners?
It can be a good project for a confident beginner who already understands basic amigurumi techniques. The main challenge is working with the small decorative details rather than the basic crochet stitches themselves.
What yarn is best for a crochet radio keychain?
A smooth cotton or cotton-blend yarn is a practical choice because it provides clear stitch definition and works well for small amigurumi pieces. Follow the pattern’s recommended yarn weight whenever possible.
How long does it take to crochet a radio keychain?
The time varies depending on your experience, crochet speed, and how quickly you work with small details. Experienced amigurumi makers may finish small accessories relatively quickly, while beginners may want to allow extra time for assembly and finishing.
Can I use different colors?
Absolutely. The retro red version has a strong vintage appearance, but you can experiment with other body colors while keeping the cream speaker and contrasting control panel.
Can I turn the crochet radio into a bag charm?
Yes. The same basic idea can work beautifully as a bag charm. Use secure hardware appropriate for the weight and how the accessory will be used.
Is this crochet radio a toy?
Because the finished design includes small components such as keychain hardware, it should be treated as an accessory or decorative handmade item rather than a toy for very young children.
Can I sell finished crochet radios made from the pattern?
This depends on the designer’s specific pattern terms and licensing conditions. Always check the pattern’s stated policies regarding selling finished items before listing them for sale.
Final Thoughts
A miniature radio is a perfect subject for crochet because it combines simple shapes with plenty of room for personality.
This Tune In to Cuteness Free Amigurumi Retro Radio Keychain Crochet Pattern is especially appealing if you enjoy miniature projects, vintage-inspired accessories, and handmade gifts. The red body, cream speaker, black controls, gray handle, and metal keychain create a recognizable little radio that feels both nostalgic and playful.
The project also offers useful practice with the skills that make amigurumi look polished: consistent tension, careful shaping, neat color changes, controlled stuffing, precise sewing, and secure finishing.
Most importantly, don’t feel that you need to rush a small project. The tiny details are what make this radio special.
If you love crochet patterns that turn ordinary objects into miniature handmade treasures, save this project for your next crochet session and give this little retro radio a try.
Happy crocheting—and tune in to some cuteness! 🧶📻