There is nothing quite like a tiny handmade friend clipped to your bag, your keys, or your backpack zipper. Crochet keychains are the perfect small project. They use only a little yarn, they work up in an hour or two, and they make wonderful gifts for birthdays, teachers, classmates, and anyone who has ever said they love something cute. If you have been looking for free and easy crochet keychain ideas that really are beginner friendly, you are in the right place.
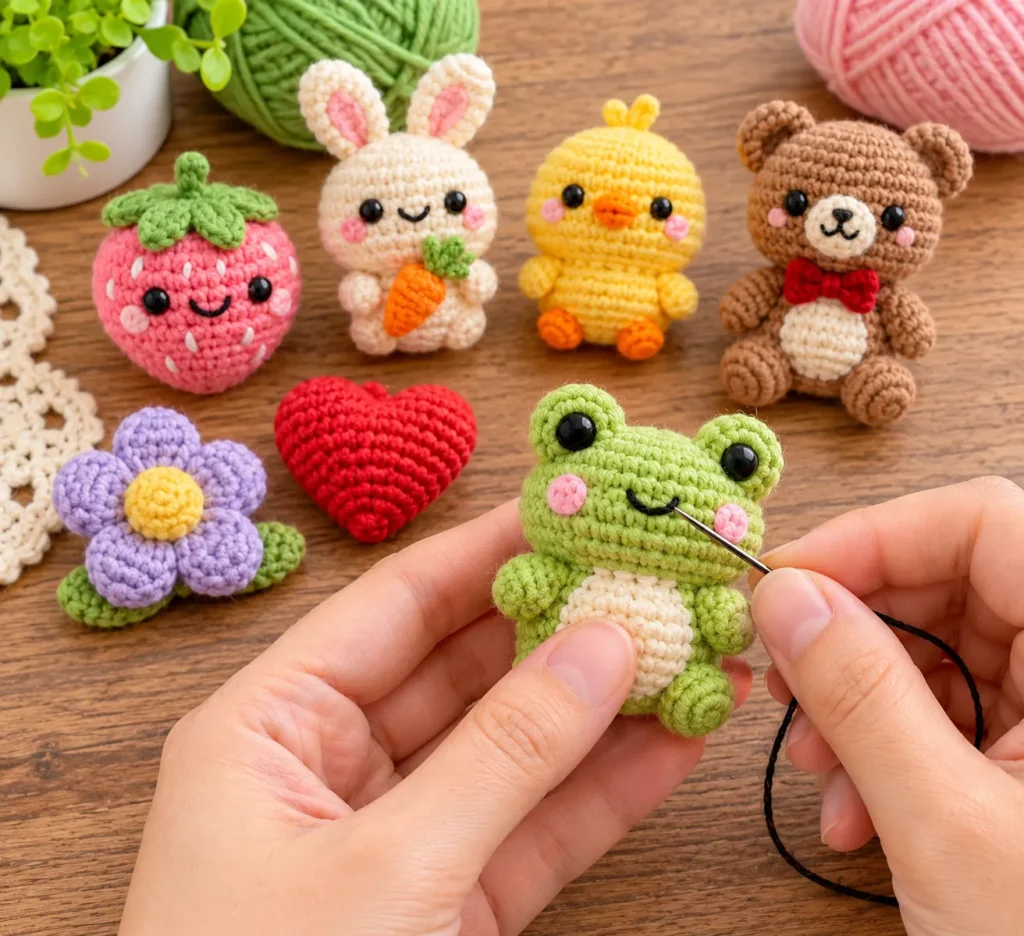
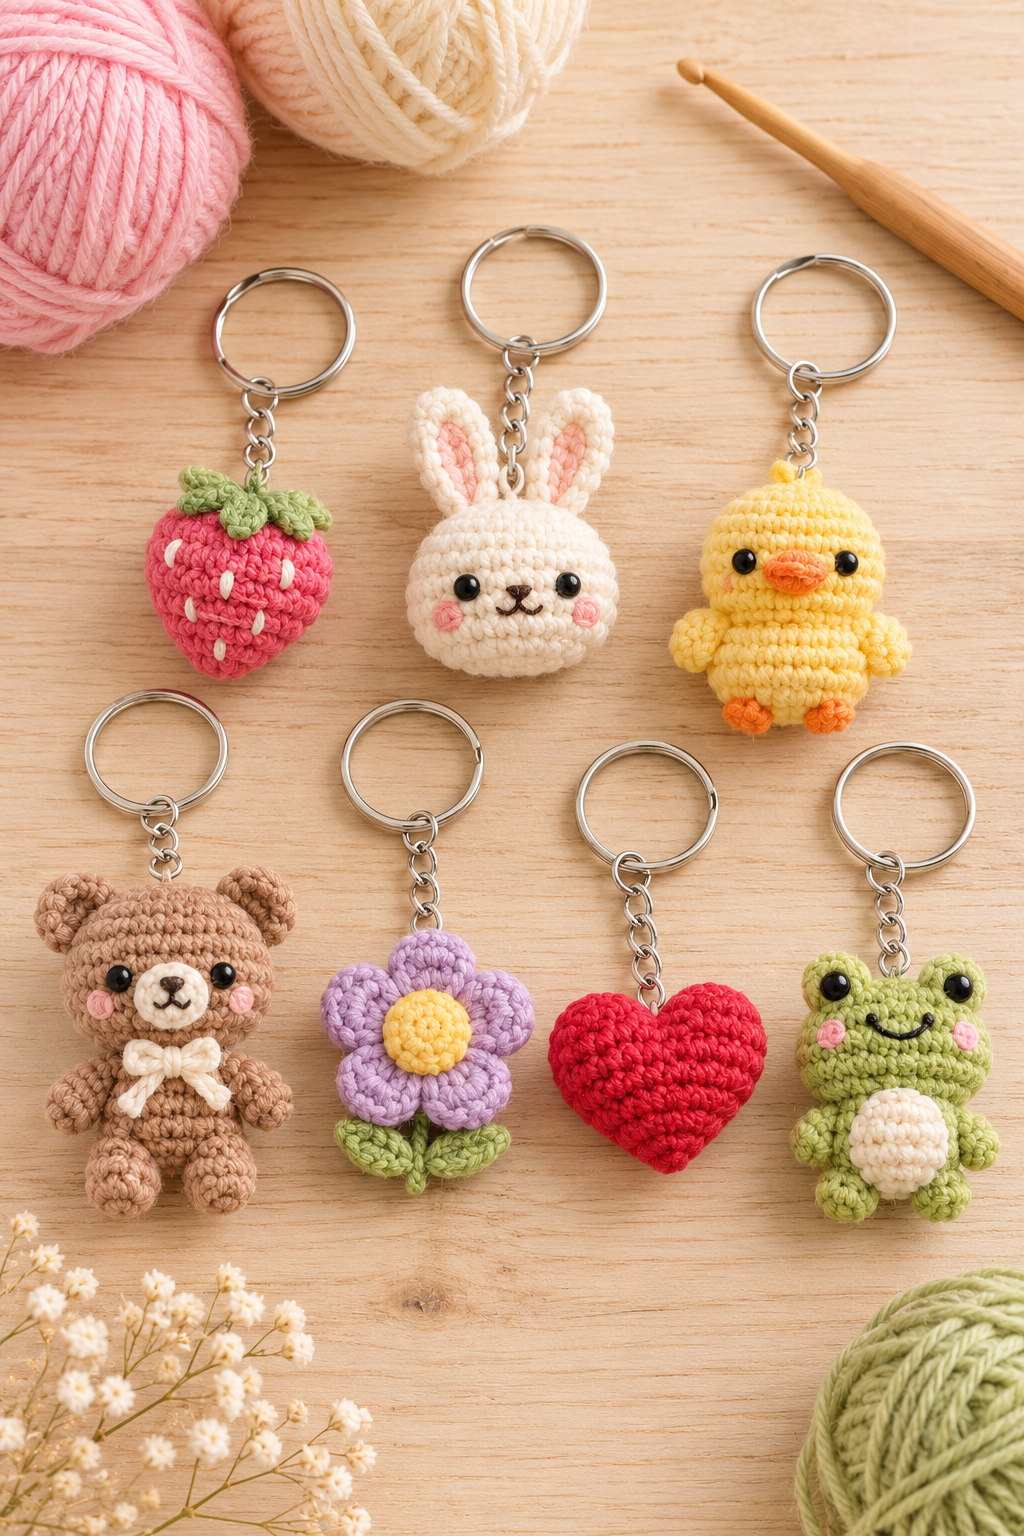
In this tutorial, I will walk you through seven adorable keychain designs that all share the same simple building blocks. You will make a plump strawberry, a sweet bunny, a fluffy chick, a cuddly bear, a bright purple flower, a classic red heart, and a smiling frog. Each one is made from basic shapes, and once you learn the first ball, you can make every other design in this collection. I will explain the materials, the stitches, the stuffing, and the finishing touches, and I will share plenty of tips from my own trial and error so that you can skip the frustrating parts and enjoy the fun ones.
Why Crochet Keychains Are the Perfect Beginner Project
Small projects are the best teachers. When you crochet a blanket, you have to wait weeks to see the result, and mistakes made in the first row stay with you for the rest of the project. A keychain, on the other hand, lets you practice a new skill, finish a project in one evening, and start again the next day. Every keychain teaches you something, whether it is how to keep your tension even, how to hide an increase, or how to close a tiny hole neatly.
Keychains are also very forgiving of yarn leftovers. A single skein can make dozens of keychains, and the scraps in your basket suddenly become useful. Pink, cream, green, yellow, brown, red, and purple are all you need to make this entire collection, and you probably already own most of them.
Another reason keychains are so popular is that they sell well. Craft fairs, online shops, and school markets all love a colorful display of little animals and flowers. Because each piece uses very little yarn, your cost per keychain is tiny, and you can make an entire set in a weekend. Even if you never plan to sell, a basket of handmade keychains is a lovely thing to have ready for gifts.
Materials You Will Need
For yarn, choose a smooth cotton or acrylic in a sport, DK, or light worsted weight. Cotton gives the sharpest stitch definition and holds its shape well, which is why it works so nicely for tiny amigurumi. Acrylic is softer and a little more forgiving, and it is easy to find in bright colors. You will need small amounts of seven colors: pink, cream, yellow, brown, red, purple, and green. Plan on about 10 to 15 yards for each keychain, plus small scraps of orange, black, and a lighter pink for details.
For the hook, a 2.5mm hook is a good match for DK weight yarn. The key to amigurumi is working tightly so the stuffing does not show through, which means using a hook that is one or two sizes smaller than the yarn label suggests. If your stitches look loose or gappy, drop down half a millimeter. A hook with a comfortable handle makes a huge difference, because you will be working small stitches in small circles.
You will also need polyester fiberfill for stuffing, a yarn needle for sewing and weaving in ends, a pair of sharp scissors, and stitch markers. A stitch marker is essential because amigurumi is worked in a spiral, and it is very easy to lose your place in a tiny circle. Safety eyes, 5mm or 6mm, give the animals their character, and you can swap them for black embroidery thread if you are making keychains for very young children. A black embroidery thread is also useful for smiles and noses.
Finally, you will need keychain hardware. Pick up a few split rings with short chains attached, which are cheap and sold in bulk. Silver and gold both look lovely, so choose whichever suits your yarn colors.
Abbreviations and Basic Stitches
This pattern uses standard US crochet terms. Mr means magic ring. Ch means chain. Sc means single crochet. Inc means increase, which is 2 sc in the same stitch. Dec means decrease, which is single crochet two stitches together. Sl st means slip stitch. Hdc means half double crochet. Every design is worked in a continuous spiral without joining, so do not chain at the start of a round and do not slip stitch at the end unless the pattern tells you to. Mark the first stitch of each round with your stitch marker and move it up as you go.
For decreasing, use the invisible decrease whenever you can. Instead of inserting your hook under both loops of the next two stitches, insert it only into the front loop of each of the next two stitches, then yarn over and pull through both, then yarn over and pull through the remaining two loops. This hides the decrease and gives you a smoother surface, which is especially helpful on tiny pieces.
The Basic Ball That Starts Almost Every Keychain
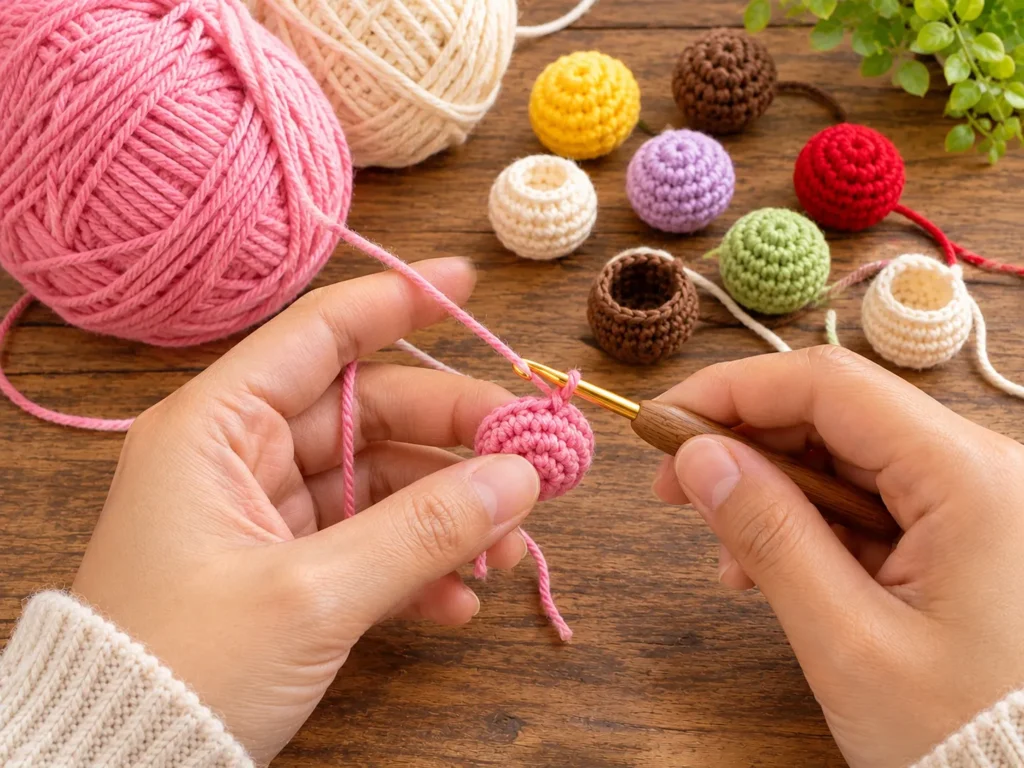
Before we begin the seven designs, let me teach you the basic ball. Once you can make this simple sphere, you can make nearly every keychain in this collection, because most of them are simply variations on it.
Make a magic ring and work 6 sc into it. Pull the tail to close the ring tightly. In round two, work inc in each stitch around, giving you 12 stitches. In round three, work sc in the first stitch and inc in the next, repeated around, which gives 18 stitches. In round four, work sc in the next 2 stitches and inc in the next, repeated around, for 24 stitches. Work 4 rounds of plain sc, one stitch in each of the 24 stitches. Now begin shaping the top of the ball. Work sc in the next 2 stitches and dec in the next, repeated around, for 18 stitches. Begin stuffing now, pushing small pieces of fiberfill into the ball with the blunt end of your hook. Work sc in the next stitch and dec in the next, repeated around, for 12 stitches. Add a little more stuffing. Work dec 6 times to leave 6 stitches. Cut the yarn, leave a tail, and use your yarn needle to weave through the front loops of the last 6 stitches. Pull tight to close and hide the end inside the ball.
That is it, and the finished ball is about 1 and a half inches across. Keep it handy as a reference, because every design below begins from here, with only small changes to the number of rounds or the colors.
Idea One: The Juicy Strawberry Keychain
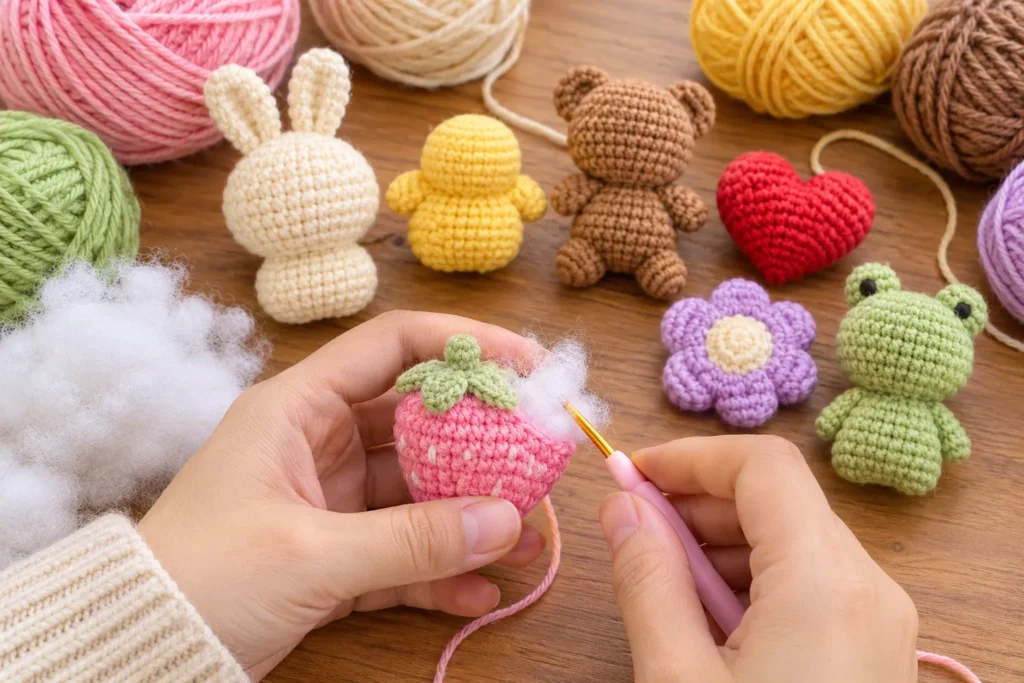
The strawberry is the star of the collection, and also the easiest to recognize. Use pink or red yarn for the berry, green for the leaves, and cream for the little seeds.
Begin with a magic ring and work 6 sc. Round two, inc in every stitch for 12. Round three, sc then inc around for 18. Round four, sc in the next 2 and inc in the next around for 24. Round five, sc in the next 3 and inc in the next around for 30. Work rounds six through nine in plain sc, 30 stitches each. This creates the full, rounded top of the strawberry. Round ten, sc in the next 3 and dec in the next around, giving 24. Round eleven, sc in the next 2 and dec in the next around, giving 18. Stuff the strawberry firmly now. Round twelve, sc then dec around for 12. Round thirteen, dec 6 times to leave 6 stitches, fasten off, and close.
For the leaves, work in green. Make a magic ring and work 5 sc into it. Then for each of five leaves, chain 5, work a slip stitch in the second chain from the hook, sc in the next chain, hdc in the next, sc in the last, and slip stitch back into the ring. Pull the ring closed, leaving a tail, and sew the green cap to the top of the strawberry with small stitches. Using cream yarn, embroider tiny straight stitches around the berry to make the seeds, spacing them evenly in staggered rows.
To attach the keyring, thread a short length of green yarn through the center of the leaf cap and tie a small loop, or sew the chain end of the split ring directly under the leaves. This detail makes the strawberry look as though it hangs naturally from its stem.
Idea Two: The Sweet Bunny Keychain
The bunny is made from a cream colored head with two upright ears and soft pink cheeks. It looks like a tiny pet, and it is always a favorite.
Work the basic ball in cream, but add 2 extra plain rounds before the decrease so the head is slightly wider than it is tall. Insert the safety eyes between rounds six and seven, about 6 stitches apart, before you finish stuffing. Add a small triangle nose by embroidering a little brown or pink Y shape with a few stitches.
For each ear, work a magic ring of 6 sc. In round two, work sc then inc around for 9 stitches. Work rounds three through six in plain sc. In round seven, work sc then dec around, leaving 6 stitches. Do not stuff the ears, but flatten them gently and pinch the base. With a light pink yarn, embroider a small oval on the front of each ear using straight stitches placed side by side. Sew the ears to the top of the head, about 3 stitches apart, tilting them slightly outward. Add pink cheeks by stitching a small cluster of light pink stitches beneath each eye. To attach the keyring, sew the chain end between the ears.
Idea Three: The Fluffy Chick Keychain
The chick uses bright yellow yarn and has an expression that makes everyone smile. It works beautifully as a spring gift or Easter basket filler.
Work the basic ball in yellow. Place safety eyes between rounds six and seven, with about 5 stitches between them. For the beak, either embroider a small orange triangle using satin stitch, or crochet a tiny orange piece by working a magic ring of 4 sc and flattening it. Sew the beak just below the eyes.
For the wings, make two small flat circles. Work a magic ring of 6 sc, then inc around for 12 stitches. Slip stitch to finish and leave a tail. Fold each wing slightly and sew it to the side of the body at the middle of the ball. For the tuft, pull three short loops of yellow yarn through the top of the head, knot them, and trim to a small spike. For the feet, embroider two small orange clusters of straight stitches at the bottom of the body. These little details give the chick its charm, and they take only a few minutes.
Idea Four: The Cuddly Bear Keychain
The bear keychain is one of the most popular designs in any handmade shop. Choose a warm brown yarn for the body, cream for the muzzle, and a bright accent for a bow if you like.
Work the basic ball in brown, but stuff it a little more firmly so it looks like a round little head and torso. Place safety eyes between rounds six and seven, about 5 stitches apart.
For the ears, work a magic ring of 6 sc, then inc around for 12 stitches. Work one round of plain sc, then fold the circle in half and sew it to the top of the head, with the fold facing outward. Make two ears and place them at a slight angle.
For the muzzle, use cream yarn and make a magic ring of 6 sc, then inc around for 12 stitches. Work one round of sc, stuff very lightly, and sew it to the face between and just below the eyes. Embroider a small brown nose and a tiny smile with dark thread. If you want a bow, chain 10 in cream or red yarn, fasten off, tie in the center with a small piece of yarn, and sew it below the muzzle.
For a seated bear, make a second smaller ball for the body and add four tiny arm and leg pieces by working a magic ring of 6 sc and 4 plain rounds, leaving a tail to sew them in place. This version takes longer but looks wonderful.
Idea Five: The Bright Purple Flower Keychain
The flower keychain is soft and cheerful, and it is the one you can make fastest. It also uses up tiny scraps well, so it is a good project for your leftover yarn.
Begin with the center in yellow or cream. Make a magic ring of 6 sc, then inc around for 12, then sc then inc around for 18. Fasten off and leave a long tail.
For each petal, work in purple. Make a magic ring of 6 sc, then inc around for 12. Work one round of plain sc. Then work dec around to leave 6 stitches, and stuff a very small amount of fiberfill. Close and fasten off. Make five petals in all. Arrange the petals in a circle with their edges just touching and sew them together at the sides using the tail ends. Place the yellow center on top and sew it down firmly so it covers the joined edges.
For the leaves, work two small green leaves, each made by chaining 6 and working sl st, sc, hdc, hdc, sc down the chain, then slip stitch back to the start. Sew them behind the flower. To attach the keyring, sew the chain end through the back of the flower, between two petals.
Idea Six: The Classic Red Heart Keychain
A simple red heart is a timeless piece. It makes a lovely gift for Valentine’s Day, anniversaries, or any time you want to say thank you.
Start with the first lobe. Work a magic ring of 6 sc, then inc around for 12, then sc then inc around for 18. Work two rounds of plain sc, 18 stitches each, and fasten off, leaving the first lobe aside. Make a second lobe in exactly the same way, but do not fasten off.
Place the two lobes side by side. Continuing with the working loop on the second lobe, work sc in each of the 18 stitches of the second lobe, then work sc in each of the 18 stitches of the first lobe, joining them as you go. You will have 36 stitches. If a small gap shows at the dip between the lobes, close it with a few stitches after finishing. Work 1 round of plain sc. Then work sc in the next 4 stitches and dec in the next around, leaving 30. Work sc in the next 3 and dec in the next around, leaving 24. Begin stuffing the lobes firmly, because a heart needs a firm shape to look right. Work sc in the next 2 and dec in the next around, leaving 18. Work sc then dec around, leaving 12. Work dec 6 times, fasten off, and close the hole at the point of the heart.
Use a small amount of stuffing at the point so the heart does not look flat. Sew the chain of your split ring to the dip between the two lobes.
Idea Seven: The Smiling Frog Keychain
The frog is full of personality, and the little embroidered smile is what makes it so charming. Use light green yarn for the body, cream for the belly, and a deeper green for hands and feet if you like.
Work the basic ball in green, but add one extra plain round before the decrease so the body is slightly taller. For the eye bumps, work a magic ring of 6 sc, then sc then inc around for 9 stitches, and work 2 plain rounds. Stuff lightly, close, and sew two bumps on the top of the head, a little apart. Insert the safety eyes through the front of each bump, securing them firmly from the inside before sewing the bumps to the head.
For the belly patch, work a magic ring of 6 sc, then inc around for 12, then sc then inc around for 18 in cream. Fasten off and sew the patch to the lower front of the body. For the hands, make two tiny pieces by working a magic ring of 6 sc and 3 plain rounds, then flatten and sew to the sides of the body. For the feet, work the same way but make them slightly longer, and sew them at the bottom front.
For the smile, thread a yarn needle with black embroidery thread. Insert the needle from the back of the head and bring it out at the corner of the mouth. Make a curved stitch across the face and secure it at the opposite corner. Add a tiny stitch at each end for dimples. Finish with two soft pink circles of embroidery for the cheeks, placed just below and outside each eye. That little smile can make or break the whole keychain, so take your time with it. If your first attempt looks crooked, pull out the thread and try again, because embroidery thread is easy to remove.
How to Attach the Keychain Hardware
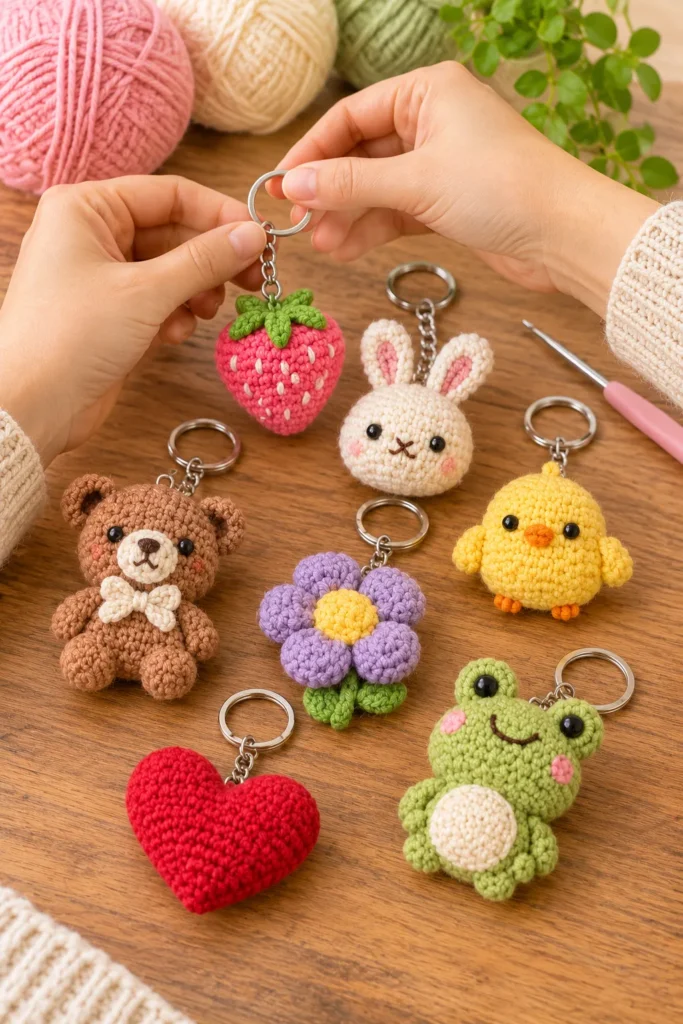
There are three easy ways to attach the keyring. The first is to sew the chain of the split ring directly to the top of the piece, passing the yarn through the last link and then through several stitches. Go through twice, then knot and hide the end inside the body. This is the quickest and most secure method for beginners.
The second is to crochet a small loop. When you finish the top of your piece, chain 6, slip stitch back to the base, and thread the split ring chain through the loop before sewing the loop securely. This looks neat and lets the piece hang naturally.
The third is to use a metal eye screw or jump ring inserted into the stuffing before the final stitches. This is the strongest method, and it works well for heavy pieces, but it should only be used for adult keychains, never for items given to small children.
Whichever method you choose, tug firmly on the keyring to test it before you give the keychain to anyone. A keychain gets pulled, swung, and thrown into bags, so it has to be strong.
Tips for Tidy, Professional Looking Keychains
Keep your stitches tight and even. This is the single most important rule in amigurumi. If your stitches are loose, the stuffing will show, and the piece will look gappy and floppy. Using a small hook and pulling each stitch snugly will give a firm fabric with a clean surface.
Stuff in small amounts. Overstuffing makes the stitches stretch and show gaps, while understuffing makes the shape collapse. Add stuffing in little tufts and push them into corners with the end of your hook. Roll the piece between your palms to check that it feels even.
Always count your stitches. In a tiny circle, a missing or extra stitch changes the shape immediately. Count at the end of every round, and fix errors at once, because they get harder to fix later.
Use a stitch marker at the start of every round. It is the easiest way to avoid losing your place, especially when you pick the project up after a break.
Plan the eye placement before you attach them. Pin the safety eyes in place, step back, and look at the face from a few feet away. A difference of one stitch can change the expression from sweet to startled, so take your time. Eyes that are placed lower and wider apart look cuter, while eyes that are placed high and close together look more serious.
Weave in your ends carefully. Run each tail through several stitches in different directions inside the body, then trim it close. Loose ends can work their way out over time.
Troubleshooting Common Problems
If your ball looks lumpy, you probably stuffed it unevenly. Open the last few stitches carefully, add or remove stuffing, and close again. If the shape looks pointed instead of round, check that your increases were spaced evenly around the round, since stacking increases in the same spot creates corners.
If your pieces look gappy, try a smaller hook or a firmer yarn. If your hands hurt from working so tightly, switch to a hook with a softer, thicker handle and take frequent breaks.
If your magic ring will not close, you may have used too many stitches, or the tail may be too short. Start again with a longer tail, and pull the tail firmly after the first round.
If your safety eyes keep coming loose, add the washer firmly and push until it clicks. If you are making a keychain for a child under three, skip the safety eyes and embroider the face.
If the embroidery looks messy, try using a single strand of thread instead of two, and keep your stitches small and even. Practice on a spare piece before you stitch the real face.
If the animal leans or flops, add a little more stuffing at the base and make sure the head sits straight on the body before sewing.
Color Ideas and Variations
Once you have made the basic collection, you can change the colors to suit any occasion. For autumn, make the bear in rust, the flower in mustard, and the heart in deep burgundy. For winter, make the chick in white and the frog in icy blue. For Halloween, try a black bunny with orange ears and a little purple bow. You can even match colors to a favorite sports team or school.
You can also add accessories. Tiny hats, scarves, bows, and flowers turn each animal into a character. A bunny holding a little carrot, a bear wearing a red bow, and a strawberry with a smile all look wonderful in a display. A single scrap of yarn can make a small bow, and a handful of French knots can add freckles or buttons.
Another idea is to make a set of keychains for a group of friends, with each animal matching a personality. The bunny for the gentle friend, the frog for the cheerful one, and the bear for the cuddly one. It is a thoughtful gift that costs almost nothing but means a great deal.
Selling Your Crochet Keychains
If you plan to sell your keychains, keep a few simple practices in mind. Take clear photos in natural light against a plain background. Write a short description that mentions the yarn, size, and care instructions. Package each keychain neatly in a small bag with a handwritten tag. Keep a consistent style so your shop looks cohesive. And always make sure everything is securely sewn and safe, especially for gifts that could reach children.
You are welcome to sell the finished keychains you make from this tutorial, and I would be grateful if you credit this blog and link back to the pattern when you share your work.
Frequently Asked Questions
Many readers ask whether these keychains are really beginner friendly. They are, as long as you can make a magic ring, a single crochet, an increase, and a decrease. If you have never made a magic ring, practice it a few times with scrap yarn before you start, because it is the most important skill in this pattern.
Another common question is how long each keychain takes. Most people finish a simple piece like the heart or the flower in about an hour, and a detailed one like the bear or the frog in about two. Your speed will improve quickly with practice.
People also ask how to wash crochet keychains. Spot clean with a damp cloth and mild soap, press out the water gently, reshape, and let it dry flat. Avoid machine washing, because the stuffing can clump and the hardware can rust.
Readers often wonder what yarn is best. Cotton gives crisp stitches and holds its shape, while acrylic is soft and easy to find. Avoid fuzzy yarns, since they hide the stitches and make small details hard to see.
Finally, many ask whether these can be made without safety eyes. Absolutely. Embroider two small black circles with a few tight stitches, or use black beads sewn on firmly for an adult keychain. Embroidered eyes are the safest choice for children.
Final Thoughts
These seven free and easy crochet keychain ideas show how much personality you can create with a little yarn, a small hook, and a handful of basic stitches. A single magic ring and a simple ball are the foundation, and from that you can build a strawberry, a bunny, a chick, a bear, a flower, a heart, and a frog. Each one is quick, cheerful, and rewarding to make, and together they create a collection you will be proud to show off.
Make one, make all seven, or mix and match to create your own designs. Share your finished keychains and tell me which one was your favorite. Happy crocheting, and enjoy every tiny stitch