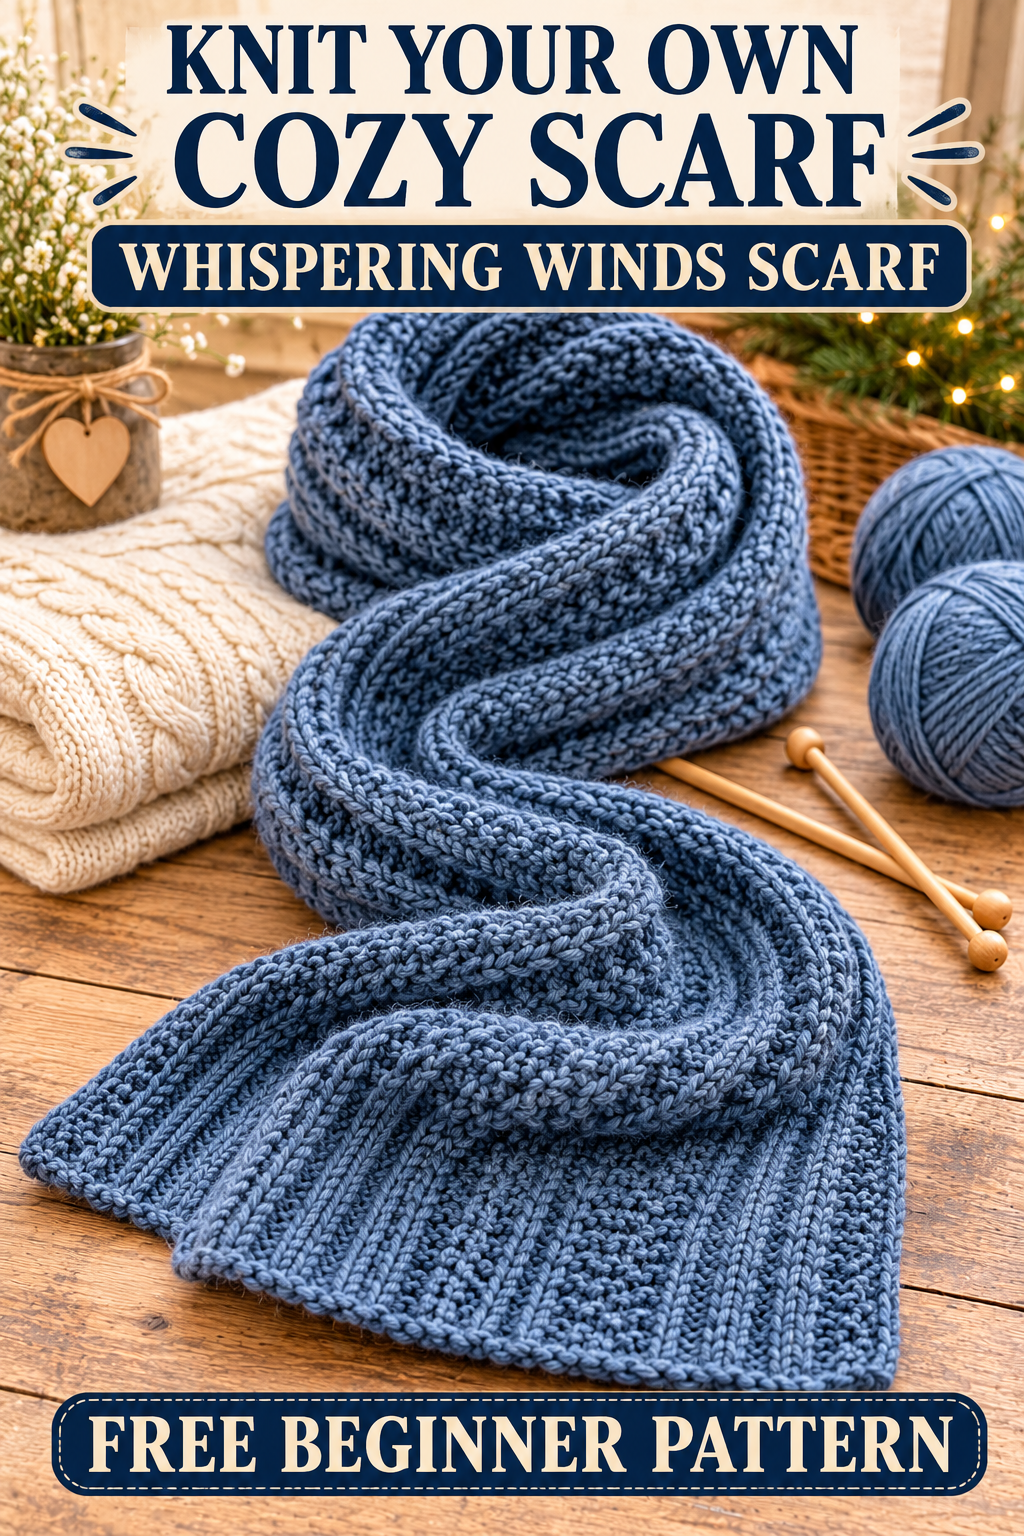
Some projects feel like they were made for the first cold morning of the year. You pull on a coat, wrap something soft around your neck, and suddenly the whole day feels a little more manageable. That is exactly what the Whispering Winds scarf is for. It is thick, squishy and gently textured, with the kind of rolling waves that make a scarf look beautiful even when you simply toss it over a chair.
The best part is that you do not need advanced skills to make it. The whole scarf is built from just two stitches, knit and purl, arranged in alternating panels of smooth ridges and bumpy seed stitch. Once you get through the first few rows, the pattern becomes easy to read, and you can knit it while watching a movie or chatting with a friend.
This free pattern walks you through everything, from choosing yarn to weaving in the last end. You will find exact stitch counts, row by row instructions written in plain language, and fixes for the problems beginners meet most often. By the end, you will have a handmade scarf that looks like it came from a boutique and feels even better.
Why This Scarf Is Perfect for Beginners
If you have ever hesitated to start a scarf because you were afraid it would be boring, this pattern is a good answer. Plain garter stitch scarves can feel endless, and fancy lace or cable patterns can feel stressful. The Whispering Winds sits right in the middle. It has enough variety to keep your hands interested, but it never asks you to count complicated repeats or follow a chart.
The texture also hides small mistakes. Seed stitch and ribbed columns are very forgiving, so a slightly uneven stitch or a tension wobble blends right into the fabric. That makes this a wonderful project for someone who has only knitted a dishcloth or a simple hat before.
Another reason to love it is that the scarf lies flat and does not curl. Many beginners are surprised when their first stockinette scarf rolls up into a tube, but the seed stitch panels in this design balance the fabric, so the edges stay neat. The result is a scarf that drapes beautifully and wraps comfortably around the neck.
What You Need Before You Begin
You will need about 520 yards of worsted weight yarn, which is roughly three skeins if each one holds around 200 yards. The scarf in the photos is worked in a heathered denim blue, and it is a lovely choice because the soft color variation adds depth to the stitches without hiding them. Any smooth, plied wool or wool blend will work well. Merino is especially nice against the skin, and a washable wool blend is practical if you plan to give the scarf as a gift.
For needles, grab a pair of US 8 (5 mm) knitting needles. Straight needles are fine, but a long circular needle can be more comfortable because the weight of the scarf rests in your lap instead of pulling on your wrists. Wooden needles are a good pick for this project since they grip the yarn gently and keep the stitches from sliding off too quickly.
You will also need a tapestry needle for weaving in ends, a pair of scissors, and a tape measure. A row counter is helpful but not required. A simple pencil tally on a scrap of paper works just as well.
The finished scarf measures about 9 inches wide and 62 inches long, which is a generous size for wrapping once or twice. The gauge is about 20 stitches and 28 rows over 4 inches in the pattern stitch. Scarves are very forgiving when it comes to gauge, so do not worry if yours is a little off. A slightly looser fabric will simply make a wider, softer scarf, and a tighter one will be a bit narrower and denser. If you want a longer or shorter scarf, just keep knitting until it reaches the length you like.
Understanding the Whispering Winds Stitch Pattern
Before you cast on, it helps to picture what the fabric will look like. Across the width of the scarf, you will work five panels of seed stitch, separated by four narrow columns of smooth knitting. Each column is framed by a single purl stitch on each side, which creates a crisp little valley between the smooth ridge and the bumpy seed stitch. These valleys are what give the scarf its beautiful, wave like definition.
Seed stitch itself is simple. You knit one, purl one, and on the next row you knit the stitches that look purled and purl the stitches that look knitted. When you work it over an odd number of stitches, as we do here, every row looks the same. You start with a knit stitch, alternate with purl stitches, and end with a knit stitch. That is one of the reasons the pattern is so easy to memorize.
The smooth columns are worked as plain stockinette, meaning you knit them on the right side and purl them on the wrong side. The single stitch on each side of the column does the opposite of the column itself. It is purled on the right side and knitted on the wrong side. Once you see how these pieces fit together, the whole pattern becomes clear.
Step 1: Cast On
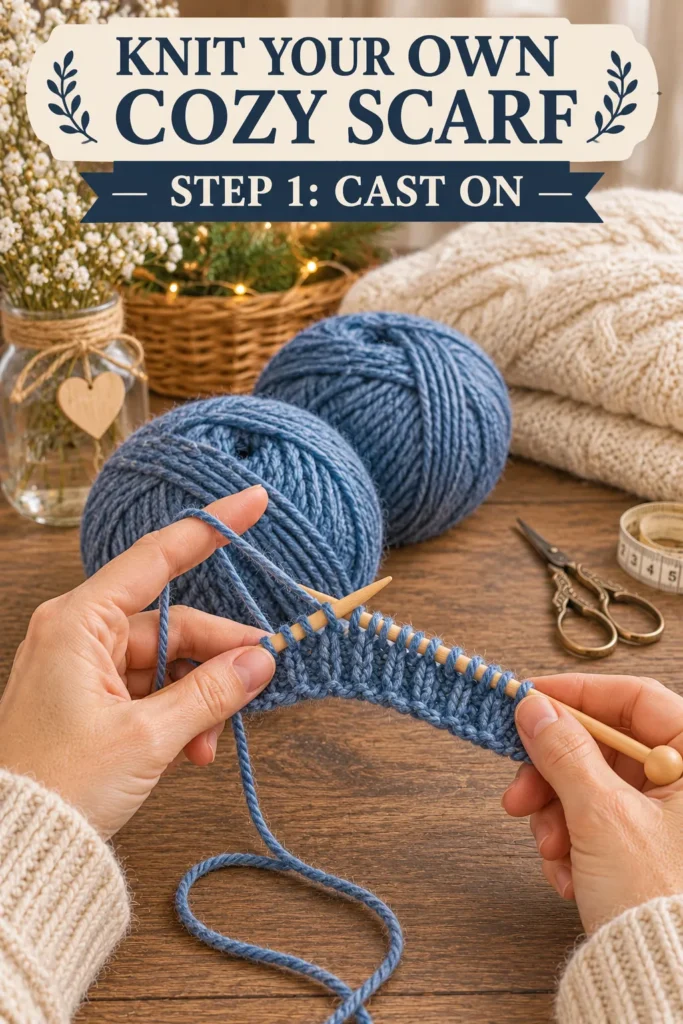
Every good scarf starts with a clean, stretchy cast on, and this step sets the tone for the whole project. Place a slip knot on your needle and cast on 45 stitches using the long tail cast on. If you are new to this method, leave a tail about four times the width of the scarf, or roughly 40 inches, so that you do not run out of yarn halfway across.
The most common mistake at this stage is casting on too tightly. A tight edge pulls in the bottom of the scarf and makes it look pinched, while a relaxed edge allows the bottom to open up and match the width of the rest of the fabric. If you tend to pull your stitches firmly, try casting on over two needles held together, then slide one out before you start knitting. You can also use a needle one size larger for just the cast on row.
Once you have 45 stitches on the needle, count them twice. This pattern depends on exactly 45 stitches, because four repeats of the 10 stitch pattern plus a final seed stitch panel add up to that number. Counting now saves you from the frustration of discovering a mistake after you have knitted several inches.
Take a moment to arrange your workspace as well. Set your yarn on the right, keep your scissors and tapestry needle within reach, and make sure you have good light. A cozy blanket, a warm drink and a comfortable chair do not hurt either. Projects like this are meant to be enjoyed, and the more relaxed you are, the more even your stitches will be.
Step 2: Work the Texture
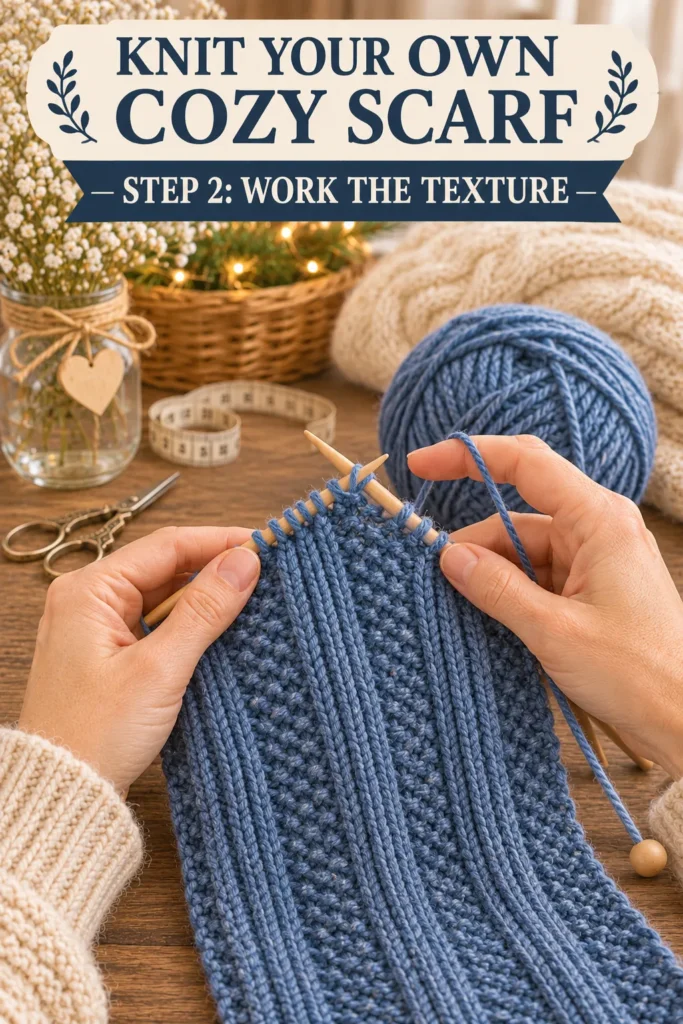
This is where the scarf comes to life. You will repeat two rows over and over, and after about an inch of fabric you will see the panels of seed stitch and smooth ridges start to take shape.
For Row 1, which is the right side, begin by knitting one, purling one, knitting one, purling one and knitting one. That is your first seed stitch panel. Next, purl one, knit three and purl one. That is your first smooth column with its two framing stitches. Repeat these two groups, which together make 10 stitches, four times across the row. After the fourth repeat, finish with one more seed stitch panel by knitting one, purling one, knitting one, purling one and knitting one. You should end the row with exactly 45 stitches.
For Row 2, which is the wrong side, begin with the seed stitch panel again by knitting one, purling one, knitting one, purling one and knitting one. Then work the column on the wrong side by knitting one, purling three and knitting one. Repeat that 10 stitch group four times across the row, then finish with the final seed stitch panel.
Keep repeating Rows 1 and 2. After about ten rows you will notice that the knit stitches in the columns line up into neat vertical ridges, while the seed stitch panels look like tiny scattered beads. If you look closely, the purl stitches on each side of the columns form a thin groove that makes each ridge stand out.
A few small habits will make this part easier. Always check which row you are on before you begin, because the right side and wrong side rows are different. If you are not sure, look at the fabric. On the right side, the smooth columns look like rows of little V shapes. On the wrong side, they look bumpy. You can also hang a small stitch marker on the needle after every right side row, which gives you a quick visual cue.
Also, pay attention to the first and last stitch of every row. They are knit stitches in seed stitch, and they form the edge of your scarf. Keeping them consistent keeps the sides neat. If your edges look loose, tug the yarn gently after the first stitch of each row.
Step 3: Knit to Length
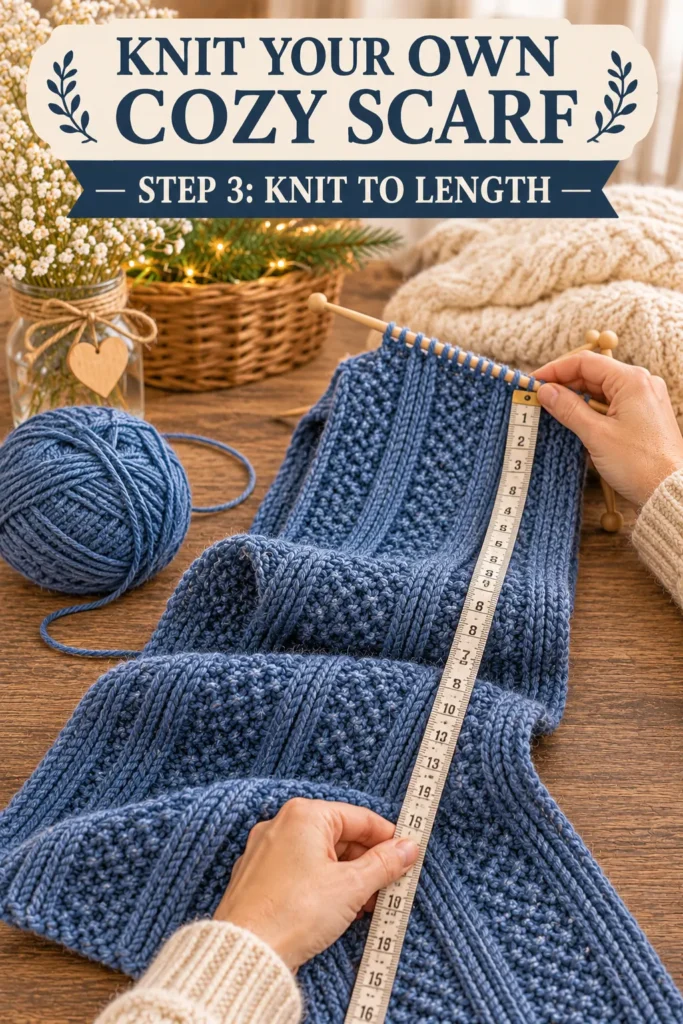
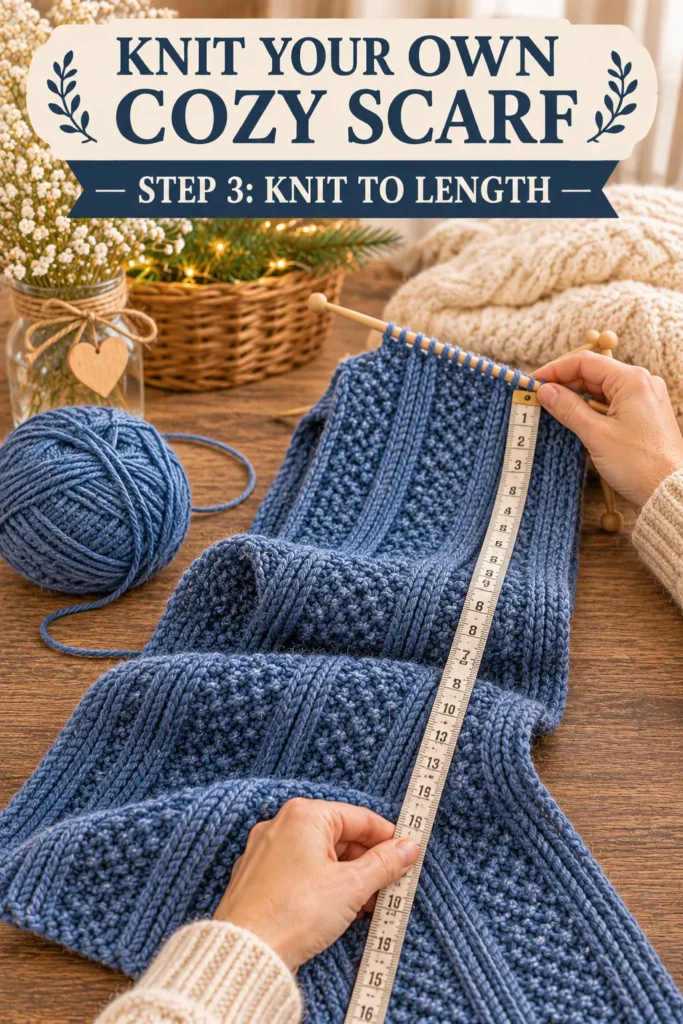
Now comes the relaxing part. Keep repeating Rows 1 and 2 until your scarf reaches the length you want. For the full size scarf shown in the photos, that is about 62 inches, or roughly 430 rows. Many knitters find the rhythm almost meditative, and this is the stage where the scarf grows quickly.
Measure your work every few inches by laying it flat on a table. Do not stretch it while measuring, because the fabric will relax a little after you take it off the needles and block it. If you plan to wrap the scarf several times around your neck, add a few extra inches. For a shorter scarf that hangs just past the chest, 50 to 55 inches is plenty.
Yarn management matters here. When you reach the end of a skein, do not tie a knot in the middle of a row. Instead, finish your row, then start the new skein at the beginning of the next row, leaving a six inch tail on both the old and new yarn. You can weave these tails into the seed stitch panels later, where they disappear easily into the texture.
If you have an extra skein, check how much yarn remains when you are about two thirds of the way through. A good rule is that you need at least as much yarn for the final third as you used for the first third. If you are running short, it is better to find out early and buy another skein from the same dye lot than to discover the problem when you are almost done.
This stage can also feel long, so give yourself small goals. Aim for a few inches each evening, or set a timer for twenty minutes of knitting a day. A scarf worked in short, regular sessions is finished before you know it, and the steady progress is satisfying.
Step 4: Bind Off and Finish
When your scarf reaches the right length, you are ready to bind off. Work one more wrong side row so the next row is a right side row, then bind off in pattern. This means you knit the knit stitches and purl the purl stitches as you pass them over, following the same rhythm as the pattern. Binding off in pattern keeps the ridges and seed stitch panels looking consistent right to the very edge.
Keep your bind off loose, just as you did with the cast on. A tight bind off is the number one reason scarf ends look puckered. If your bind off tends to be tight, switch to a needle one size larger while you work it. Once only one stitch remains, cut the yarn with a 6 inch tail, pull it through the final loop, and tighten.
Now it is time to weave in the ends. Thread each tail onto your tapestry needle and run it along the back of the fabric for about two inches in one direction, then back in the other direction for another inch. Use the seed stitch panels to hide the yarn, because the bumpy texture grips the yarn and keeps it from popping out. Trim the ends close to the fabric, but not so close that they can pull free.
Take a final look at your scarf. If any seed stitch bumps look uneven, gently tug the fabric sideways to even them out. If you spot a loose stitch, use the tail to tighten it before you weave in the end. A few minutes of careful finishing makes a handmade scarf look professionally made.
Blocking Your Scarf
Blocking is the secret to a scarf that looks polished. Fill a basin with lukewarm water and a small amount of wool wash, then submerge your scarf and let it soak for fifteen minutes. Lift it out gently, without wringing, and press it between two towels to remove most of the water.
Lay the scarf flat on a dry towel or blocking mat and smooth it into shape. Gently pat the ends so they are square and the edges run straight. Do not pull hard, because you want the texture to stay plump and springy. Let it dry completely, which usually takes a day or two. Once it is dry, the stitches will look even, the ridges will look defined and the fabric will feel softer and more relaxed.
If you used a yarn that does not like water, such as certain acrylic blends, you can steam the scarf lightly instead. Hold the iron above the fabric without touching it, and let the steam relax the stitches.
Making It Your Own
One of the best things about this pattern is how easy it is to change. For a wider scarf, add 10 stitches, which is one more column and seed stitch panel, and your scarf grows by about two inches. For a narrower scarf, remove 10 stitches. Just remember to keep the pattern balanced, with a seed stitch panel on each side of every column.
Color changes give you plenty of room to play. Try working in a soft gray, a creamy oatmeal or a deep forest green. A variegated yarn adds movement, but a solid or heathered yarn shows off the texture more clearly, which is why the denim blue in the photos looks so good. You can also stripe two colors by changing yarn every 20 rows, which creates a pretty vertical rhythm against the horizontal bands.
If you want a fringe, cut lengths of yarn about 10 inches long, fold them in half, and pull the loop through the cast on edge with a crochet hook. Pull the tails through the loop to tie a knot. You can also add a small pom pom or a button as a finishing touch on a shorter scarf made for a child.
For a cowl version, knit about 30 inches, then seam the ends together with mattress stitch. The result is a chunky infinity cowl that wraps twice around the neck and stays in place without slipping.
Troubleshooting Common Problems
My Scarf Is Getting Narrower as I Knit
This usually happens when you pull your yarn too tightly on the first or last stitches of the row. Try relaxing your grip and leaving a little extra slack at the edges. Count your stitches to make sure you have not accidentally dropped one, and check that you are not working into the same stitch twice.
The Seed Stitch Looks Messy
Seed stitch can look uneven when the knit and purl stitches get out of sequence. Look at the stitch you are about to work. If it looks like a knit, purl it. If it looks like a purl, knit it. If you lose your place, tink back, which means knitting backward one stitch at a time, until the pattern lines up again.
The Edges Look Wavy
Wavy edges usually come from inconsistent tension on the first and last stitches. Tug gently on the yarn after the first stitch of every row, and keep your last stitch snug. Blocking will help smooth minor waviness.
The Smooth Columns Look Too Tight or Too Loose
Stockinette columns can look uneven if you purl more tightly than you knit. If your wrong side rows look different from your right side rows, try loosening your purl tension or using a slightly larger needle for the purl rows.
I Ran Out of Yarn
Do not panic. If you are close to the end, use a matching skein from the same dye lot and join it at the start of a row. If you cannot find a match, add a short band of a contrasting color at both ends to make it look like a deliberate design.
My Scarf Curls at the Ends
Slight curling is normal before blocking. A good soak and a flat dry will usually fix it. If it still curls, add a few rows of seed stitch across the whole width at the beginning and end.
Caring for Your Whispering Winds Scarf
To keep your scarf looking fresh, wash it by hand in cool water with a gentle wool wash. Press out the water and dry flat, away from direct heat. Avoid hanging it, because the weight of wet yarn can stretch the fabric. Store it folded, not on a hook, and keep it in a breathable cotton bag during warm months. If your yarn is machine washable, use a cold, gentle cycle inside a mesh bag.
If you notice small pills forming after a season of wear, remove them gently with a fabric shaver or a sweater comb. This keeps the texture looking crisp.
Frequently Asked Questions
Is this scarf pattern good for beginners?
Yes. If you can cast on, knit, purl and bind off, you have every skill you need. The pattern repeats the same two rows, and the stitch counts stay the same throughout.
How long does it take to knit this scarf?
Most knitters finish in 20 to 30 hours, depending on speed. That is about two to three weeks if you knit an hour or so each evening.
What yarn works best for a textured scarf?
A smooth worsted weight yarn in wool or a wool blend is ideal, because it shows off the stitch definition. Avoid very fuzzy or bumpy yarns, which hide the texture.
Can I use bulky yarn instead?
You can. Switch to US 10.5 needles and cast on 35 stitches, which gives you three columns and four seed stitch panels. Expect a quicker project and a thicker, warmer scarf.
How much yarn do I need for a shorter scarf?
For a 50 inch scarf, about 420 yards is enough. For a child sized scarf around 40 inches long, 330 yards will do.
Can I make this scarf in cotton?
Cotton works, but it is less elastic than wool, so the scarf will have less bounce. It is a good choice for mild climates or for people with wool allergies.
Your Cozy Scarf Is Ready to Wear
The Whispering Winds scarf proves that a simple project can feel truly special. With just knit and purl stitches, a few repeating rows and a skein or two of good yarn, you have made something warm, beautiful and entirely your own. Every wave in the fabric carries the quiet satisfaction of handwork, and every wrap around your neck is a small reminder of the time you spent making it.
Whether you keep it for yourself or give it to someone you love, I hope this pattern brings you many cozy days. If you make one, share a photo and tell me what color you chose. I would love to see your version, and your feedback helps other knitters decide what to try next. Happy knitting, and stay warm!