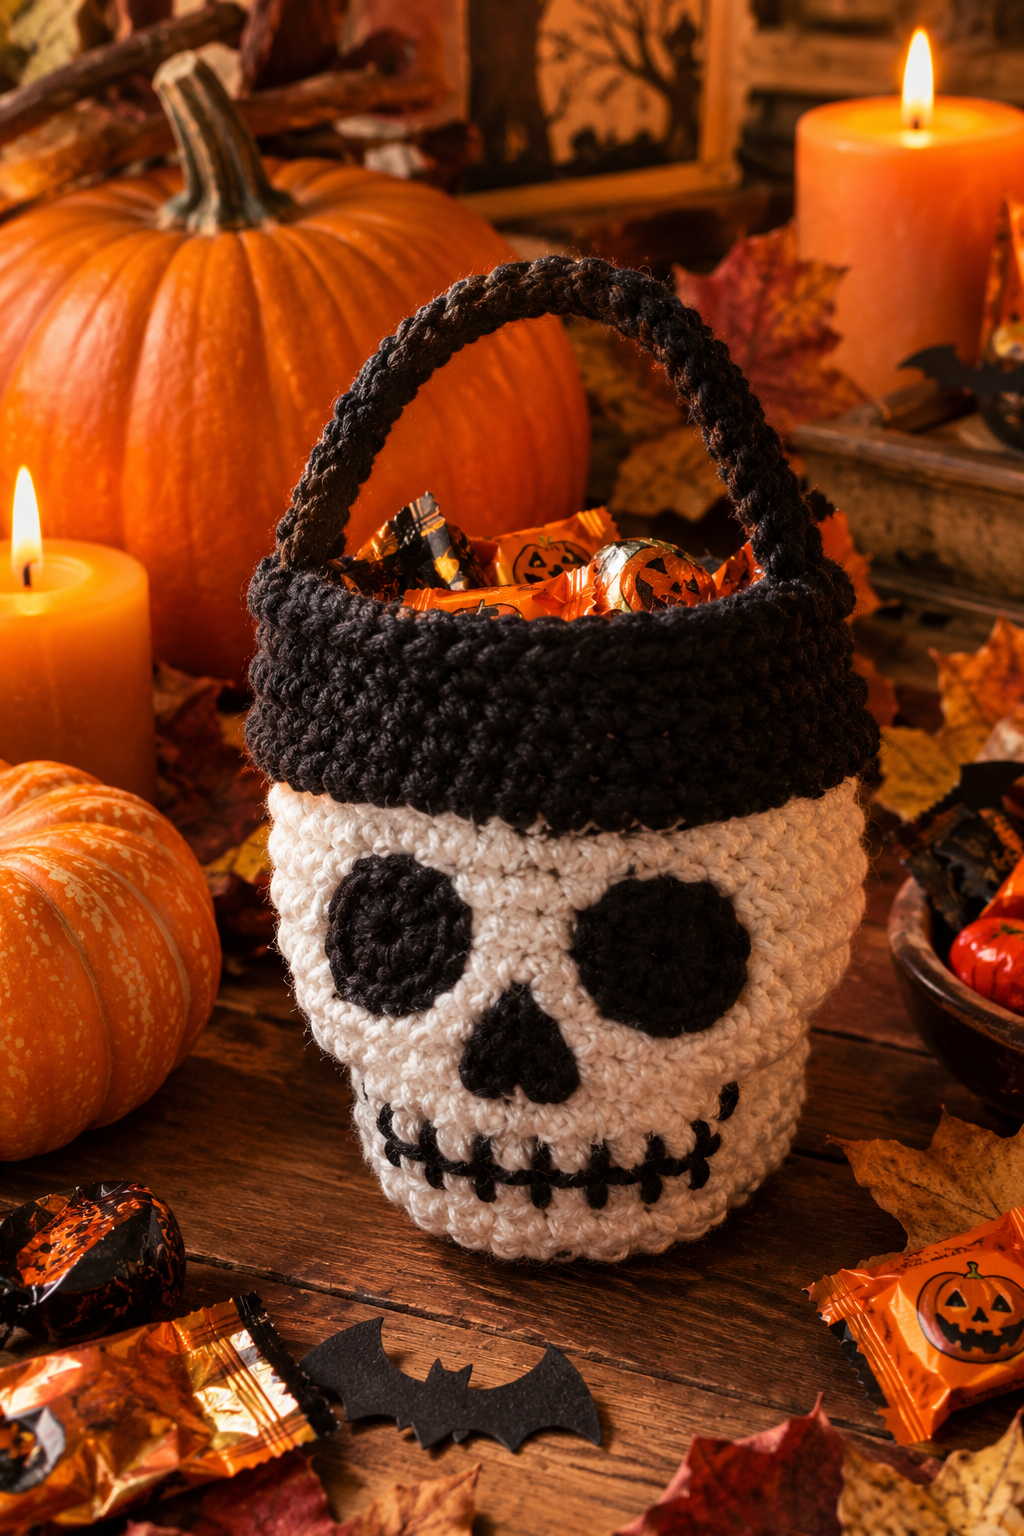
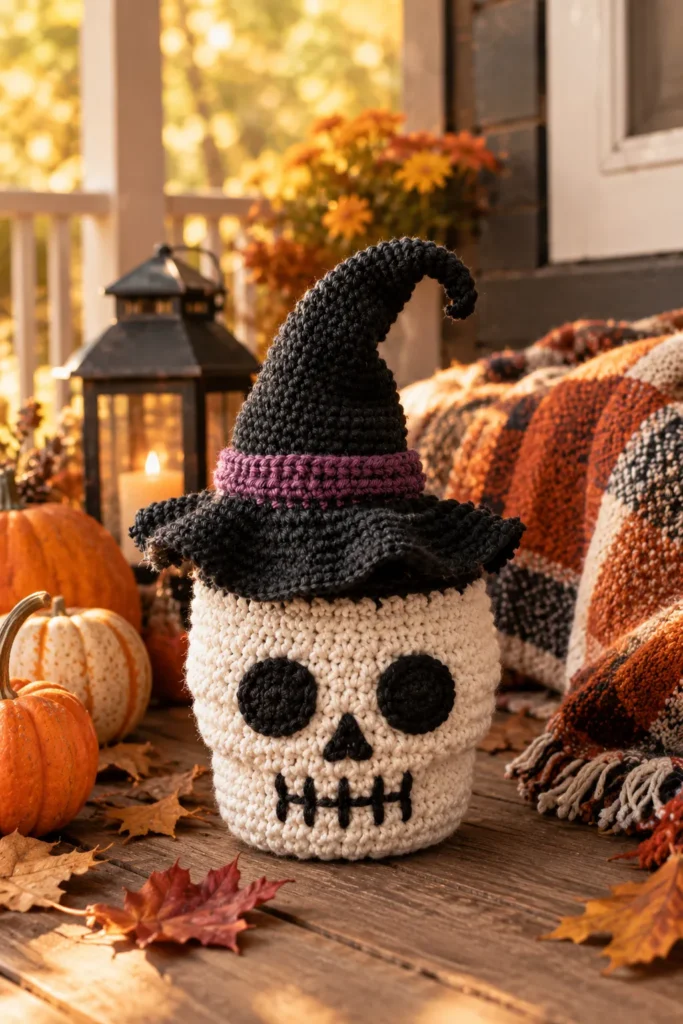
There is something wonderfully contradictory about a cute skull. It should be spooky, yet when it is made from soft white yarn with a neat black top, it looks more like a friendly little character than a warning sign. That is the charm of a cute white skull bucket with a black top in crochet. It carries the mood of Halloween without any of the harshness, and it is useful at the same time.
This guide is for anyone who wants to make one, whether you plan to fill it with candy, use it as a decorative storage basket, or simply set it on a shelf to make the room feel a little more seasonal. We will walk through the idea behind the design, the yarn and tools that work best, how to build a bucket that actually stands up, how to give the skull a face with personality, and how to avoid the problems that catch most makers the first time. Take your time with it, and you will end up with something you are proud to display.
Table of Contents
Why a skull bucket is such a good project, what you can use it for, skill level and time, choosing yarn and hook, extra supplies, planning the shape, building the base and body, creating the skull face, adding the black top and handle, making it stand up, finishing and lining, common mistakes, ways to style it, care tips, frequently asked questions, and a short summary.
Why a Skull Bucket Is Such a Good Project
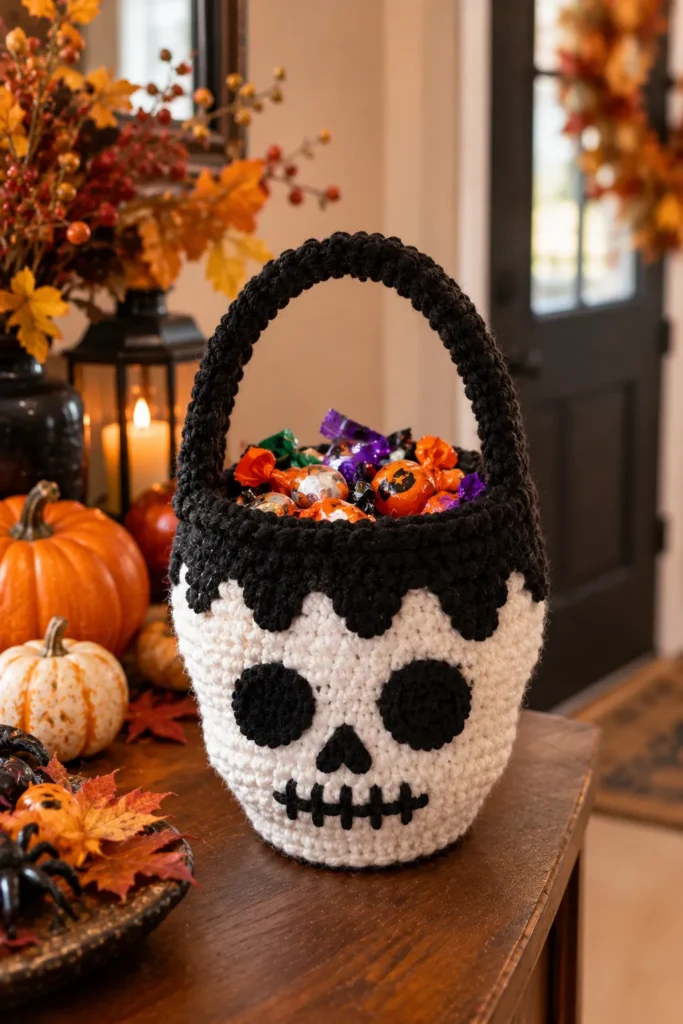
Most Halloween crochet leans heavily on pumpkins, ghosts and bats, which are lovely, but a skull has a different feel. It is graphic and simple, and the shapes are easy to read from across a room. A white body with dark eye sockets and a black top is an instantly recognizable combination, and because it uses only two main colors, it looks clean and modern rather than cluttered.
The bucket form adds something else, which is function. A flat decoration sits on a shelf and does nothing. A bucket can hold things. That makes it more satisfying to make, and it makes it more likely that you will bring it out year after year instead of packing it into a box and forgetting about it.
There is also an emotional appeal that is hard to ignore. A rounded skull with a slightly oversized head and a small, sweet face reads as cute, and cute is exactly what people want when they browse handmade Halloween ideas. It appeals to adults who like a gothic look, to families who want something friendly, and to anyone who prefers their spooky season on the cozy side.
What You Can Use It For
The most obvious use is as a trick-or-treat bucket. A sturdy crochet bucket with a handle is much nicer than a plastic pumpkin, and it holds its shape well if you build it properly. Children enjoy carrying something that looks like a character, and adults like that it can be kept and reused.
It also works beautifully as a candy bowl for the front door. Set it on a table or the porch step with a handful of wrapped sweets inside, and it becomes part of your decoration as well as a serving dish. If you have a covered porch or entry, this is where it will get the most attention.
Beyond Halloween night, a skull bucket makes a very good storage basket. It can hold yarn balls, small tools, remote controls, pens, or craft supplies. If you make it larger, it can sit beside a sofa and hold a small blanket or a few magazines. Some people even slide a small plastic plant pot inside and use the skull as a cover for a seasonal plant, such as a little succulent or a trailing ivy, which gives a gothic cottage look.
It is also a thoughtful handmade gift. Fill it with tea, chocolates, a candle or a few small crochet treats, and you have a present that feels personal without needing to be wrapped in anything fancy.
Skill Level and Time Needed
This is a beginner-friendly project with a few intermediate touches. If you can crochet in the round, make increases and decreases, and change colors, you can make it. The skull face is the part that requires the most care, but it can be done in several ways, from simple embroidery to color work, so you can choose the method that suits your confidence.
For time, most people need between four and eight hours, depending on the size and the amount of detail. A small bucket with an embroidered face may take an afternoon. A larger one with a handle, lining and stiffening can take a weekend, spread over a few sittings. It is worth working in short sessions, because tight, even tension matters more here than speed.
Choosing Yarn and Hook
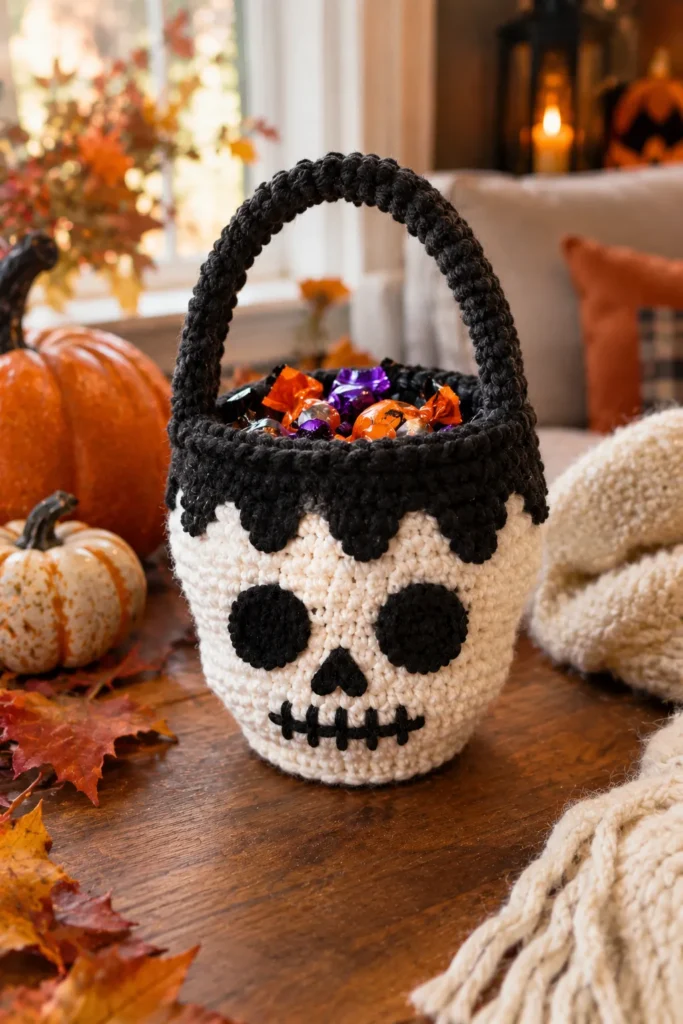
For a bucket, the yarn is more than a color choice. It decides whether the finished piece stands up or slumps. Cotton is usually the best material, because it has very little stretch and creates a firm fabric. Mercerized cotton has a pleasant smooth finish and shows the stitches clearly, which suits a clean white skull. A cotton and acrylic blend can also work well and is often softer on the hands.
Acrylic is a perfectly acceptable alternative, especially if you want a bright white or a deep, true black at a low price. It tends to be springier and less structured, so you will need a smaller hook and a bit of reinforcement. If you plan to use the bucket for heavier items, cotton is the safer choice.
White yarn deserves a little extra attention. It shows dirt easily, so wash your hands before working with it, and keep it in a clean bag between sessions. Black yarn, on the other hand, hides stitches, which makes it hard to see your work in low light. Work on the black parts near a window or under a good lamp.
For hook size, go smaller than the label suggests. If the yarn is worsted weight, a hook around 3.5 to 4.0 mm will give a dense, sturdy fabric, whereas the recommended size would produce something floppy. Dense stitches also stop the stuffing, lining or contents from showing through the gaps, which matters if you plan to put candy inside.
As for quantity, a medium bucket, roughly the size of a small pail, usually takes somewhere around 200 to 300 yards of white and 80 to 120 yards of black, including the handle. Those numbers vary with your tension, so it is wise to buy a little extra of each. Running out of white in the last rounds is annoying, and dye lots can differ slightly.
Extra Supplies Worth Having
Apart from yarn and a hook, you will want stitch markers, because working in a continuous spiral makes it easy to lose your place. A yarn needle is necessary for weaving in ends and sewing on details. A small pair of sharp scissors makes clean cuts, and a tape measure helps you check the size as you go.
To help the bucket stand, a circle of plastic canvas cut to fit the base is very useful. It sits inside the bottom and keeps it flat under weight. Some makers also use a stiffening spray or a fabric lining for extra structure, though neither is essential if your tension is firm.
For the face, you can use black yarn or embroidery floss for stitching, or small pieces of black felt for shapes. Safety eyes are not suitable here because the skull usually has hollow, dark sockets rather than round eyes, and they would be a hazard for children anyway. Embroidered and crocheted details are safer and look better.
Planning the Shape
Before you start, decide how big you want the bucket to be and what you will use it for. A trick-or-treat bucket should be wide enough to reach into easily and sturdy enough to carry a decent amount of candy. A decorative piece for a shelf can be smaller and more delicate.
The shape of a skull bucket is slightly different from a standard pail. Most designs make the body a rounded, gently curved form, wider near the top so it resembles the cranium, and then taper in a little toward the bottom to suggest the jaw. The black top is usually a band or a rim that sits at the opening, like a lid edge or a hat brim, and it helps frame the white body.
It helps to sketch the proportions on paper first. Draw the outline, mark where the face will sit, and decide how deep the black top should be. This does not need to be neat. It is only a way to catch problems before you have spent hours on stitches.
Building the Base and Body
Start with the base by working a magic ring and crocheting in a spiral with single crochet, increasing evenly in each round so the circle lies flat. The increases must be placed consistently, usually six per round, otherwise the base will ripple or curl. If it ruffles, you have too many increases. If it forms a bowl, you need a few more.
Keep adding rounds until the base reaches the width you want. As an example, a base about six inches across usually comes out at roughly seventy to eighty stitches in worsted weight cotton, though your own gauge will decide the exact number. Treat that as an illustration rather than a rule.
Once the base is the right size, work one round in the back loop only. This creates a clear edge and makes the sides rise up neatly instead of bending outward. From here, work even rounds for the lower body, keeping the stitch count the same so the sides climb straight.
To create the skull shape, add a few increases evenly spaced around the middle of the body, then work several even rounds, so the upper part gently bulges. Then begin to decrease slightly as you approach the top, if you want the opening a little narrower than the widest point. If you prefer a simpler shape, skip the decreases and keep the sides straight. Both look charming, and the straight version is easier to line and to fill.
Check the size by holding your hand over the top. The opening should be comfortable to reach into, but not so wide that the sides collapse inward.
Creating the Skull Face
The face is what makes this project memorable, and it is also where most people worry. The good news is that there are three reasonable methods, and none of them is difficult once you take it slowly.
The first is embroidery. After the body is finished, use black yarn and a needle to stitch two large, rounded eye sockets, a small nose shape and a row of teeth along the lower area. Embroidery is forgiving, because you can pull out a stitch and try again. Before you begin, mark the positions with removable markers or pins, and step back to check that the two eyes are level.
The second method is color work. As you crochet the body, you can bring in black yarn for the stitches that form the eyes and nose, carrying the white yarn behind the work. This gives a smooth, built-in look, and the shapes are very neat. It takes a bit more concentration, and you will want a chart to follow. The back can be a little untidy, which is another reason a lining is helpful.
The third method is appliqué. Crochet small black ovals for the eyes and a tiny triangle for the nose, then sew them onto the body. This is the best choice for anyone who wants control over the shapes. It also lets you try different expressions, such as sleepy eyes, wide eyes or a sweet side glance, before committing.
A cute skull face works best when it is simple. Large, slightly slanted eyes and a small nose look friendlier than sharp, narrow ones. The teeth can be a short row of straight vertical lines, or you can leave them out and add a tiny curved smile instead. Keep the details a little spaced out so the white yarn shows through, because that contrast is what makes the face readable from a distance.
If you want a cuter look, add a small touch of color, such as pink cheeks in a very soft shade, or a tiny bow stitched at one side of the head. These small additions give the skull personality without changing the basic design.
Adding the Black Top and Handle
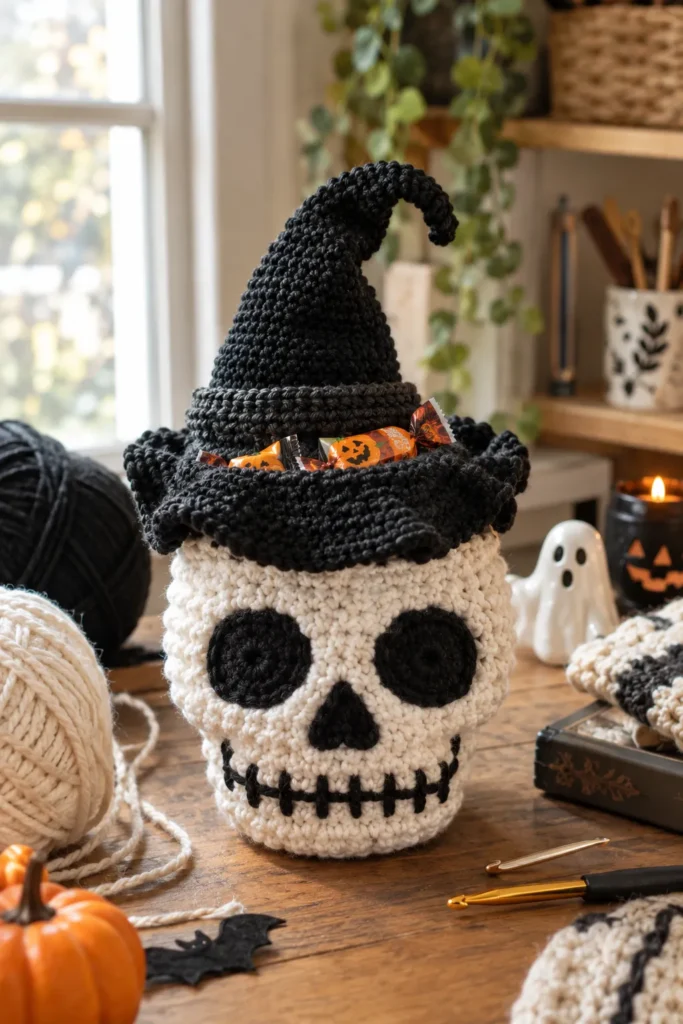
The black top is the signature feature of this design. It frames the white body and turns what could be a plain white pot into something more graphic and finished.
To make it, change to black yarn at the round where you want the color to begin. Work a few rounds of single crochet, keeping the stitch count the same, so the band looks like a solid cuff. Many makers add a round of slip stitches or work the last round in the back loop to create a defined, ribbed edge. A deeper band gives a more dramatic look, while a narrow one feels lighter.
When you change colors, do it at the very end of a round to keep the join tidy. Pull the new yarn through at the final yarn-over of the last stitch, and carry on in the next stitch. This prevents the little step that often shows where two colors meet.
For the handle, you have a few choices. A simple crocheted strap is easy to make: chain a length that suits your bucket, then work single crochet back along the chain, and repeat for a few rows until the strap is sturdy. Sew it securely on both sides, stitching through several rounds so the weight is spread out. For extra strength, run a length of cotton cord through the center before sewing. If the bucket is for children carrying candy, make the handle wider and shorter, so it stays comfortable and does not tangle.
Black yarn is a good choice for the handle because it continues the line of the top and makes the whole piece look planned. Make sure the attachment points are reinforced, since the handle takes the most strain.
Making It Stand Up
A bucket that slumps will always look a bit sad, so structure is worth thinking about early. The biggest factors are tight stitches and a firm base. If your crochet feels loose, go down a hook size and continue. If your sides still lean, add a cardboard or plastic canvas circle to the bottom and cover it with a fabric lining.
Another useful trick is to double the base. Crochet a second circle and sew it inside the first, with the plastic canvas sandwiched between. This gives you a strong, flat bottom that will not warp, even when it is full of candy.
For the sides, a fabric lining adds a great deal of support. Cut a rectangle of cotton fabric a little larger than the inside circumference, sew it into a tube, add a circle for the base, and slip it inside. Stitch it to the top edge so it stays in place. A lining also keeps sticky sweets away from the yarn and makes cleaning easier.
If you want an even firmer finish, you can lightly stiffen the crochet with a fabric stiffener, following the directions on the label. Test it on a small swatch first, because some products darken white yarn or change its feel.
Finishing and Weaving in Ends
Take your time with the finishing, because that is what separates a casual project from a neat one. Weave in every end, passing the needle through the stitches in at least two directions, then trim the tails close. On white yarn, black ends can show through, so weave them into black areas only.
Give the bucket a quick shaping once it is finished. Press the sides gently with your hands, round out the top, and check that the face is positioned evenly. If your yarn allows it, you can steam the piece lightly, holding the iron or steamer a little away from the fabric instead of pressing directly.
Common Mistakes and How to Fix Them
One of the most common problems is a base that will not lie flat. This happens when the increases are uneven, or when there are too few or too many. Count your stitches at the end of each round, and if the circle starts to ruffle, pull back and rework the round.
Another frequent issue is a bucket that is too loose and floppy. Usually, the cause is a hook that is too large. Switching to a smaller hook, even just half a millimeter smaller, will tighten the fabric, and you will notice the difference immediately.
Color changes that look messy are also very common. If you see a jagged line at the join, make sure you switch yarn at the end of the round and not in the middle. Hiding the old tail inside the next few stitches also helps.
Many makers find the face looks crooked. The solution is to plan it before sewing: mark both eyes with pins, check them against the center of the bucket, and ask someone else to look at it, because small differences are easy to miss when you have been staring at your work.
A white bucket that looks grey after a few days is usually just dirty yarn. Keep it away from dark fabric, and wash your hands before long sessions. If it picks up marks, a gentle spot clean with mild soap usually works.
Finally, handles that pull away are a design problem more than a stitching problem. Attach them through several rounds, and use strong thread or the same yarn doubled. It is always better to over-reinforce than to have a bucket full of candy come apart on Halloween night.
Styling Ideas
A skull bucket looks wonderful on a dark wood surface surrounded by small pumpkins, dried grasses and warm candlelight, since the white yarn stands out against the darker tones. Placed on a porch step, it becomes a friendly greeter for trick-or-treaters. On a mantel, it can hold dried flowers or faux autumn leaves.
You can make a small set in different sizes and arrange them together, or change the color of the top to purple, orange or deep green for a variation. If you want a softer look, keep the face minimal and add a tiny pink bow. If you want a more dramatic style, use a deeper black top and sharper eye shapes.
For photos, soft window light works best. White yarn can look washed out in strong light, so place the bucket where the light is gentle and even, and use a dark background to make the shape stand out. This helps if you plan to share your work online or sell it.
Care and Storage
Treat the bucket kindly and it will last for many seasons. Spot clean with a damp cloth and a little mild soap whenever it gets marked. If it needs a full wash, do it by hand in cool water, remove any lining or plastic canvas first, and reshape the bucket while it is still damp. Let it dry completely away from direct heat.
Avoid hanging it by the handle when wet, because the weight will stretch the strap. When storing it for the year, wrap it in tissue paper or a clean pillowcase, stuff the inside lightly so it keeps its shape, and keep it somewhere cool and dry.
Because yarn is flammable, keep the bucket away from open flames. Real candles are lovely on a styled table, but battery operated ones are a safer choice for displays and photos.
Frequently Asked Questions
Is the cute white skull bucket hard to crochet?
It is not difficult. The base and body use basic single crochet in the round, and the face can be embroidered if you do not want to do color work. The main skill is keeping your tension even.
What yarn is best for a crochet bucket?
Cotton or a cotton blend in worsted weight works best because it is firm and holds its shape. Acrylic can work too, but you will need a smaller hook and extra support.
How do I stop the bucket from collapsing?
Use a smaller hook, keep your stitches tight, and add a stiff base made from plastic canvas. A fabric lining gives the sides extra support.
Can children use it for trick-or-treating?
Yes, as long as you avoid small parts that could come loose. Embroider the face instead of using buttons or safety eyes, and attach the handle securely.
How big should the bucket be?
For candy, a bucket roughly six to eight inches across is a comfortable size. For decoration or storage, you can go smaller or larger.
Can I wash it?
Yes, by hand in cool water with mild soap. Remove any lining or stiffeners first, then reshape and air dry.
Can I change the colors?
Of course. A white skull with a black top is classic, but the same shape looks lovely in grey, cream, or even pastel colors for a softer take.
Can I sell items made from this design?
Many makers do, but if you are following someone else’s pattern, check its license terms before selling.
Summary
A cute white skull bucket with a black top in crochet is one of those projects that feels fun and useful at once. It has a clear, simple look, it works as a candy bucket, a storage basket or a seasonal decoration, and it is within reach of anyone who is comfortable crocheting in the round.
The keys to a good result are simple. Choose a firm yarn and a smaller hook, build a sturdy base, shape the body gently, and keep the face simple and sweet. Add the black top neatly with a clean color change, attach the handle firmly, and finish with a lining or stiff base if you want it to last.
Take your time, test the proportions as you go, and enjoy the small details, because they are what give the skull its character. When it is finished, set it on your table, fill it with treats, and share a photo with us at StitchNestStudio. We would love to see your version.