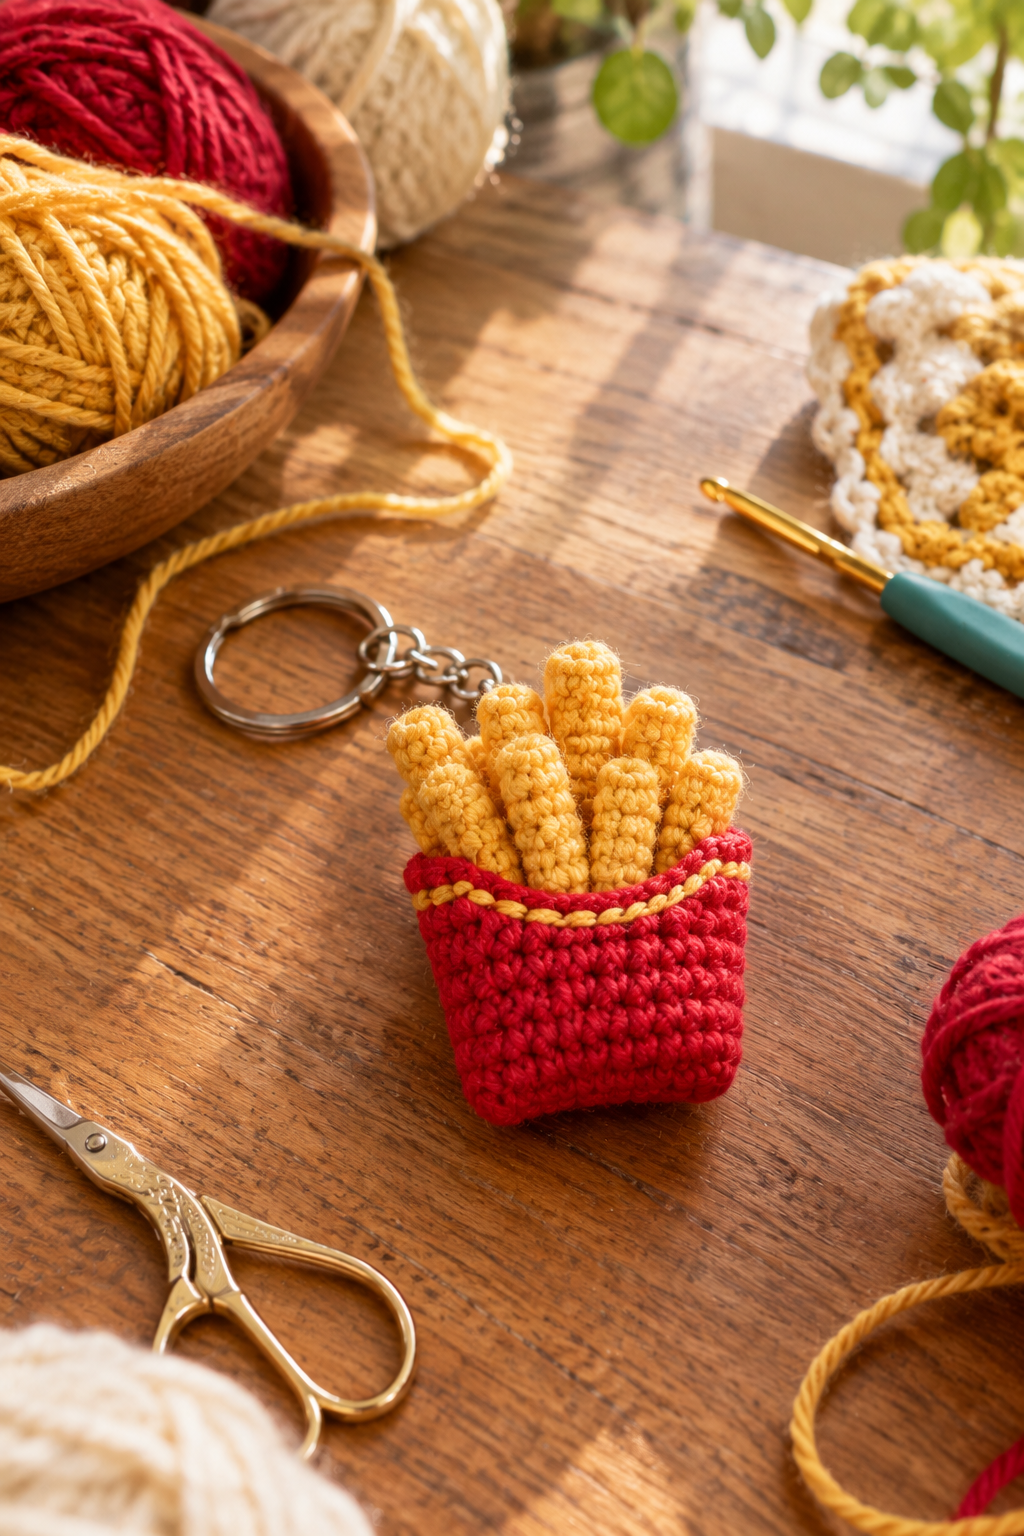
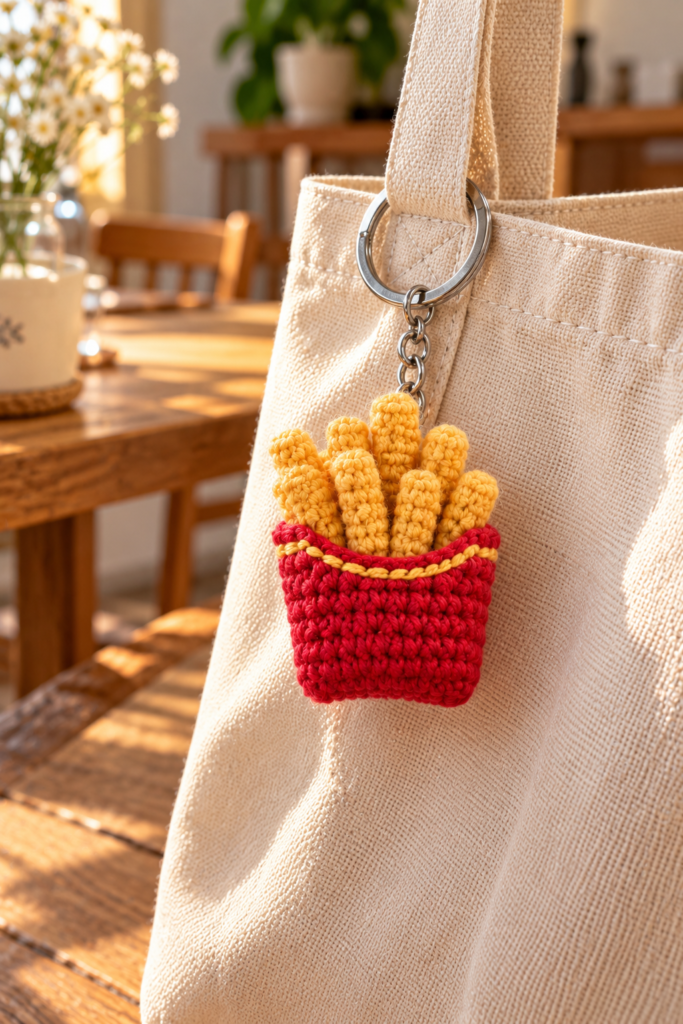
If you love tiny crochet projects, this Easy Crochet French Fries Keychain Amigurumi is a fun project to add to your handmade collection. It turns one of the most recognizable comfort foods into a miniature crochet accessory that can be attached to a backpack, tote bag, purse, keys, or crochet project bag.
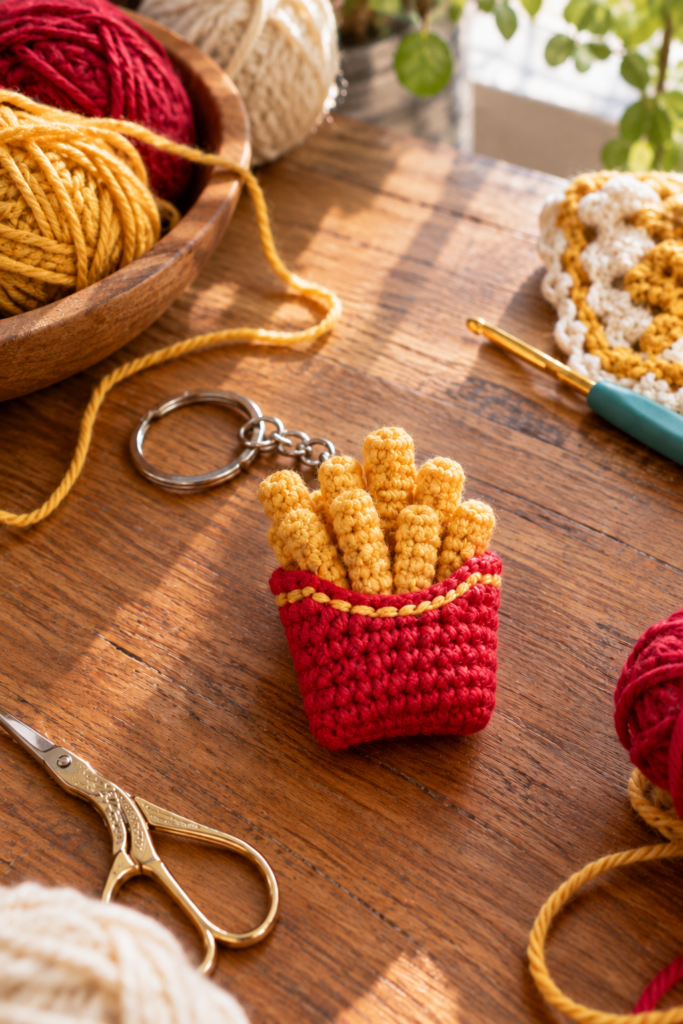
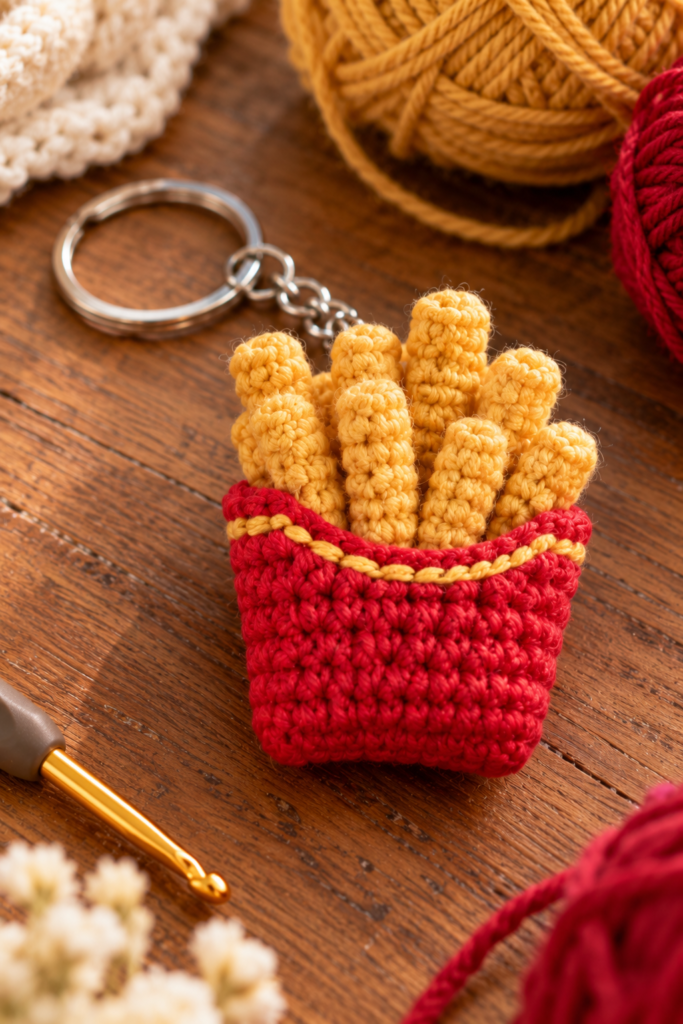
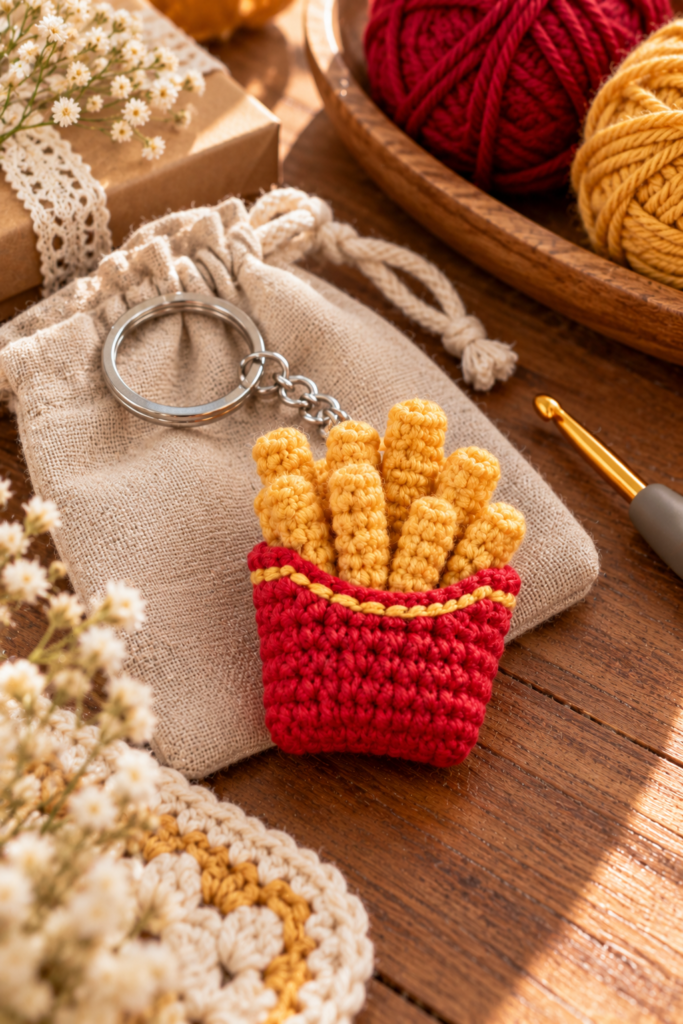
The design is simple and playful: a bright red crochet fries container holds several golden-yellow crocheted fries, finished with a small yellow decorative stripe and silver keychain hardware.
The small size also makes this project useful for using leftover yarn. You only need small amounts of red and yellow yarn, making it an approachable project when you want something satisfying without starting a large blanket, sweater, or amigurumi.
Pattern note: The finished appearance can vary depending on yarn weight, hook size, tension, stuffing, and individual crochet technique. The construction guidance below focuses on the techniques and design process rather than inventing stitch counts that cannot be determined reliably from a photograph.
Why Make a Crochet French Fries Keychain?
Small food-themed crochet projects are fun because they let you turn familiar objects into miniature handmade pieces.
This French fries design has a particularly simple visual structure:
- A rectangular red fries container
- Several golden-yellow fries
- A yellow decorative stripe
- A silver keychain ring and chain
- Tight, textured crochet stitches
- A compact three-dimensional shape
The contrast between the red container and golden fries makes the finished keychain immediately recognizable.
It is also a practical size for an accessory. Unlike a larger stuffed food project, a keychain can be completed without using much yarn or stuffing.
Materials You’ll Need
Before beginning, gather your supplies.
Yarn
You will mainly need:
- Red yarn for the fries container
- Golden-yellow yarn for the fries
- A small amount of yellow yarn for the decorative stripe
- Optional cream or neutral yarn for small finishing details
A smooth yarn is particularly useful for miniature amigurumi because it allows the stitches to remain clearly visible.
Cotton or cotton-blend yarn can work especially well for small crochet accessories because it tends to provide good stitch definition.
Other Supplies
You will also need:
- Crochet hook suitable for your yarn
- Polyester fiberfill
- Yarn needle
- Small scissors
- Keychain ring
- Small connector chain or jump rings
- Stitch marker, if you normally use one
For a keychain that will be handled frequently, choose sturdy metal hardware rather than very lightweight decorative hardware.
Crochet Skills You’ll Need
This project is best suited to a beginner who has some basic amigurumi experience.
You should be comfortable with:
- Magic ring
- Chain stitch
- Single crochet
- Increasing
- Decreasing
- Slip stitch
- Working in rounds
- Changing yarn colors
- Sewing crochet pieces together
- Weaving in yarn ends
You don’t need advanced crochet techniques.
The main challenge is working neatly at a small scale.
When you’re crocheting a large blanket, a slightly uneven stitch can disappear into the overall design. On a tiny keychain, every stitch is much more noticeable.
Understanding the Construction
Before picking up your hook, it helps to break the design into separate components.
The project essentially consists of two parts:
- The red fries container
- The individual golden fries
The fries are made separately and then positioned inside the container.
This construction method gives you more control over the finished appearance. You can adjust the height and positioning of individual fries instead of trying to crochet everything as one complicated piece.
Step 1: Crochet the Fries
Start with your golden-yellow yarn.
Each fry is essentially a small, narrow crocheted tube or stuffed cylindrical piece.
Work in rounds using tight stitches.
As you crochet, keep the diameter relatively small. The fries should look narrow compared with the container.
Keep the Fries Slightly Different
One useful detail in the reference design is that the fries aren’t perfectly identical.
Some are taller while others sit slightly lower.
This creates a more natural pile of fries.
Rather than making every piece exactly the same height, you can create several slightly different lengths.
For example, you might make:
- A few taller fries for the back
- Medium-length fries through the middle
- Shorter fries toward the front
This creates depth without requiring complicated shaping.
Add a Little Stuffing
If your fries are designed as three-dimensional pieces, add a very small amount of stuffing.
Don’t pack them tightly.
Overstuffed miniature pieces can become stiff and lose the soft handmade appearance you’re trying to achieve.
Step 2: Shape the Red Fries Container
Next, work on the red container.
The container has a compact rectangular shape with slightly rounded corners.
Work the base first and then build upward.
Use relatively tight stitches so the container maintains its shape.
The container shouldn’t collapse when the fries are inserted.
A Useful Amigurumi Tip
If your crochet fabric feels too loose, try going down one hook size rather than simply pulling your yarn tighter.
Consistent tension produces a cleaner result than forcing every stitch.
Step 3: Create the Decorative Yellow Stripe
The yellow stripe near the top gives the red container an extra visual detail.
You can create this using a narrow round or embroidered line of yellow yarn.
Work slowly around the container so the stripe stays relatively even.
Because this is a small project, even a small variation can be noticeable.
If your stripe doesn’t look perfectly even on the first attempt, don’t worry. Handmade crochet doesn’t need to look machine-produced.
Step 4: Assemble the Fries
Now position your completed yellow fries inside the red container.
Start with the tallest fries toward the back.
Then place the medium and shorter pieces toward the front.
This creates the familiar overflowing appearance of a serving of French fries.
Before sewing anything permanently, arrange all the fries and look at the project from the front.
Move individual pieces until the distribution looks balanced.
Step 5: Secure the Fries
Once you’re happy with the arrangement, secure the fries inside the container.
Depending on your construction method, you can sew the lower portions together or attach them directly to the inside of the container.
The goal is to prevent individual fries from falling out when the keychain moves.
Use matching yarn where possible so the attachment points remain discreet.
Step 6: Attach the Keychain Hardware
The final structural step is attaching the keychain hardware.
This part deserves extra attention because the charm will be pulled and moved regularly.
Attach the metal connector securely to the upper section of the crochet container.
Weave the yarn through several stitches rather than relying on a single stitch.
Then attach the connector to the split key ring or keychain ring.
Before using the finished charm, gently pull the hardware to make sure the attachment feels secure.
If anything moves excessively, reinforce it before attaching the charm to your bag.
Tips for Getting Clean Crochet Stitches
Use Tight, Consistent Tension
Small amigurumi pieces usually look cleaner when the stitches are fairly tight.
Loose stitches can make the stuffing visible and can cause the container to lose its shape.
Don’t Overstuff
This is particularly important for the fries.
You want them to look soft and slightly rounded rather than stiff.
Add stuffing gradually and stop once the piece holds its shape.
Count Your Stitches
Even if you’re comfortable crocheting without a stitch marker, using one can be helpful for miniature projects.
One missed increase or decrease can change the shape of a small piece considerably.
Check the Shape Frequently
Don’t wait until the end to inspect your work.
After several rounds, pause and look at the piece from different angles.
This makes it much easier to correct problems early.
Common Mistakes to Avoid
Making the Fries Too Thick
The fries should remain noticeably narrower than the container.
If they’re too thick, the finished charm can lose its recognizable French fries shape.
Making Every Fry Exactly the Same Height
A perfectly uniform group can look less natural.
Varying the heights slightly gives the finished piece more depth.
Using Loose Stitches
Loose stitches can reveal stuffing and make the container look uneven.
If this happens, try a smaller hook.
Attaching the Keychain Too Loosely
The hardware receives more stress than the crochet itself.
Reinforce the attachment point carefully.
Overloading the Top
You don’t need to fill every available space with fries.
Leave enough visual separation so individual fries can still be seen.
How to Make This Project Beginner-Friendly
If this is your first miniature amigurumi project, don’t try to rush through it.
Start by making one fry.
Practice getting the size and tension you want.
Then make the container.
Once you’re comfortable with both shapes, assemble the complete keychain.
This approach is much easier than trying to understand the entire project at once.
Another useful technique is to photograph your project as you work.
A quick photo from the front can reveal proportions that aren’t obvious while you’re holding the piece in your hands.
Ways to Customize Your Crochet Fries Keychain
Once you’ve mastered the basic construction, there are many ways to personalize the design.
Change the Container Color
Instead of bright red, try:
- Burgundy
- Pink
- Orange
- Green
- Cream
- Pastel colors
Make Different Fry Styles
You can make the fries shorter, longer, thinner, or slightly curved.
Create a Matching Food Collection
The same miniature crochet approach can be used to make other food-inspired accessories, such as:
- Crochet burger keychains
- Crochet pizza charms
- Crochet donut keychains
- Crochet coffee charms
- Crochet popcorn
- Crochet ice cream
- Crochet cupcake charms
A complete food-themed keychain collection could make a fun handmade gift set.
Where Can You Use a Crochet French Fries Keychain?
Once finished, attach it to almost any small bag or accessory.
Some ideas include:
- Canvas tote bags
- Backpacks
- Purses
- Pencil cases
- Crochet project bags
- Zipper pulls
- Key rings
Care Tips for Your Crochet Keychain
Because this project is likely to be used as an everyday accessory, it will eventually collect dust and lint.
For regular cleaning, gently brush away surface dust with a soft, dry brush.
If the yarn becomes dirty, check the yarn manufacturer’s care instructions before washing.
Avoid soaking the entire charm unless you know the yarn, stuffing, embroidery, and metal hardware can safely handle water.
Allow the charm to dry completely before storing or using it again.
It’s also a good idea to occasionally check the keychain attachment. If the stitching begins to loosen, repair it before the hardware separates from the crochet piece.
Frequently Asked Questions
Is this crochet French fries keychain suitable for beginners?
Yes, especially for beginners who already know basic single crochet, increases, decreases, and working in rounds. The small size can make the project slightly fiddly, so patience is more important than speed.
What yarn should I use?
A smooth cotton or cotton-blend yarn is a practical option for miniature crochet because it provides clear stitch definition. Choose a yarn weight that you’re comfortable crocheting tightly.
Can I make the keychain without stuffing?
The container can be made with a structured crochet fabric, but stuffing helps give the individual fries their rounded three-dimensional appearance. Use only a small amount so they don’t become overly firm.
How do I keep the fries securely inside the container?
Secure the lower portions of the fries to the inside of the container with matching yarn. Reinforcing the connection helps prevent them from shifting during everyday use.
Can I make this into a larger plush?
Yes. You can scale up the design by using thicker yarn and a larger hook. Keep in mind that increasing the size may require adjustments to the proportions and construction.
Can I sell finished crochet French fries keychains?
That depends on the specific pattern’s licensing terms if you’re following someone else’s written pattern. Always check the designer’s stated permissions before selling finished items made from a published pattern.
Final Thoughts
This Easy Crochet French Fries Keychain Amigurumi is a great example of how a small amount of yarn can become a fun, useful handmade accessory.
The project doesn’t require a huge yarn stash or a long list of complicated techniques. Instead, it relies on clean stitches, simple shapes, careful assembly, and a little attention to proportion.
The most important thing is to take your time with the tiny details. Keep the fries narrow, give them slightly varied heights, maintain consistent tension, and reinforce the keychain attachment.
Once you’ve made the basic version, you can use the same miniature crochet skills to create an entire collection of food-inspired charms.
Save this project for your next small crochet session, grab your red and golden-yellow yarn, and make your own tiny serving of handmade fries.