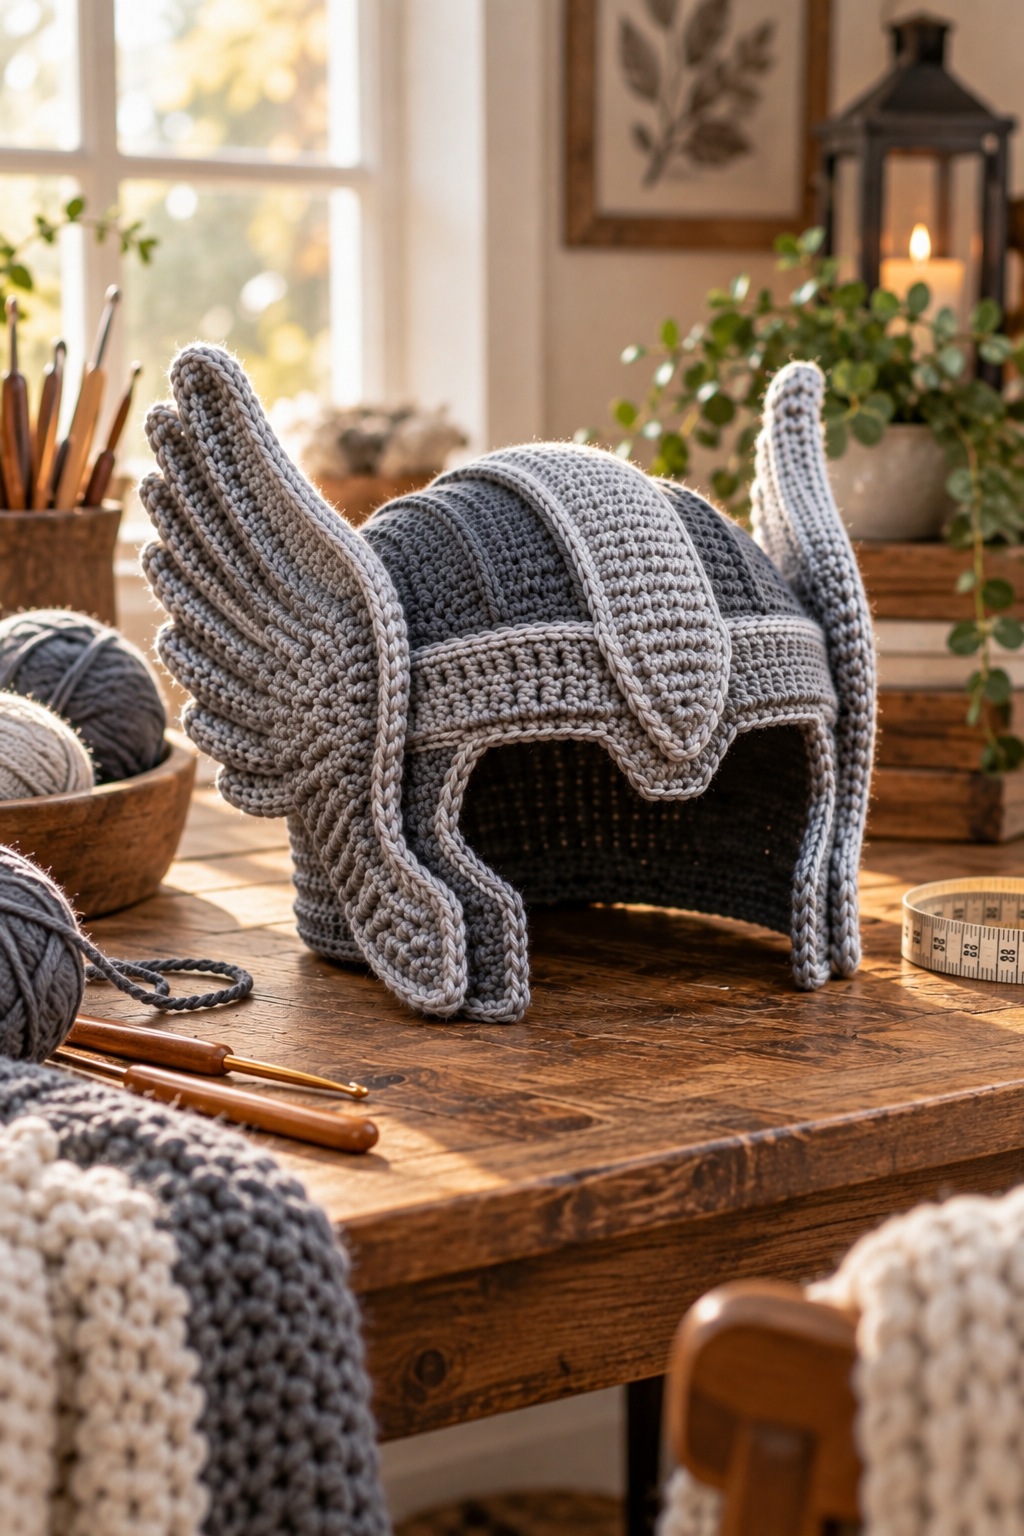
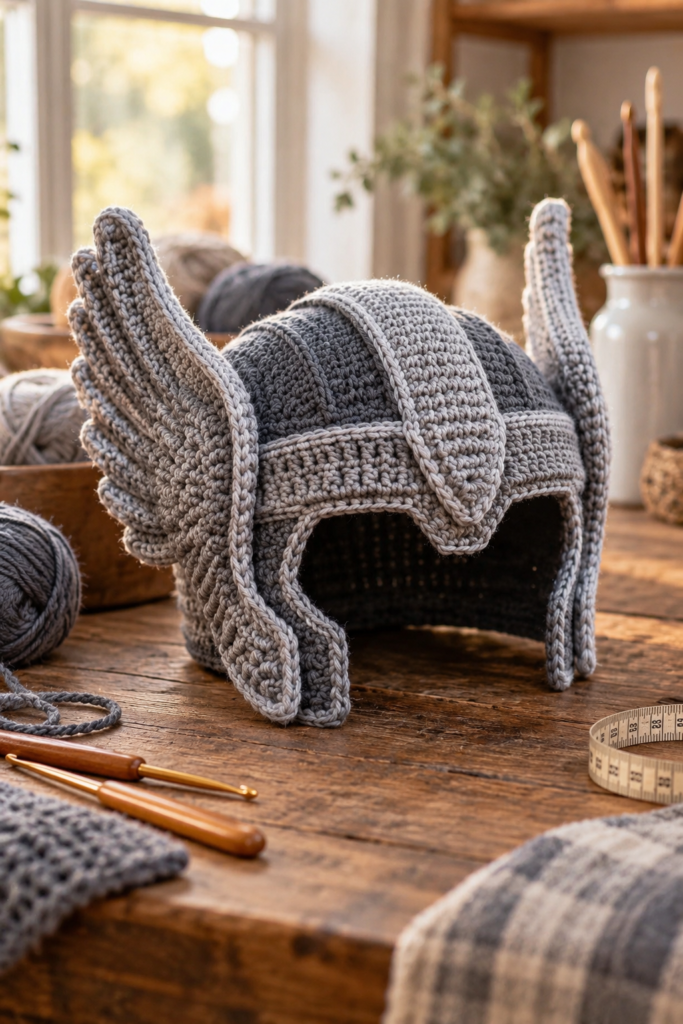
If you enjoy making crochet projects that are a little different from the usual hats, blankets, and amigurumi, this Easy Crochet Thor Helmet Pattern Tutorial is a fun project to add to your list. The finished helmet has a bold Viking-inspired look, with a rounded gray crochet body, raised sections, large side wings, and a structured front opening.
What makes this project especially interesting is that it looks detailed and complicated at first glance, but the construction can be broken down into manageable sections. You can work on the main helmet shape first, then build the decorative pieces separately and attach them once the base is ready.
This tutorial is written for crocheters who want to understand how to approach a crochet Thor helmet, how to choose materials, how to think about sizing and shaping, and how to get a cleaner finished result. If you’re making your first structured crochet accessory, take your time with the shaping rather than trying to rush through the decorative details.
Table of Contents
- What Is a Crochet Thor Helmet?
- Why This Crochet Helmet Is a Fun Project
- Skill Level
- Materials You’ll Need
- Choosing the Right Yarn
- Choosing Your Crochet Hook
- Understanding the Helmet Construction
- How to Crochet the Main Helmet
- Creating the Front Opening
- Adding the Raised Helmet Details
- Making the Side Wings
- Attaching the Decorative Pieces
- Getting the Helmet to Hold Its Shape
- How to Adjust the Size
- Common Mistakes to Avoid
- Beginner Tips for Better Results
- How to Make the Project Faster
- Finishing and Blocking
- Care and Storage
- Frequently Asked Questions
- Final Thoughts
What Is a Crochet Thor Helmet?
A crochet Thor helmet is a handmade fantasy-style helmet inspired by the traditional Viking and superhero helmet aesthetic. Instead of using hard materials such as plastic or metal, the helmet is constructed from yarn and crochet stitches.
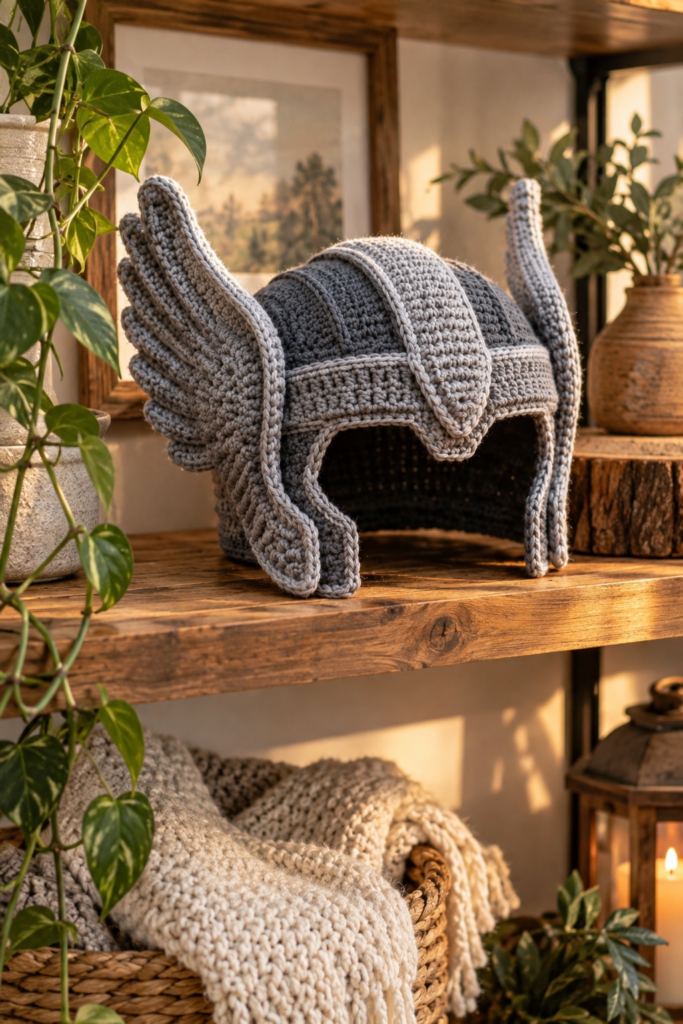
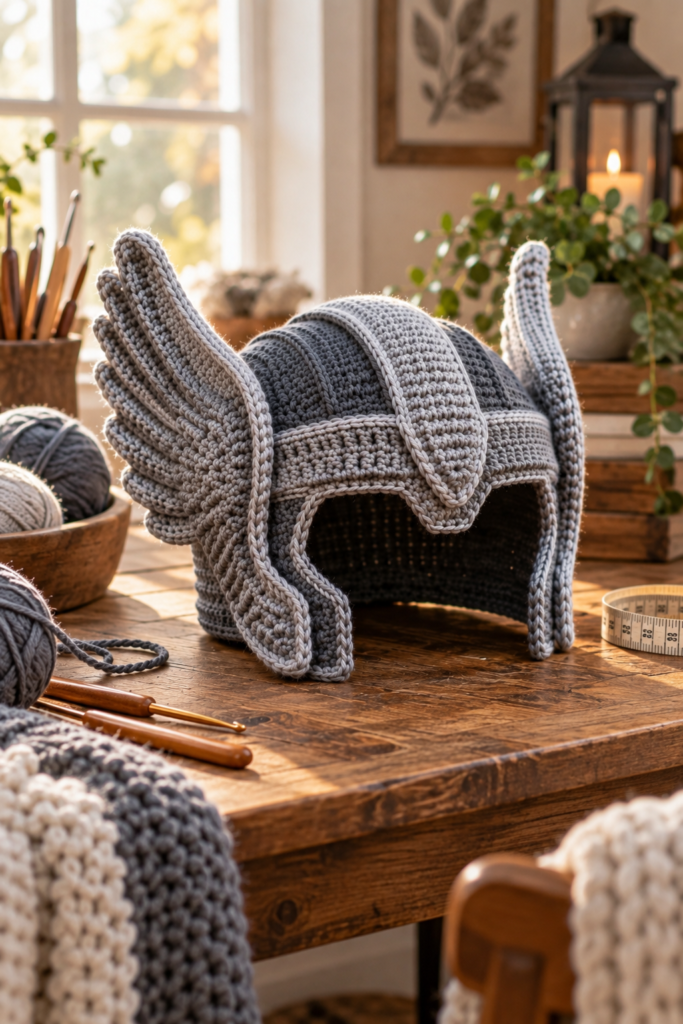
The design shown in the reference has a gray rounded helmet body, a darker central section, lighter raised panels, prominent side wing pieces, and an open area at the front.
The interesting part of this project is the combination of simple crochet fabric with dimensional details. The basic helmet can be thought of as the foundation, while the wings, raised bands, and edging create the recognizable finished appearance.
For a crochet maker, this type of project is also useful because it teaches several valuable techniques:
- Working crochet into a three-dimensional shape
- Maintaining consistent tension
- Creating structured panels
- Making symmetrical decorative pieces
- Joining separate crochet components
- Shaping an opening
- Using edging to make a project look more finished
It is therefore more than just a costume accessory. It is a good practice project for anyone interested in moving from flat crochet pieces into more structured designs.
Why This Crochet Helmet Is a Fun Project
One reason I like projects like this is that they give you room to work on your crochet skills without requiring a huge amount of material.
A helmet is also much more visually interesting than a standard crochet hat because the decorative elements change the entire appearance.
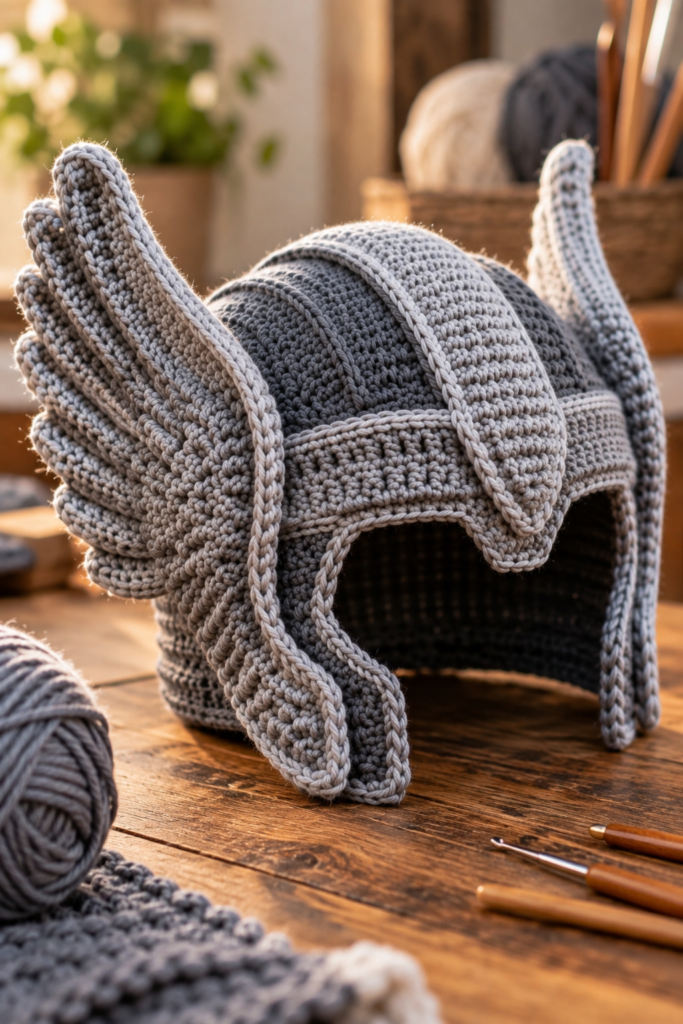
The side wings are particularly important. They give the project its fantasy/Viking character, while the raised strips across the helmet create additional depth.
Another advantage is that you can customize the finished piece once you understand the construction.
For example, you could make it:
- Smaller for a child
- Larger for an adult
- More fitted
- Slightly loose for costume use
- Darker gray
- Light gray
- A combination of gray shades
The important thing is to keep the basic structure balanced.
Skill Level
I would place this project around intermediate crochet level, although an adventurous beginner could attempt it if they are comfortable reading crochet instructions and making basic shaping.
You should ideally already know how to:
- Make a magic ring
- Chain
- Slip stitch
- Single crochet
- Increase
- Decrease
- Work in rounds
- Count stitches
- Join crochet pieces
- Weave in yarn ends
You do not need advanced crochet experience to understand the construction, but patience is important.
The decorative sections require more attention than a simple hat because symmetry matters. If one wing is noticeably larger or positioned differently from the other, the helmet can look uneven.
Materials You’ll Need
Before starting, gather everything you need so you don’t have to stop halfway through the project.
Yarn
For the reference design, a medium-weight gray yarn is a practical starting point.
You can use:
- Worsted-weight yarn
- Medium #4 acrylic yarn
- Cotton-blend yarn
- A durable wool/acrylic blend
A yarn with clear stitch definition is particularly useful because the helmet contains several raised and layered areas.
Crochet Hook
Choose a hook appropriate for your yarn.
For worsted-weight yarn, a hook somewhere around the 4.0–5.0 mm range is often a reasonable starting point, but your personal tension matters more than simply copying a hook size.
If your stitches are very loose, the helmet may lose its structure.
If your stitches are extremely tight, the fabric can become stiff and difficult to shape.
Other Supplies
You may also want:
- Yarn needle
- Stitch markers
- Scissors
- Measuring tape
- Scrap yarn
- Pins or clips for positioning pieces
- Blocking supplies if needed
Choosing the Right Yarn
Yarn choice can make a surprisingly big difference in the final helmet.
For this particular style, I would avoid extremely soft, fluffy yarn because it can hide the stitch definition.
A smooth worsted-weight yarn is easier to work with and makes the raised sections much more visible.
Gray is the obvious choice if you want the same overall appearance as the reference. You can use two shades of gray to create contrast between the main body and raised details.
For example:
Main body: medium charcoal gray
Raised details: light gray
This gives the helmet additional depth without requiring complicated colorwork.
If you’re making the helmet for costume use, acrylic is convenient because it is affordable, lightweight, and widely available.
For a more natural fiber feel, a wool blend can also work, although it may require more careful washing and storage.
Understanding the Helmet Construction
Before picking up your hook, it helps to understand how the project is assembled.
Think of the helmet as several separate components:
1. Main Helmet Body
This forms the rounded portion that sits over the head.
2. Front Opening
The lower/front section needs to remain open so the helmet can be worn comfortably.
3. Raised Panels
These create the layered appearance across the top and front.
4. Side Wings
The wings are separate decorative pieces that are attached to both sides.
5. Edging
A clean border around important sections gives the finished helmet a more polished appearance.
This modular approach makes the project much easier to manage.
Instead of trying to crochet every detail directly onto the helmet, you can create individual pieces and attach them carefully.
How to Crochet the Main Helmet
Start with the main helmet structure.
The goal is to create a rounded crochet form that gradually becomes large enough to sit comfortably around the intended head size.
Begin with your chosen gray yarn and work your foundation rounds while keeping track of your stitches.
The most important thing at this stage is consistent increases.
If increases are added unevenly, the helmet can become lopsided or develop unwanted bumps.
Check Your Shape Regularly
Don’t wait until the final round to check the shape.
After several rounds, gently place the piece against the intended head size or a suitable form.
You’re looking for a rounded shape rather than a completely flat circle.
If the fabric starts becoming too flat, the shaping may need adjustment.
If it curls dramatically, you may have too few increases for your tension.
This is one of the biggest advantages of checking your work as you go: small adjustments are much easier before the entire helmet is finished.
Creating the Front Opening
The front opening is one of the most important parts of the helmet.
It should be large enough to give the wearer comfortable visibility without making the helmet feel too loose.
Rather than concentrating only on appearance, consider where the wearer’s eyes, nose, cheeks, and forehead will sit.
A good crochet costume piece should look interesting while still being practical.
When creating the opening:
- Mark the center front.
- Identify the area that should remain open.
- Maintain symmetry on both sides.
- Reinforce the edge with clean crochet stitches.
- Check the opening against the intended wearer.
- Adjust before attaching the decorative pieces.
The edging around the opening also helps prevent the fabric from stretching excessively.
Adding the Raised Helmet Details
The raised sections are what make this design look much more elaborate than an ordinary crochet hat.
These pieces can be worked separately as narrow crochet panels and then sewn onto the main helmet.
This method has a major advantage: you can reposition the panels before permanently attaching them.
Lay the pieces over the helmet and check:
- Are they centered?
- Are the spaces between them even?
- Do both sides look balanced?
- Do the panels follow the curve of the helmet?
- Are the edges sitting flat?
Do not sew everything immediately.
Use a few pins or clips first and look at the helmet from the front, side, and top.
This small step can save a lot of time.
Making the Side Wings
The side wings are the most recognizable decorative feature of the design.
They should have a layered appearance, with the crochet fabric gradually forming a curved feather-like shape.
The biggest challenge here is symmetry.
Make the first wing carefully and use it as your reference for the second one.
Don’t rely only on memory.
Count your rows and stitches, and if possible, write down what you did.
A Helpful Trick
Once the first wing is complete, place it beside the second piece while working.
Compare them regularly.
Look at:
- Overall length
- Width
- Number of rows
- Curvature
- Border thickness
- Pointed or rounded shape
Even a small difference can become obvious once the wings are attached to the helmet.
Attaching the Decorative Pieces
Once all the separate pieces are finished, arrange them on the helmet before sewing.
This is where you can really improve the final appearance.
Use stitch markers or removable clips to temporarily hold each piece in place.
Step back and look at the helmet from a distance.
A common mistake is to position decorative pieces based only on how they look when you’re holding the helmet close to your face.
From a normal viewing distance, even small alignment problems can become more noticeable.
When you’re happy with the placement, sew the pieces securely using a yarn needle and matching yarn.
Take small, controlled stitches rather than pulling the yarn aggressively.
Over-tight sewing can distort the crochet fabric.
Getting the Helmet to Hold Its Shape
Crochet is naturally flexible, so a structured helmet may need some help maintaining its form.
The best approach depends on how you intend to use it.
For a soft costume accessory, you may not need additional structure at all.
If you want a firmer display piece, you can shape the crochet over a suitable form while blocking.
Blocking
Light blocking can help:
- Smooth uneven sections
- Improve symmetry
- Shape the wings
- Flatten curling edges
- Give the helmet a cleaner silhouette
Always consider the fiber content before using heat or water.
For acrylic yarn, avoid treating it like wool. Excessive heat can permanently change acrylic fibers.
How to Adjust the Size
Sizing should be considered from the beginning.
The easiest way to make a crochet helmet larger or smaller is to adjust the main body before adding the decorative components.
Measure the intended head circumference first.
Then compare that measurement with your crochet fabric as you work.
Don’t assume that using the same hook and yarn will produce the same size for everyone.
Crochet tension varies considerably from person to person.
If Your Helmet Is Too Small
You may need:
- More shaping rounds
- A slightly larger hook
- A different yarn weight
If Your Helmet Is Too Large
Consider:
- Fewer expansion rounds
- A slightly smaller hook
- Firmer tension
However, don’t simply change hook size without checking the resulting fabric.
A very large hook can create a loose fabric that doesn’t hold the helmet shape well.
Common Mistakes to Avoid
1. Ignoring Gauge
Gauge isn’t only important for sweaters.
A helmet also needs predictable sizing.
Make a small swatch before starting if you’re unsure about your tension.
2. Making the Wings Different Sizes
This is one of the easiest mistakes to spot.
Use the first wing as a physical guide for the second.
3. Pulling Sewing Stitches Too Tight
Tight joining can cause puckering.
The pieces should sit naturally against the helmet.
4. Skipping Shape Checks
Don’t finish the entire project before checking the fit.
Try the helmet on or compare it with the intended head measurement during construction.
5. Using Yarn With Poor Stitch Definition
Very fuzzy yarn can hide the detailed structure.
A smoother yarn usually gives this design a cleaner appearance.
6. Rushing the Finishing
Crochet pieces can look ordinary until the finishing work is done properly.
Take time to hide ends, straighten edges, and position the decorative pieces.
Beginner Tips for Better Results
If this is your first structured crochet project, don’t worry if the first few rounds don’t look like a helmet.
Three-dimensional crochet often looks strange during construction.
Keep checking the shape rather than judging the project too early.
I also recommend using stitch markers more often than you think you need them.
Markers can help you identify:
- The center
- Beginning of rounds
- Increase locations
- Decorative attachment points
- Symmetrical positions
Another useful habit is taking photographs during construction.
A quick photo from the front can reveal an uneven section that you might not notice while holding the piece in your hands.
How to Make the Project Faster
The fastest way to crochet a complicated project isn’t necessarily to crochet faster.
It’s to avoid having to redo your work.
Before starting:
- Prepare all materials.
- Choose your colors.
- Make a gauge swatch.
- Measure the intended wearer.
- Read through the construction.
- Make one decorative piece completely before starting its matching piece.
You can also work the decorative components while the main helmet is resting between shaping sessions.
This makes the project feel less repetitive.
Finishing and Blocking
Once all components are attached, inspect the helmet carefully.
Look for:
- Loose yarn ends
- Uneven borders
- Loose attachments
- Twisted wings
- Puckered seams
- Uneven spacing
- Areas that need gentle shaping
Weave in the loose ends securely.
Then gently shape the helmet into its final form.
If blocking is appropriate for your yarn, use it to improve the silhouette rather than dramatically changing the dimensions.
The finished helmet should still look handmade. Small variations in stitches are perfectly normal and are part of the charm of crochet.
Care and Storage
Because this is a handmade crochet item, it deserves gentle care.
Always check the yarn label before washing.
For many crochet pieces, gentle hand washing is safer than putting the finished helmet through a regular washing cycle.
Avoid aggressive wringing because it can stretch the helmet and distort the decorative pieces.
Instead:
- Clean gently according to the yarn instructions.
- Remove excess moisture carefully.
- Reshape while damp if appropriate.
- Allow it to dry completely.
- Store it somewhere dry.
For long-term storage, don’t crush the helmet underneath heavy objects.
The wings and raised panels can lose their shape if they remain compressed for a long period.
A shelf, storage box, or breathable fabric bag can work well.
Frequently Asked Questions
Is this crochet Thor helmet suitable for beginners?
It can be attempted by an adventurous beginner, but an intermediate crocheter will likely find the shaping and decorative assembly easier. Basic crochet skills such as increases, decreases, working in rounds, and joining pieces are helpful.
What yarn is best for a crochet Thor helmet?
A smooth worsted-weight yarn is a good starting point because it provides clear stitch definition and enough structure for the helmet. Acrylic, cotton blends, and suitable wool blends can all work depending on the intended use.
What color should I use?
Gray is the natural choice for the reference-inspired look. You can combine dark gray with light gray to emphasize the raised sections and give the helmet more visual depth.
Can I make the helmet smaller?
Yes. The main body can be adjusted to fit a smaller head by changing the amount of shaping. Always measure the intended wearer rather than relying only on age categories.
Can I make it larger?
Yes. Additional shaping and careful measurement can be used to create a larger version. Remember that increasing the size of the helmet may also require proportionally adjusting the decorative pieces.
Are the wings difficult to crochet?
The wing pieces require more attention than the basic helmet because they need to look symmetrical. Making one wing first and using it as a template for the second can make the process much easier.
How do I make the helmet stiffer?
A tighter stitch fabric and appropriate yarn can provide more structure. Gentle blocking may also improve the shape. For costume pieces requiring significant rigidity, consider the intended use carefully before adding any internal structure.
Can children wear a crochet Thor helmet?
A properly sized crochet helmet can be used as a costume accessory, but it should be comfortable and supervised when worn by young children. Make sure the opening provides adequate visibility and that no loose components create a safety concern.
Can I sell finished helmets made from a crochet pattern?
That depends on the specific pattern designer’s terms. Always check the copyright and selling policy associated with the pattern you are using before selling finished items.
Crochet Tips From the Designer’s Perspective
One thing I would emphasize with a project like this is don’t judge your crochet by the first few rounds.
Structured crochet projects often look completely different once the pieces are assembled.
The quality of the finished helmet comes from several small decisions:
- Consistent tension
- Accurate counting
- Symmetrical pieces
- Clean joining
- Good yarn selection
- Careful finishing
You don’t need every stitch to look machine-perfect.
In fact, the handmade texture is one of the things that makes crochet special.
What matters most is that the overall structure is intentional and the pieces are securely joined.
How to Get a Cleaner Handmade Finish
If you want your helmet to look polished enough for photography, Etsy, Pinterest, or a costume display, spend extra time on the finishing stage.
Before photographing it, gently shape the wings and make sure the raised panels are sitting correctly.
Use natural light whenever possible.
A window with indirect daylight can reveal the crochet texture beautifully without creating harsh shadows.
For Pinterest photography, a wooden surface, neutral textiles, yarn, crochet hooks, plants, and warm home décor can complement the gray yarn without distracting from the helmet itself.
Why Handmade Crochet Makes This Design Special
There is something different about a handmade costume accessory compared with a mass-produced one.
Crochet gives the helmet visible texture.
You can see the individual stitches, slight variations in tension, yarn fibers, and the work that went into every section.
Those details are especially noticeable in a design like this because the raised panels and wings create shadows across the surface.
The result feels softer and more approachable than a traditional hard helmet while still having a strong fantasy character.
It can be a fun project for a costume, themed party, photography prop, display piece, or simply a unique crochet challenge.
Final Thoughts
This Easy Crochet Thor Helmet Pattern Tutorial is a great example of how basic crochet techniques can be combined to create something much more dramatic.
The main helmet provides the foundation. The raised panels add structure and depth, while the side wings create the bold Viking-inspired appearance.
If you’re making this style of project for the first time, focus on shape, symmetry, and patience rather than trying to finish as quickly as possible.
Measure as you go, keep your stitch counts organized, and don’t be afraid to temporarily pin decorative pieces before sewing them permanently.
Most importantly, remember that handmade crochet doesn’t need to look factory-made. The visible stitches and natural yarn texture are part of what makes the finished piece special.
If you enjoy unusual crochet projects, save this tutorial to your crochet inspiration board and come back to it when you’re ready for your next creative project.
Happy crocheting! 🧶